
Where do you find QR-and bar codes?
Service object
When you add a new service object, a QR code is automatically created for the service item. The code is displayed on the service item record.
Condition: That the Module setting – Service object setting “Show QR for service objects” is selected. Requires admin permissions
Articles
When you add a new service object, a QR code is automatically created for the service object and shown on the service object record.
Condition: That you have selected on or more allowed codes in the Module settings – Article settings. If none are selected, the function is not displayed.
Requires admin permission. See more under Information for administrators.
Why codes?
You can print the code and stick it on the service objects or articles. For an article, the QR code and barcode can be printed on the same label as desired.
By scanning the code, using the camera on your mobile phone or webcam connected to your computer, you can:
- linked directly to the service object information.
- add a service object to a service order by clicking Add Service object and scanning the code. All information about the object will then be included in the order.
- create a new work order and add details by scanning the QR code on an existing service object or article. All details about the service object or article will then be imported into the order.
- link to or add articles to an order.
- If you scan the code on the article and are logged in to the system, you will be taken to the article in the article register.
- If you are also performing an order, the article you scanned will be added to the order.
Print labels
Service object
Alternative: when to print for one (1) service object
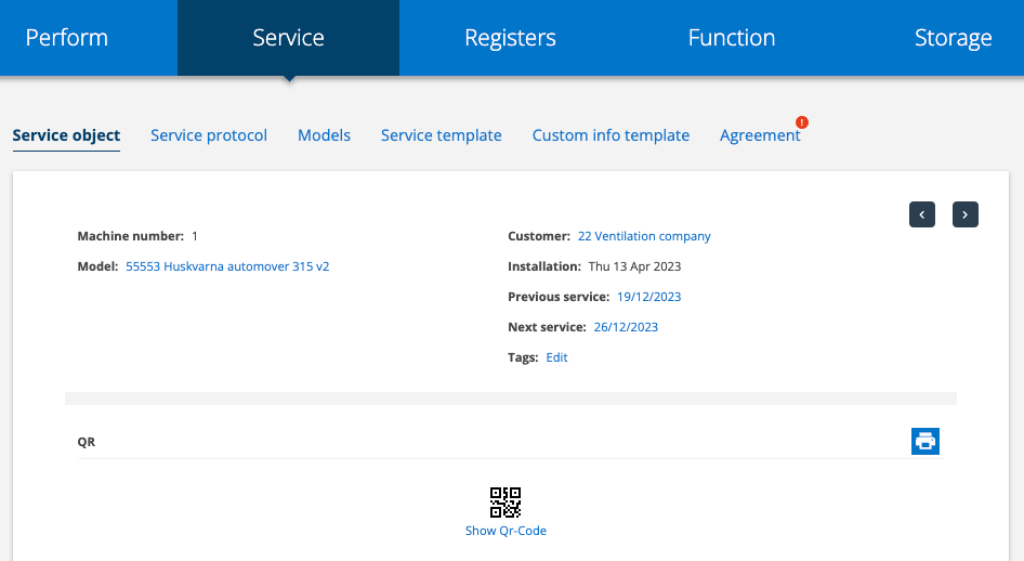
Click on the printer symbol on an individual service object (see image 1) to print the code. With this variant you cannot make any print settings. If you want to include your logo on the printout here, set it in Module Settings – Printouts. Requires admin rights.
If you created your own template for printing QR-codes you can choose to use that or the default template.Click on the Print symbol.
Option: when you want to print QR code to multiple service objects

Do this:
- Go to Register – Service object.
- Do a search for objects that should have labels.
- Click on the collection functions symbol (Figure 2). A list of all objects will be created based on your search.
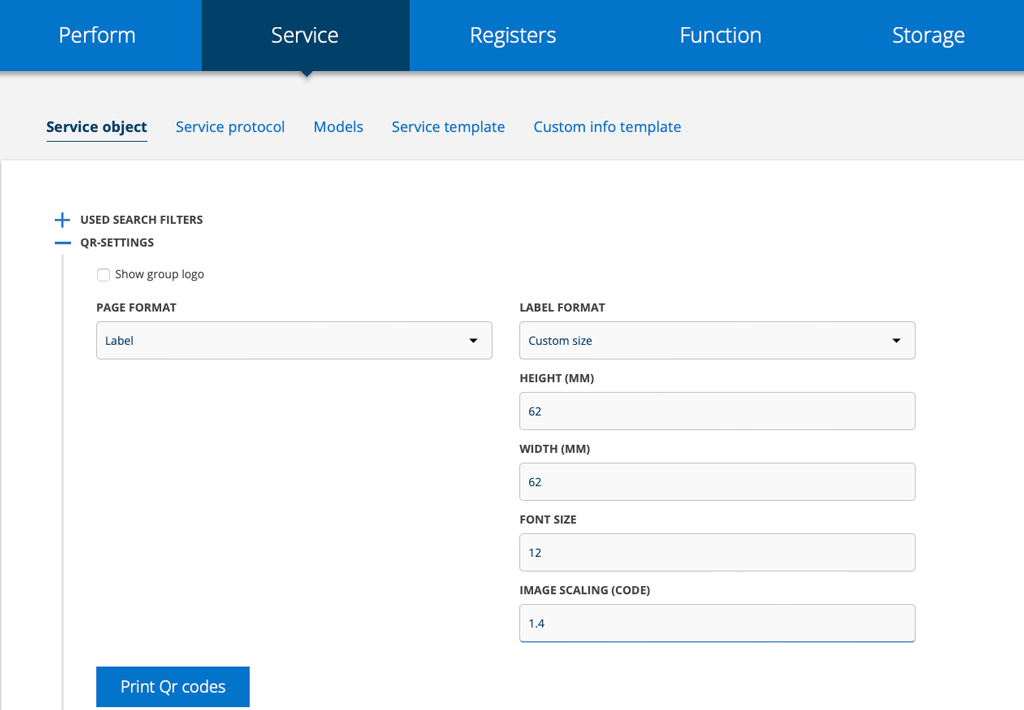
- Click on QR SETTINGS
- If you want your logo or the group’s logo on the labels, check the box Show group logo.
- You can set the label size manually or select the default label printer settings under LABEL FORMAT.
- Select which objects you want to print labels for. The list can be sorted in a variety of ways to facilitate selection.
- Click Save and a pdf is created. If you are not happy with the format, try changing the settings until it matches your labels and settings for your printer.
Articles
Print for an article
- Go to Register – Article register.
- Use the search function to find the article you want to print a label for.
- Go to the bottom of the article entry and click Print.
With this variant you cannot make any print settings. If you want to include your logo on the printout here, set it in Module Settings – Prints. Requires admin permission.
Alternative printing code for one (1) article
- Go to Register – Article register.
- Use the search function to find the article you want to print labels for. Otherwise, the list of articles will be long and take time to load :).
- Then click on the symbol for collection functions (Figure 2).
- In the article list, select which articles you want to print labels for.
- If you want your logo or the group’s logo on the labels, check the box Show group logo.
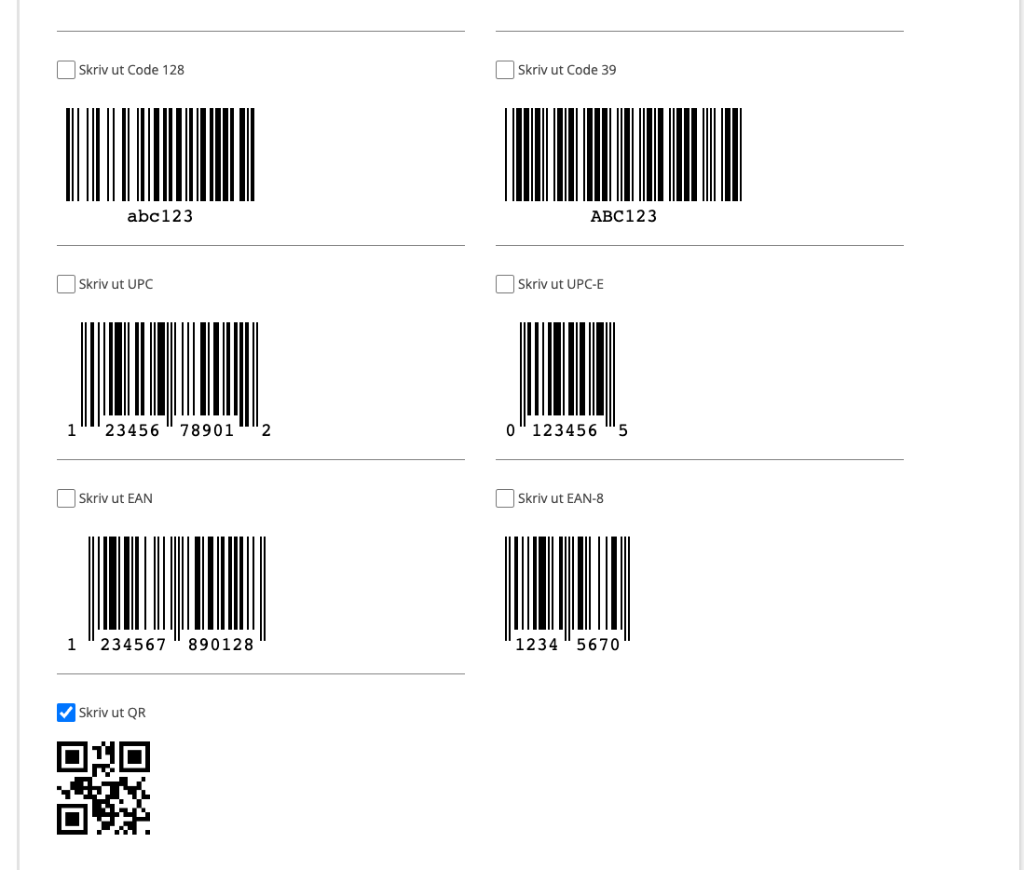
- If barcode – choose which standard the code should use. Read more about standards below.
- Select settings for the printout. There are a number of presets to choose from, but you can set them according to your own needs and preferences.
- Click Save. A PDF is created that you can then use for printing. If you are not satisfied with the format, try changing the settings until it matches your labels and your printer settings.
- If QR code – select Print QR code and then click the blue “Print QR codes” button.
Print labels upon delivery
When you make a delivery, you can print labels for the articles. The system automatically fills in the same quantity as will be delivered. You can change the number of labels to be printed.
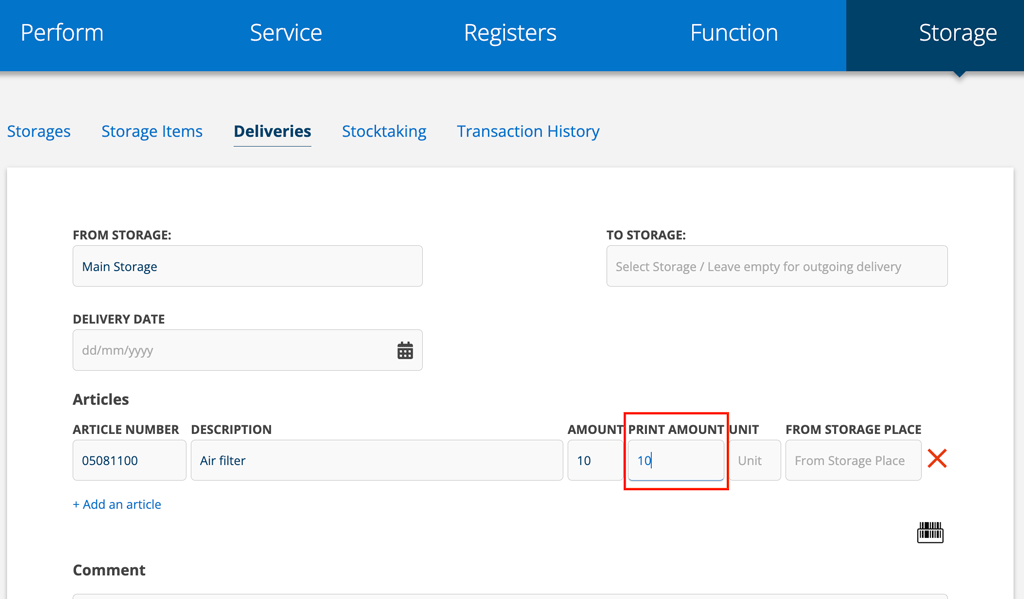
Once you have saved the delivery, click Print labels.
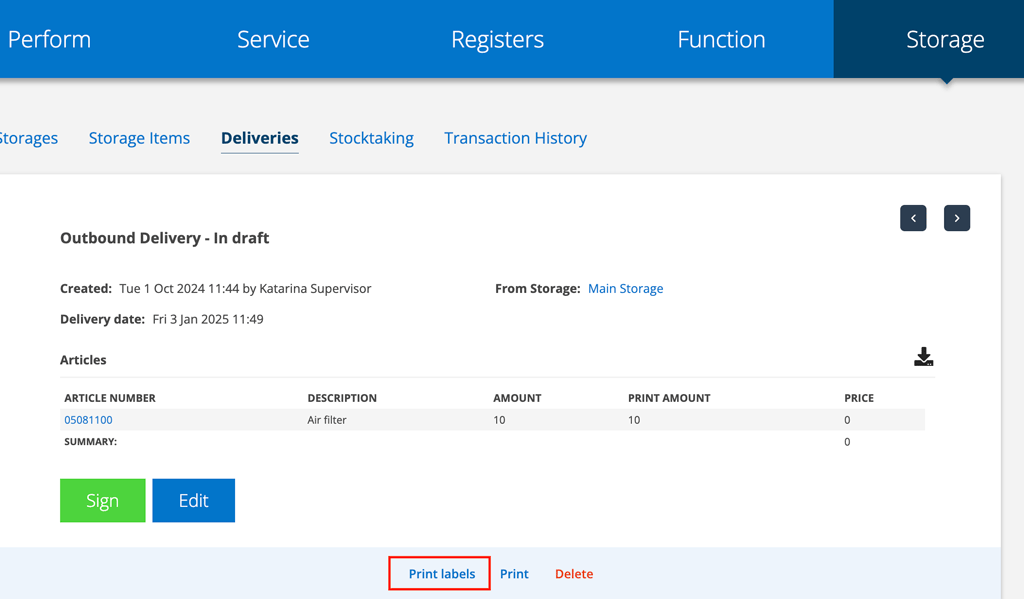
To activate this function, select the setting in Storage settings – Show print column on deliveries. Admin permissions are required.
Standards
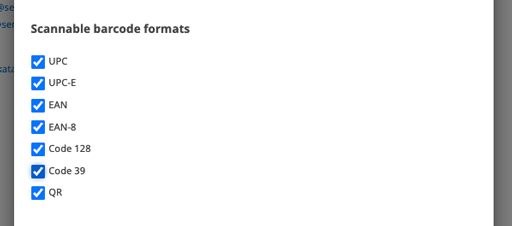
Barcodes use different standards – UPC, EAN, etc. To see which standard you can print in, you can test by typing an article number in the Enter a test value field. Barcodes that do not support your article number / name will be marked in red.
Which standards are displayed depends on which settings you have made in scannable barcode formats in the Module settings – Article settings. See more info under Information for administrators below.
Information to administrators
To set permissions and settings for modules, admin permissions are required.
Permissions linked to QR and barcodes:
Select Scannable Barcode Format in Module Settings – Edit Article Settings.
This affects which barcode formats you see and can select in the print function for articles.
Select whether you want to include the logo on label printing for an individual service object (see Image 1).
You set this in the Module settings – Edit Print settings.
QR-VERIFICATION
QR verification is used to verify that a technician has been at the site of the service object. The technician scans the QR code on the object and information about time, technician and location is saved.