
This is a feature under development.
The picking list under Storage is used to include and check that all articles for a job are available in the storage.
Using the filter function, you can search for picking lists with different statuses.
User permission for pick list is needed. See more information under “Information for administrators.“
When can a pick list be created?
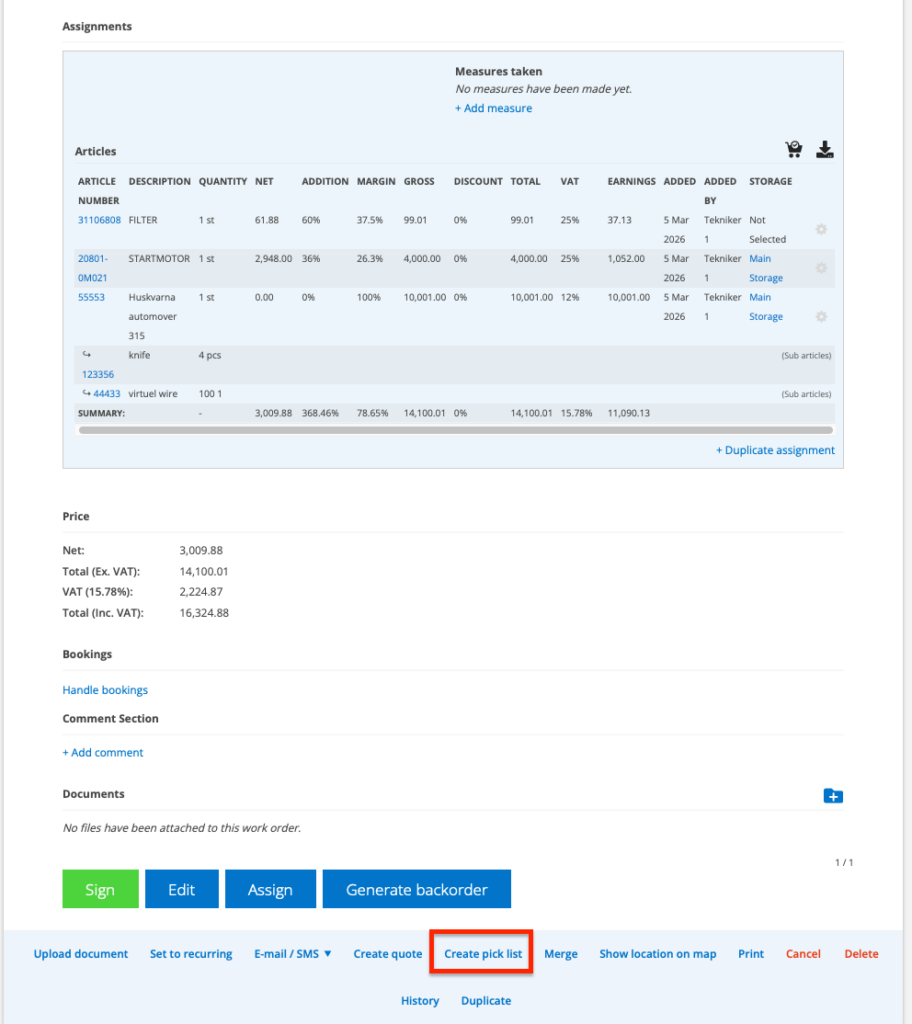
The picking list is always based on a single order. If you can create a picking list, the Create pick list button (see image 1) is located at the bottom of the order.
The function is available on these order types:
- On a service order with status Not handled. Once the order has started, you can no longer create a pick list.
- Always on an work order.
- On a sales order, the button appears if the status is Received or if you have entered your own status text in the “Status” field.
How do you create a pick list?
- Open an order.
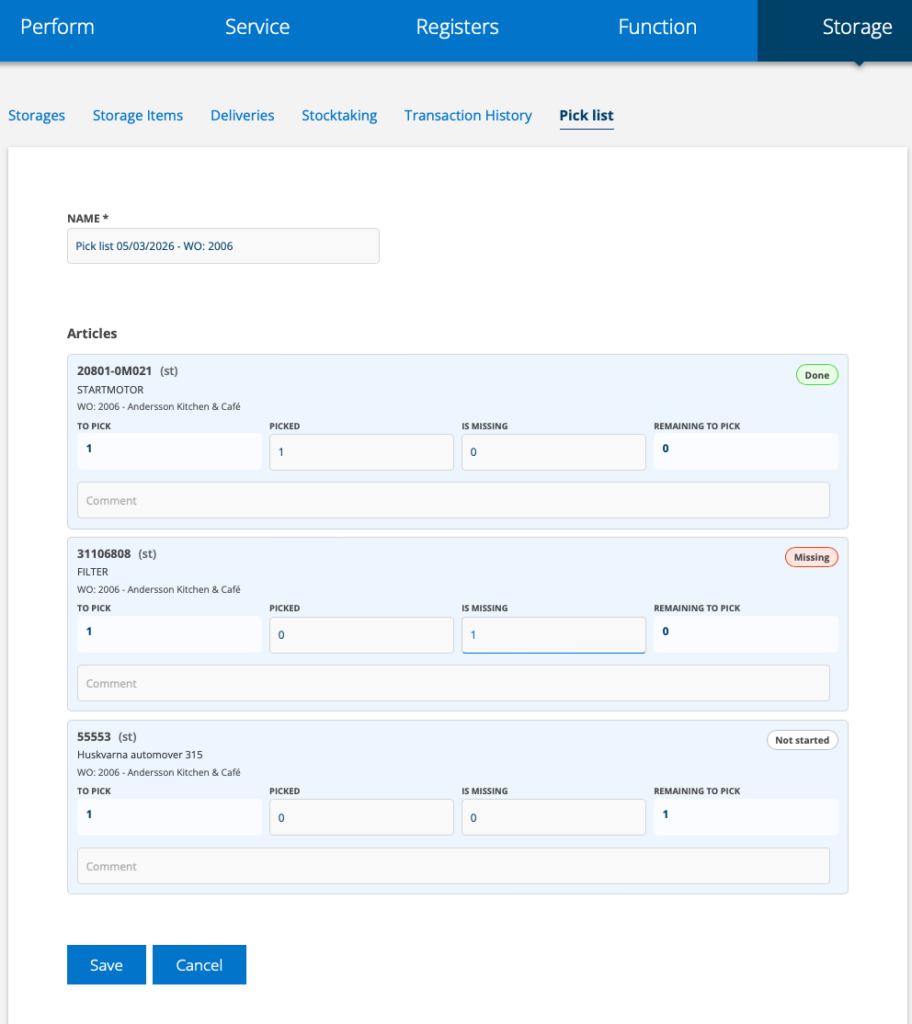
- Click Create Pick List. This will create a pick list with all articles on the order.
- The pick list is named with today’s date and the order number and is found under Storage – Pick List.
- Click Save if you don’t want to pick and check off the articles immediately.
- When you pick, mark which articles you picked and the quantity.
- Save
If you want to continue on a saved pick list, click on the pick list number and then Edit.
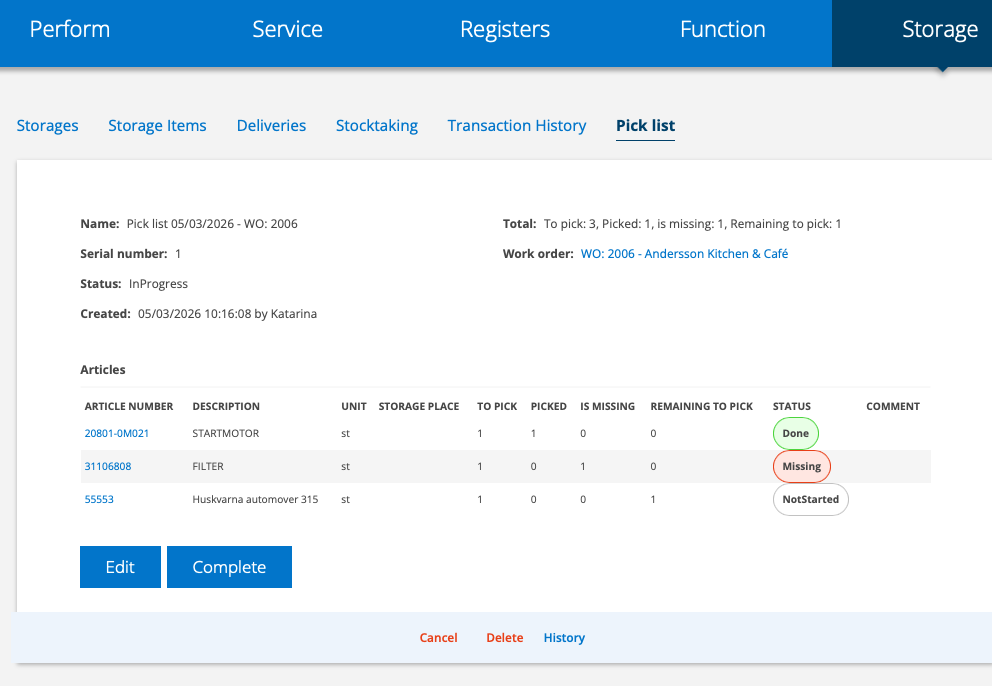
When you are completely finished with the list, click Completed.
Information for administrators – Give users permissions for Picklist
Requires admin permission.
- Go to Group Settings and click on the user who should have Pick List permissions. Select Edit permissions.
- Select which permissionss the user should have: View, Edit, Create, Cancel and Delete.
- Don’t forget to Save.