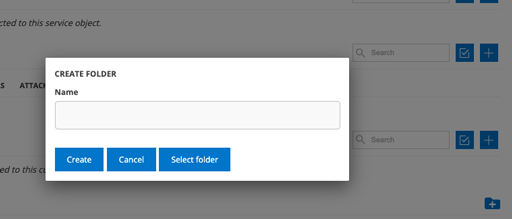
If you have many pictures and documents to be added to a registry entry, it may be a good idea to create folders.
You can find the symbol for creating a folder at the bottom of a register entry for customer, facility, service object. If the symbol is not present, the function does not have the option of folders – yet.

To create a folder:
- Click on the symbol
- Add a name on the folder
- Click Create

Adding files in the folder:
- Click on the folder
- Drag files from your computer to the folder
- Drop the file in the box
- Close the folder by clicking on the “house” symbol.
Upload folder:
- Click on Select folder
- Choose the folder you want to upload
- Agree to the folder being uploaded
Max size of the folder is 100Mb.
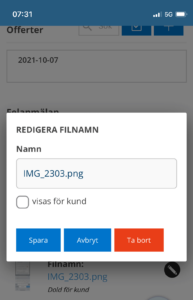
Change name on file
- Click on the pen symbol to the right of the file you want to change
- Enter a new name
- Choose Save

Choose whether or not to display the file to customer users
When you upload the file, you can choose whether it should be shown to the customer. By default, it is unchecked.
Click on the pencil to the right of the file. By default, the file is not displayed to customer users.
This default setting can be changed in the Group settings – Group settings. Select the option “Uploads shown to customer as default”. Admin permission is required to make the change.
Move files
Drag and drop the file where you want it. If you want to move it out of a folder, first drag it to the house symbol, then you can drag and drop it into the correct folder. Below you will find a short video that shows how it works.
Allowed file formats
doc, docx, .txt, pdf, xls, xlxs, .csv, .mdb
jpg, jpeg, gif, png, .heic, .webp, .pcd
mp3, wav, mp4, .mov, .avi, .wmv, .mpeg, .mpg
glf, stp, dfx, .step, .stp, .dxf
.rar, .zip, .tnzip, .tszip
If you can’t find the file format you want to upload, please contact us.
Don’t see the symbol?
To upload files, delete uploaded files and choose whether to show or hide the file from the customer, you must have the user permission for the respective registry to “Upload files” and “Delete/modify uploaded files”.*
* Here’s how to add the permission:
(Requires admin permission)
Go to Group Settings.
Click on the user who should have the permission.
Select Edit permission.
Scroll down to the heading CUSTOMER.
Select “Remove/change uploaded files” / Upload files
See a list of all your uploaded files
When you are logged in, you can get a list of all your uploaded files by changing the URL to https://app.serviceprotocol.com/filecontainer
You get a simple list that you can sort by name, size, who uploaded it, etc. You cannot delete files this way.
