
A service template can be used to specify what to do on a service. It also forms the basis for the service protocol and provides traceability of what has been done and needs to be done in the future.
Service templates can, for example, be created for the different steps or levels in a specified service: large, small, 1-year service, 2-year service, 100-hour service, etc.
The phrase “Select a template” shows you where you can use a template. This is what it looks like in a Service order when you add a service object.

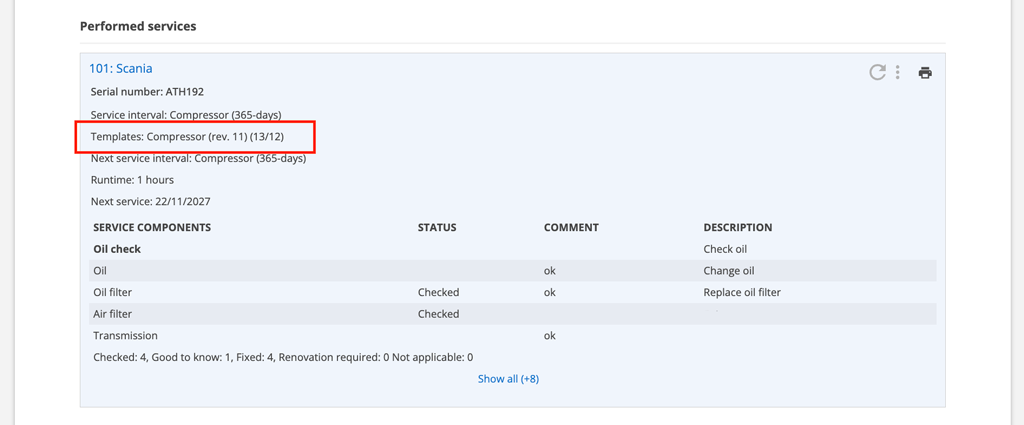
You can see which template you used on the service protocol – the name of the template, which revision (rev. 11) and how many of the template’s points were used on this particular order.
STEP 1 – Create a template
Here’s how to create a service template
- Go to Service > Service template.
- Click the + sign to create a new template.
- Give the template a name.
- Add components that need to be checked when performing service. A new component is added by pressing + Add service component.
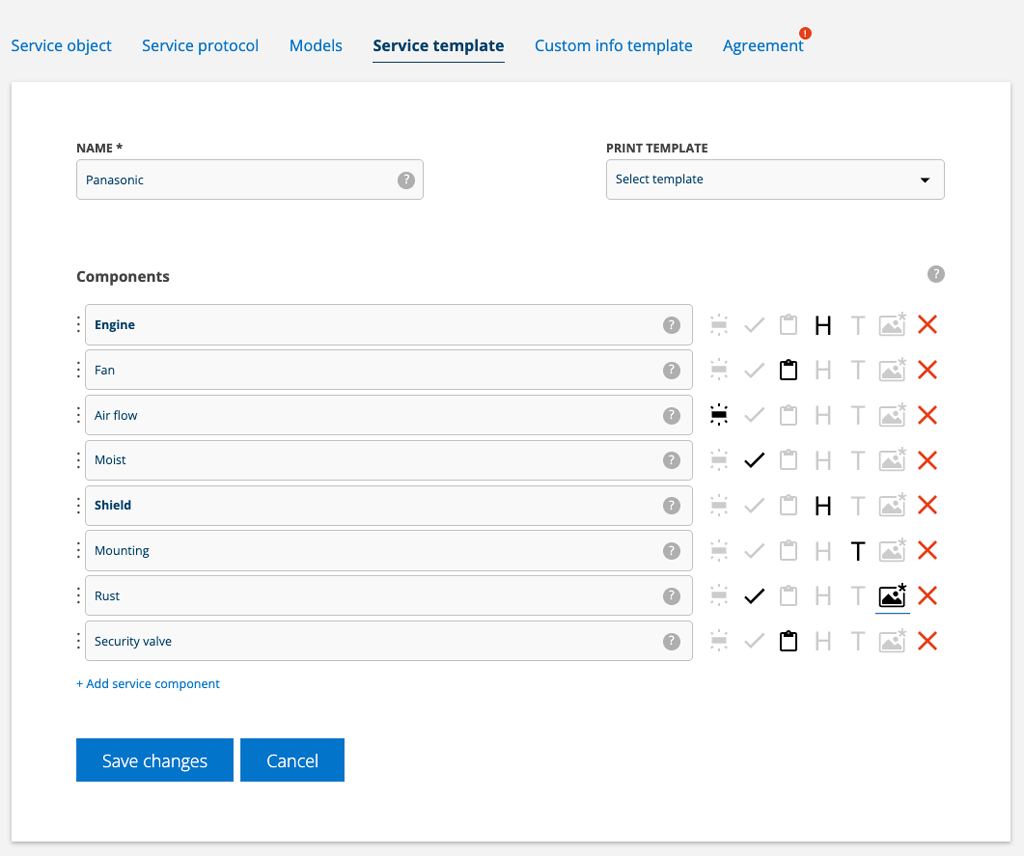
Service components to choose among
– Measured value
– Yes/No
– Status
– Heading
– Free text
– Require image
Keep the mouse pointer over the symbols and you will get information about what the symbol means.

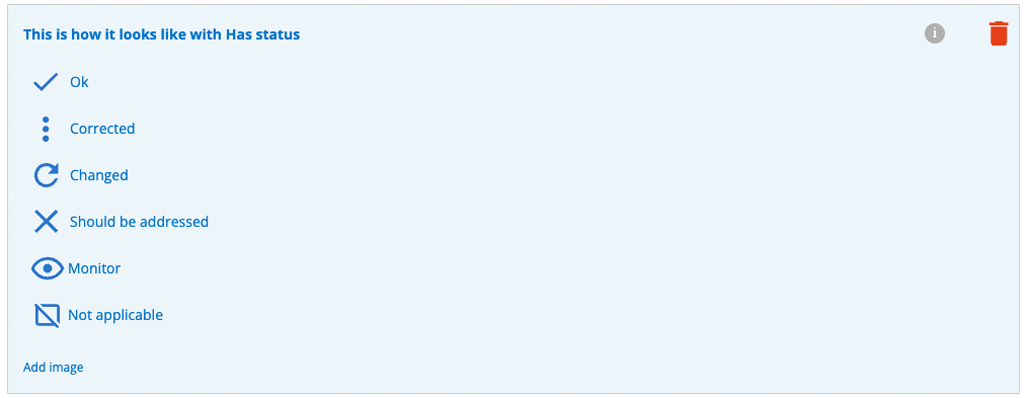
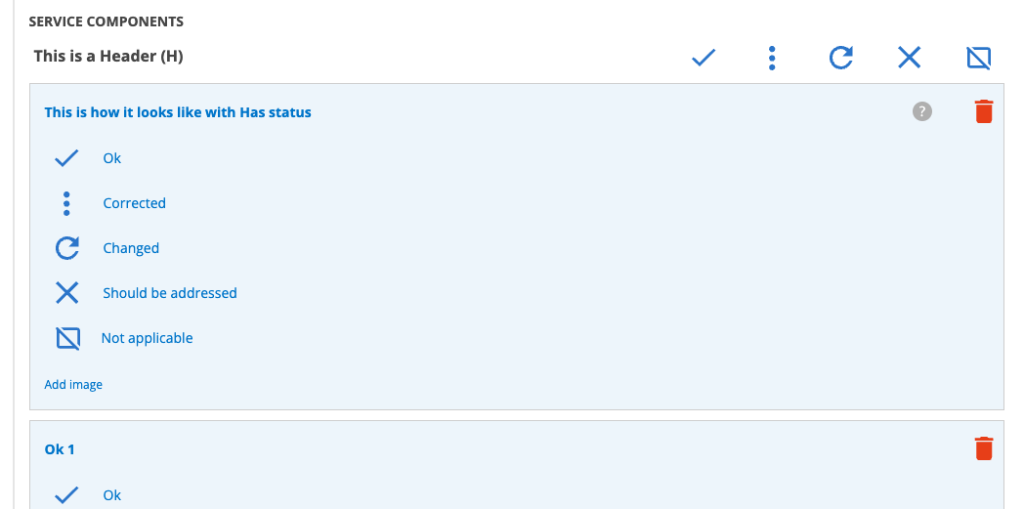
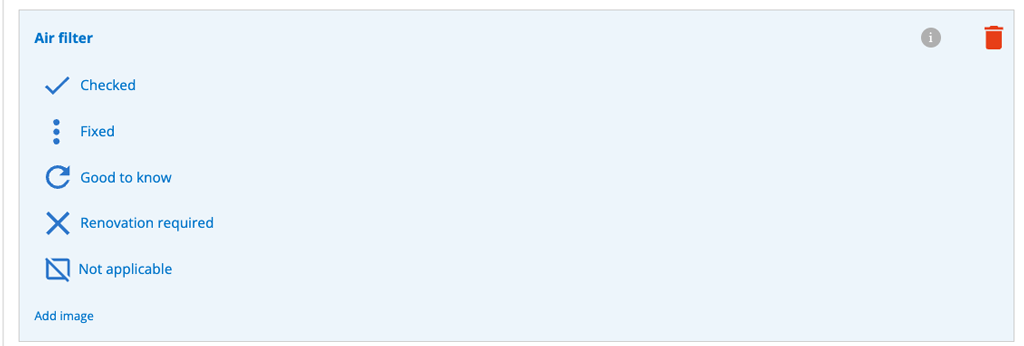
Concerning status
Status contains a number of points: Ok, Corrected, Changed, Should be addressed, Not applicable.
Monitor can be added by selecting the Service Protocol Setting: Show monitor check point. This setting adds an “eye” to the service template to signal that attention needs to be paid to the point.
Regarding Heading
Heading can, for example, be used to divide a protocol into different parts to make it clear. Ex: Electrical system, Mechanics, Work environment, etc. A header will by default be bold to make it easier to see that it is a header.
With a Header in your service components list, during the service you can check off (set to Ok) all components with Status at the same time. If you want to change one of the components, you can open the component by clicking on the header again and make your changes.
If you want to use Header but not give the option to check off all at once, you need to select Module setting – Service protocol setting – Remove header checks. This requires admin permissions.
Concerning Should be addressed
If Should be addressed is selected during the service the system adds buttons to create a work order or quote directly from the order. See also the section Change names of the check points “has status”.
Add help, images, descriptions and comment suggestions
Add help texts and descriptions
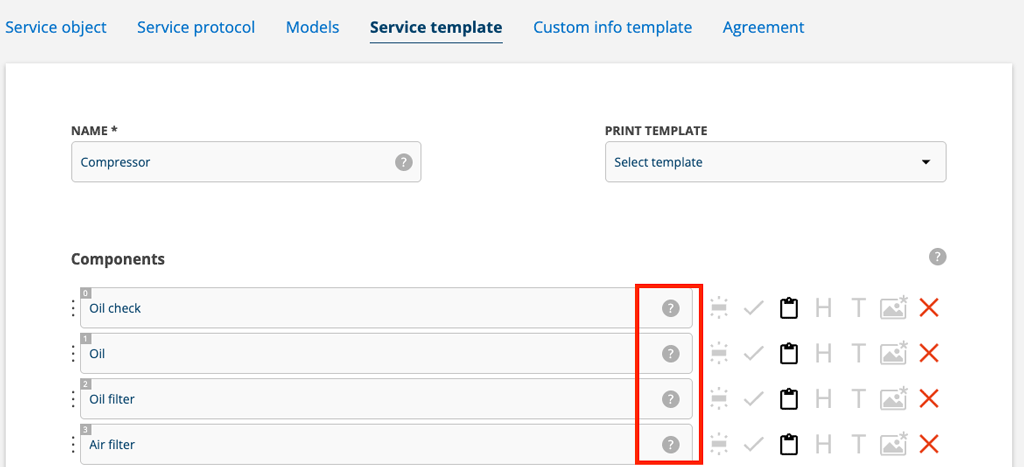
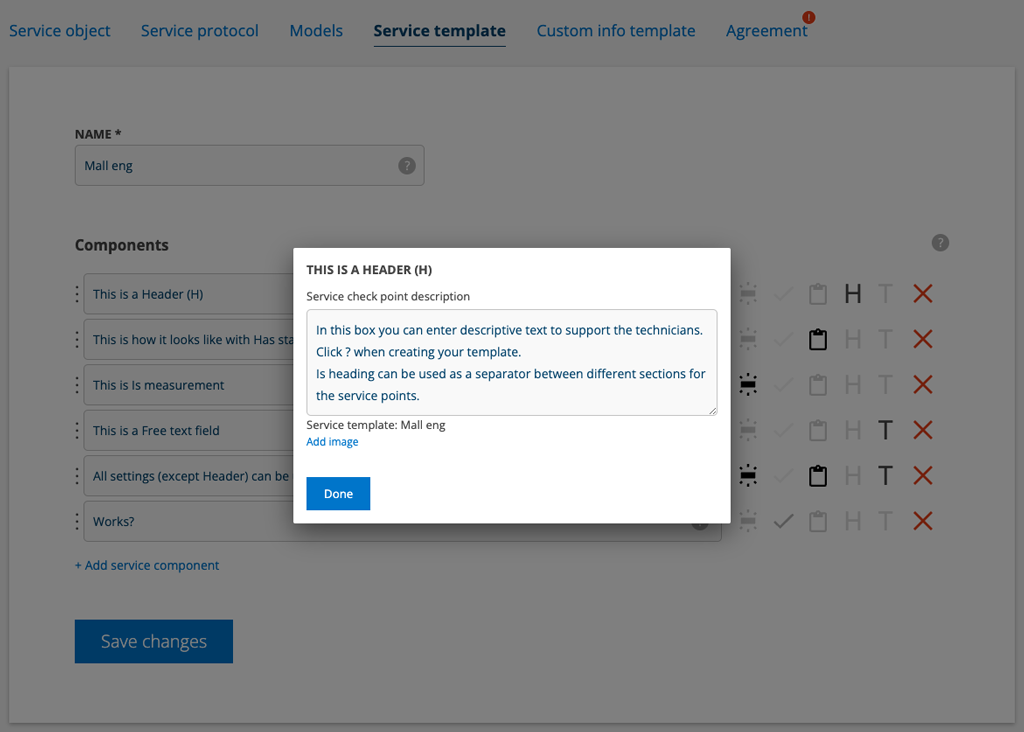
If you want to enter help texts/service component description for the person performing the service, click on ? (the question mark on the far right of the Service components field) and fill in a description of the service component. Then the person who is to perform the service can receive extra support. All texts under ? appears when you perform a protocol other than Heading.
If the help texts are to be displayed as a column on the protocol itself, select that setting under Module settings – Service protocol settings – Show description on service points. Requires admin permission.
Add images as support to the instructions
You can also add an image to further explain what to do under the component.
- Click on Add image
- Select an image from your computer
- Click Done
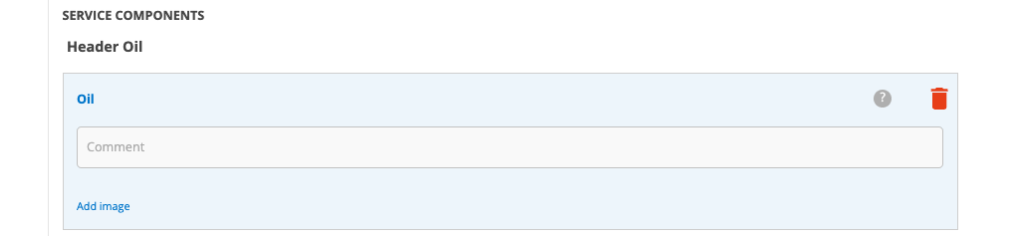
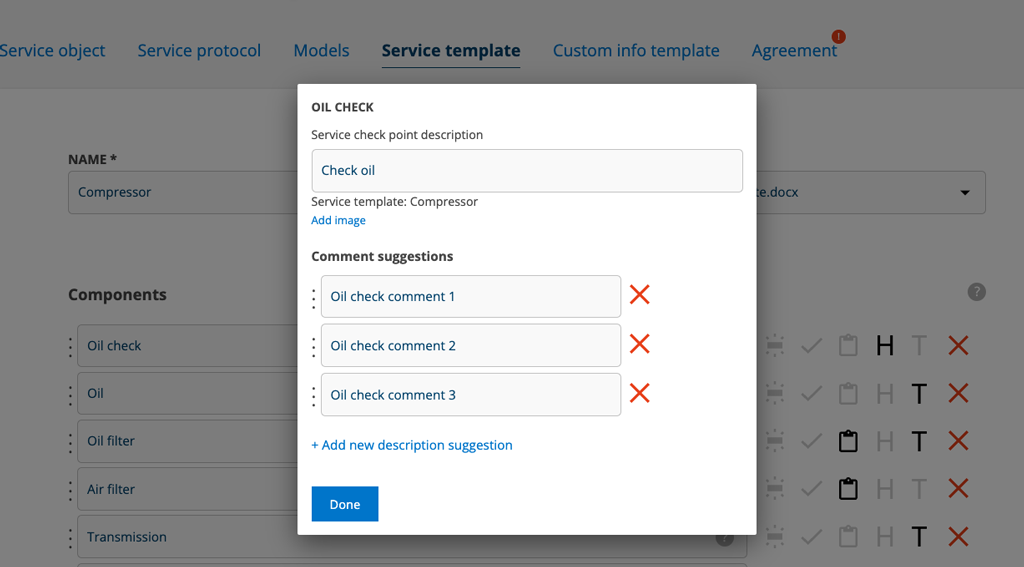
Add comment suggestions on servicecomponents
The comment field is added when you have selected the symbol T (text).
To speed up when you often need to add the same comments at a service point, you can add comment suggestions. Click + Add new comment suggestion.
When filling out a service template, you can select multiple comment suggestions for a service point. The comments are placed on a line separated by a , (comma).
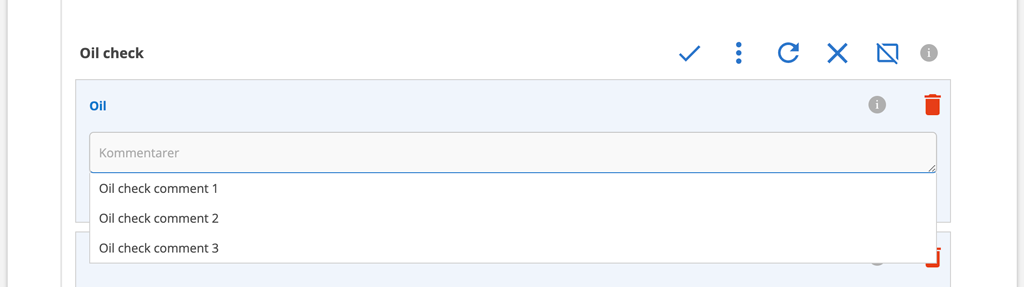
This is how it looks like on the service protocol
When you have then selected the service template on an order, the suggestions appear when you place the cursor in the field for “Comments”.

TIP! Date in service point
Do you often write dates in the service points? Add a service point to your service template where “date” are included in the text somewhere (eg start date or leash expiration date) and a calendar icon will appear. When you then perform the service, you click on the symbol and can quickly select the day. The service point must be a “free text” or “value”.

Change the order of the points?
If the service components is in the wrong order, it is easy to move them. Hover over the three dots at the far left of each field, drag and drop the field where you want it.
Click Save (or Save changes)
Click Preview to see how your service template will look on an order.
Set Conditional
You can show or hide a service point based on the value in another service point.
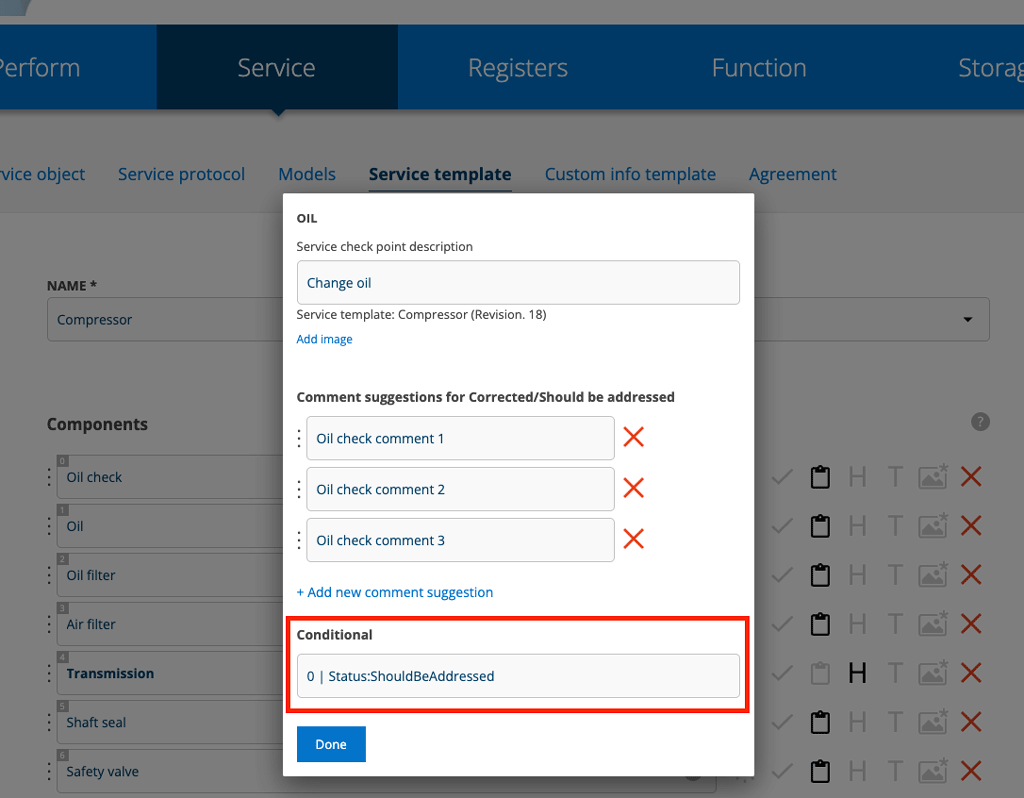
Each service point has a number. You will need this number in the next step.
- Click on the question mark after the service point you want to set as dependent. See image 9.
- Start by entering the number of the service point that will control.
- Type a | (vertical bar). Feel free to copy the examples below.
- Then choose which value will control.
When it is Status
Status is Ok, Corrected, Changed and Should be addressed.
Example:
- 1 | Status:Ok = Only displayed if service point 1 has status Ok.
- 5 | Status:Corrected = Only displayed if service point 5 is Corrected
- 3 | Status:Changed = Only displayed if service point 3 is Changed
- 7 | Status:ShouldBeAddressed = Only displayed if service point 7 is Should be addressed
- 12 | Status:Monitor
When it is Value
When it is a Value, use < or > (greater than/less than)
Example:
- 2 | Value>10 → Only displayed if service point 2 has a value greater than 10.
- 4 | Value<0 → Only displayed if service point 4 has a value less than 0.
- 9 | value>3.5 → Only displayed if service point 9 has a value greater than 3.5.
When it is Yes/No
Bool (Yes/No → True/False)
Example:
- 5 | Bool:Yes → Only displayed if service point 5 has the answer Yes (True).
- 5 | Bool:No → Only displayed if service point 5 has the answer No (False).
Uppercase/lowercase doesn’t matter so you can also write bool:no.
Duplicate
If you need a new but similar template, you can choose to duplicate a template, give it a distinctive name and then add, delete or edit the service components.
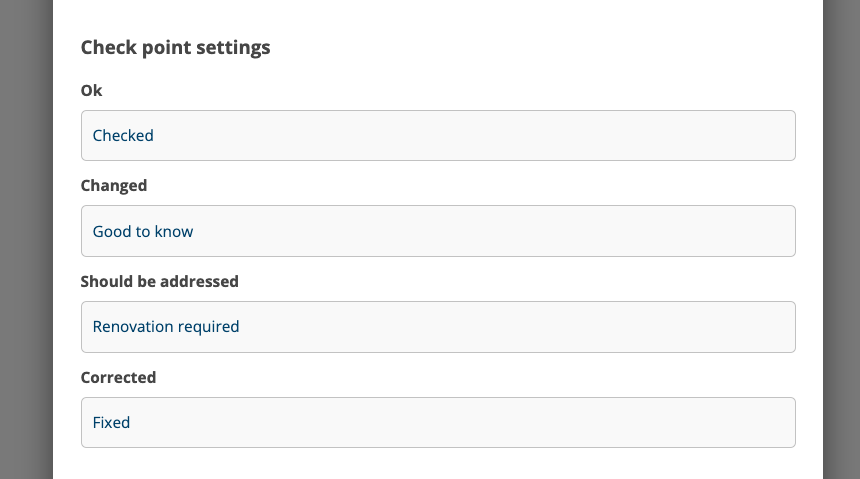
Change the names of the service points “have status”
If you want to use other names for the service points for Status, that is possible. However, the conditions for the different concepts are the same. The standard term “Should be addressed” always gives a note that a measure is required and opens to create a work order.
Admin permissions are required to add new terms.
Do this:
- Go to Group settings
- Select Service protocol settings
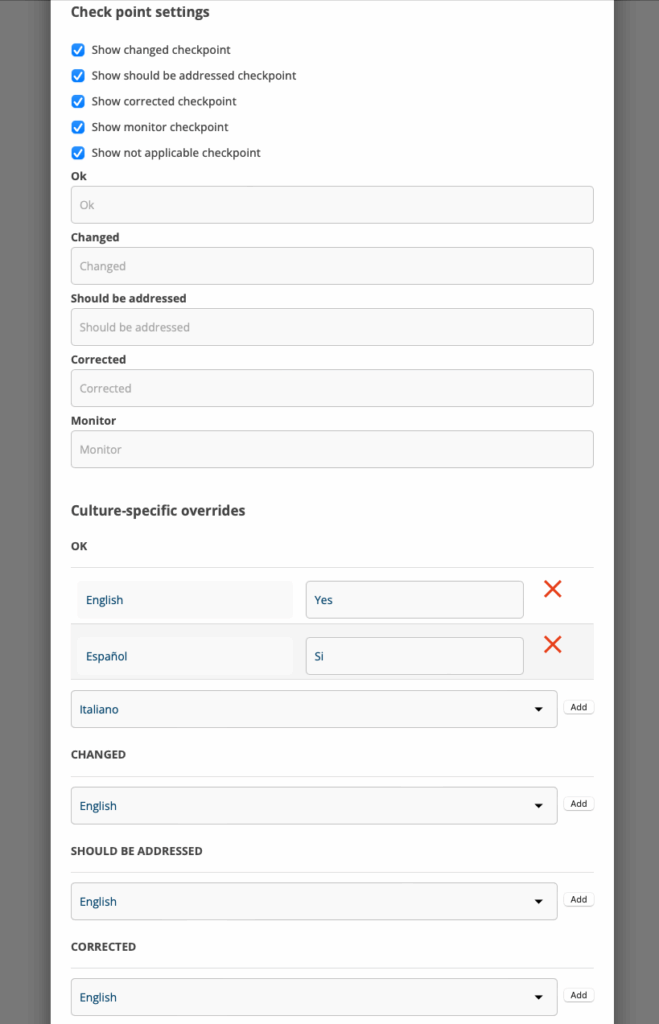
- Scroll down to Check points settings
- Fill in the desired terms
- Save
Translate your own concepts for service points
When you create your own expressions for service points, the system cannot automatically translate these into other languages. If you have users and employees in other countries or who speak a language other than your company’s language, you will need to translate these.
Under the Culture-specific overrides heading in the Service Protocol settings, you can add translations for all languages that Service Protocol provides.
- Choose language in the drop-down list
- Click “Add”
- Fill in the translation
- If you want to translate into more languages, select a new language and repeat the procedure.
- Don’t forget to scroll to the bottom and choose to save.
STEP 2 – add the template to an service object or service order
Add a template to a service object’s service interval
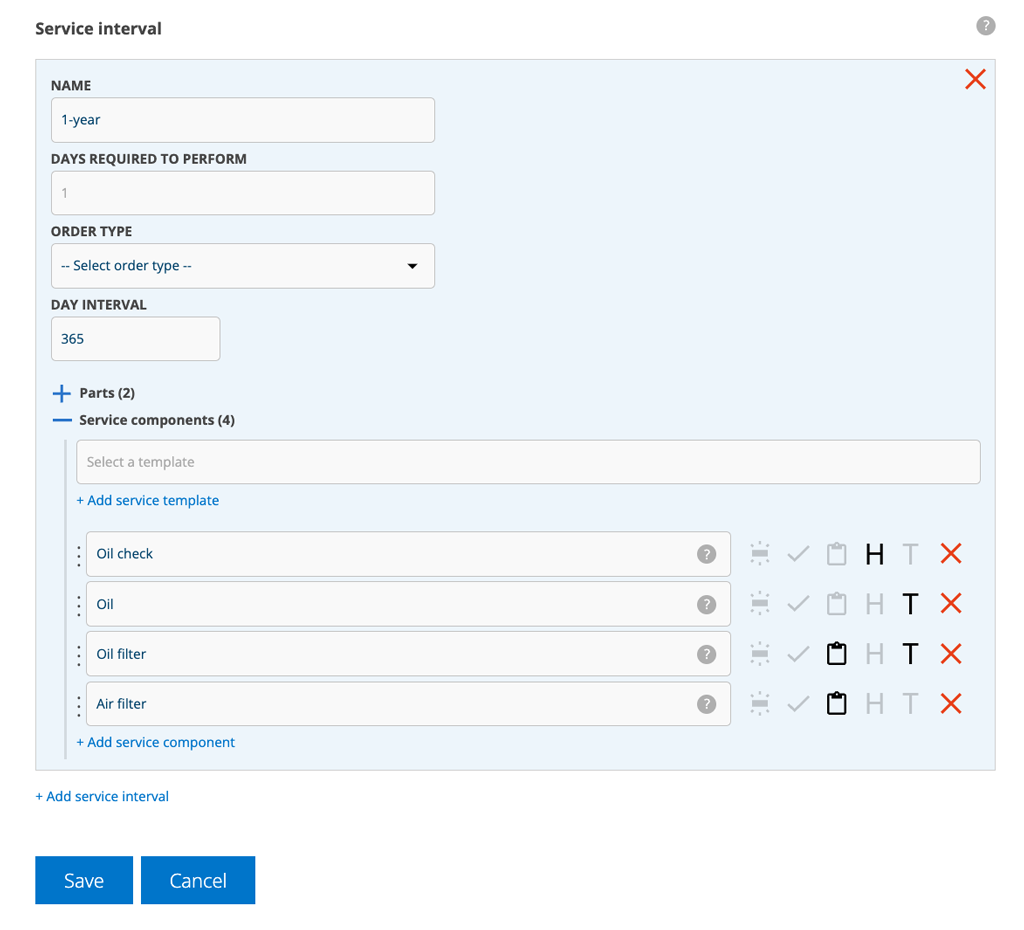
When you create a new service object, you can find Select a template under the Service interval – Service components tab. Put the cursor in the box under Service components and all your service templates will appear in a popup. Select the one you want to use. You can change the service components (remove and add) here without affecting the template itself.
If you want to create a new template, click on the blue plus symbol on the right (see picture below) and a new window will open where you can create your template.
You can connect several templates to the same service interval. If you want to create one (1) large service and three small ones, you create two different service intervals, each with its own service templates.
Add a template to a Service order
Learn how to use a Service template on a Service order.
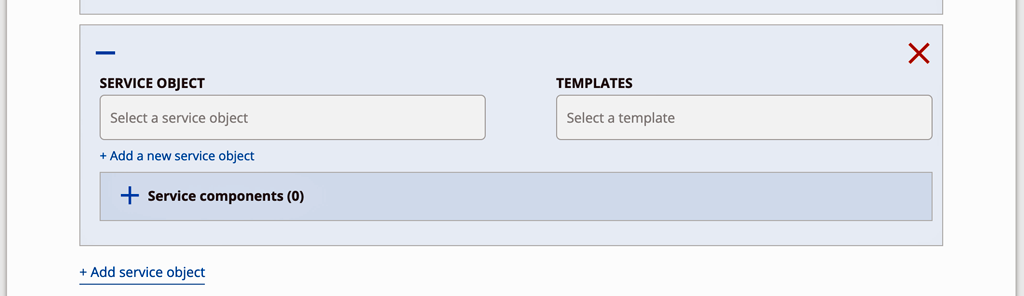
When you add a service object to a service order, the service interval is retrieved with all parts and service components, if any.
If there is no service template, place the cursor in the fields under TEMPLATES and a list of your templates will open.
If there is already a template on the service object and you want to choose another service template, you will be asked if you want to add the service components from the template or replace existing service components from the object with those from the selected service template.
Edit and update a service template
You can add and remove service components in a service order without affecting the template itself.
Keep in mind that if you make the same change to the template afterwards, they will not be counted as linked.
Changing the template does not automatically change existing templates on created orders, objects or service intervals. To get the updated template, you need to remove the old one and add the updated one.
Here’s how to apply changes to a service template to linked service components
For the changes to take effect in existing service objects, these must have been entered into models, have a service interval and be created with the service template.
ATTENTION! If you have many objects and orders to be updated, we recommend that you first update the heading Affected service objects and then Affected orders, otherwise the update may take a long time.
You need to have admin permission to update linked service points.
- Edit the template
- Save changes
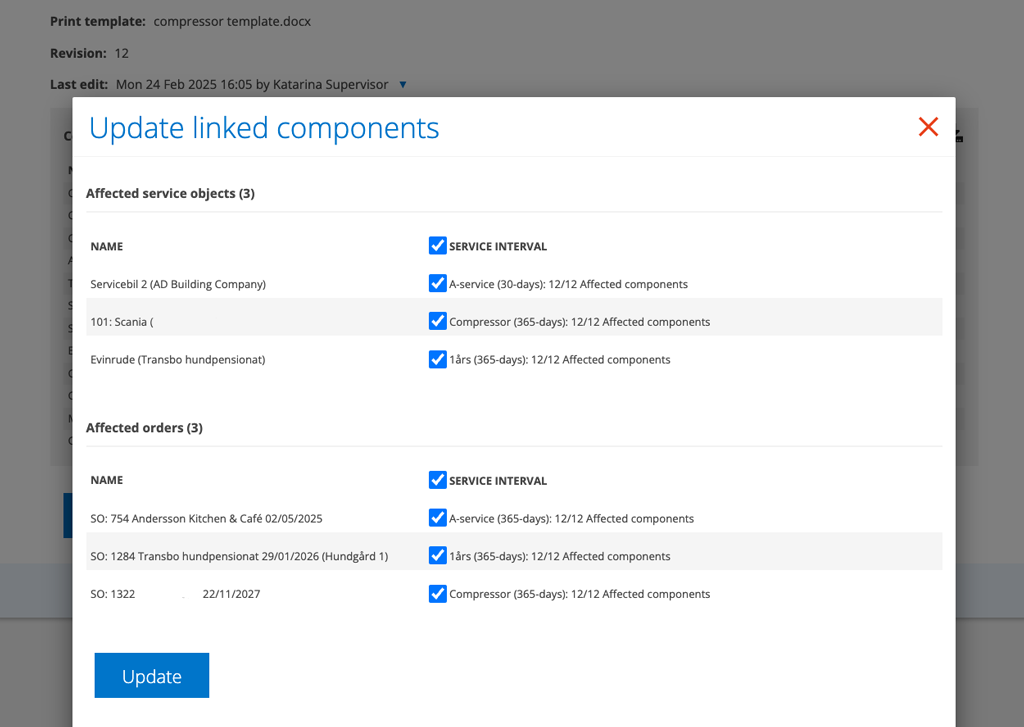
- Go to the bottom of the page and click Update Linked Components
- A list is created where you see all models, service objects and orders where the service template has been used and how they are affected, e.g. service intervals and service components. The numbers e.g. 30/30 indicate how many service components there are on the object and how many of these are affected by the update.
- Select the service object that shall be updated
- Click Update
- When the update is complete, you will see this under your notifications.
Print template for service template
By creating a print template and connecting it with a service template, it is always that print template that is used when printing service reports with this particular service template. You do not need (and cannot) select a different template when you click Print the report.
To be able to choose a print template, you first upload it under Group settings – Service protocol settings and check the option under Print settings – Auto select print template.
Print service components from a single service template on a protocol with multiple service templates
If you have several service templates on a protocol and want to be able to print only the service components from one of the service templates, do this:
- Create a print template for each service template you want to be able to print. Instructions can be found in the article Print templates.
- Upload your templates in Group settings – Service protocol settings
- At the same time you select the setting – Only print template check points
- Save
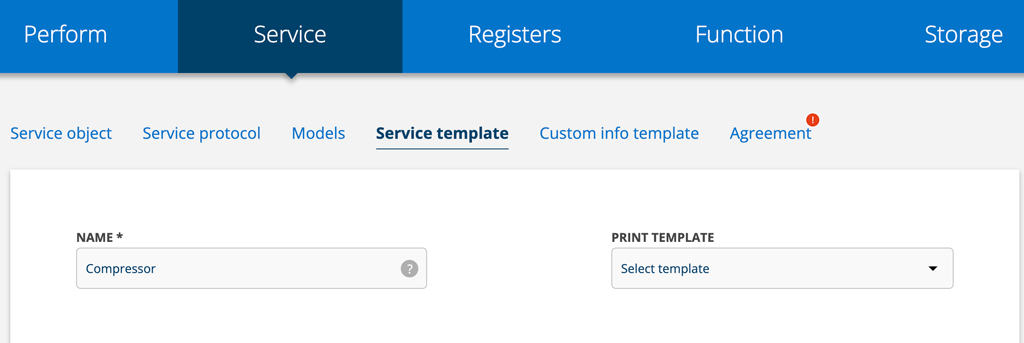
- Go to your service template and select the print template under PRINT TEMPLATE.
- Save
- Select the print template under Print service report.
If you have both print options (Auto select print template and Only print template check points) checked but only one service template linked to the protocol, the protocol is printed directly with the print template you selected for the service template.
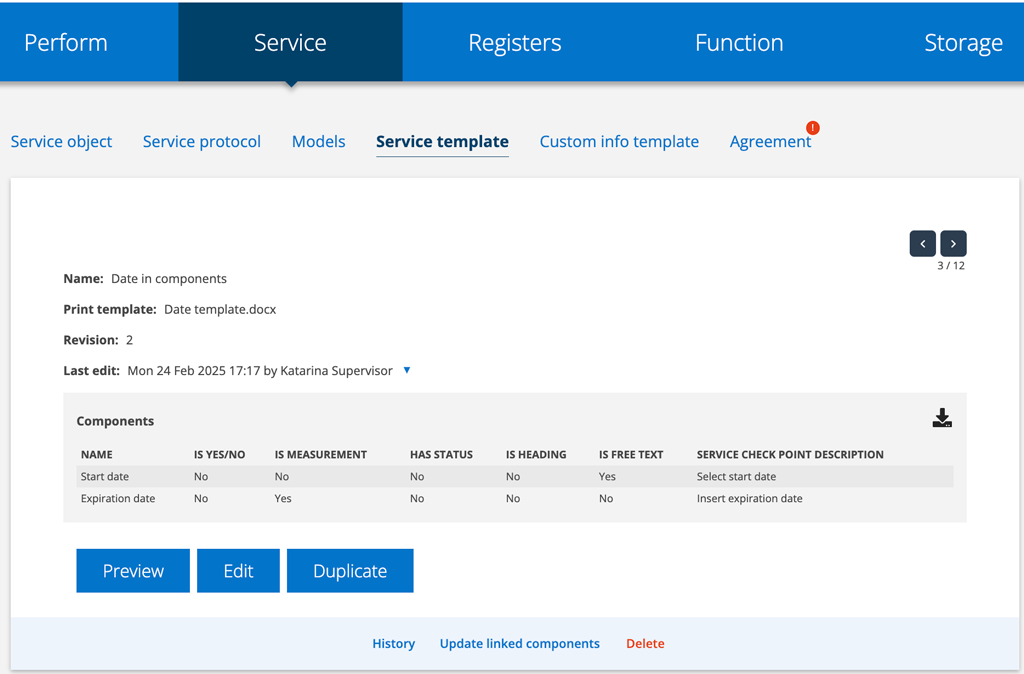
Download the template

If you want to download your template, click on this symbol to the right of your template. The file is downloaded as a xlsx file or csv file depending on your Group settings.
Accidentally deleted a service template?

Click the filter icon and select Show removed. Find the template you want to restore, click it, and click Restore at the bottom of the page.