
For instructions how to upload a model register see Upload a register.
By entering models into a Model Register and then linking service objects to the model, you can make changes to a model and then quickly update all service objects of that model by using the function update linked service objects.
To view Models you need to have that user permission (Models or Group model’s).
Each model found in the Models is marked with an * after the object when searching for items to associate with the customer. This is to distinguish models from the model database provided by the system (currently a database of compressors). If you use a model database models are called Group model’s. See more under Model database.
Add a new model
- Go to Service > Models.
- Click on the symbol with the +sign to the right of the search bar.
- Alias
Aliases can be used to make it easier to find models. You can have several different aliases for the model. The alias you choose under MODEL when you add a new service object becomes the service object’s “description”. - Fill in the name of the model’s manufacturer and type.
For example “Kaeser” or “Atlas Copco”. The name must be unique, so if there are several models from the same manufacturer, distinguish them using an additional name, type or number – “Kaeser 50 A”. - Parts
Articles used for the current service object can be entered here. It will then be easier to find parts when you work with orders for the service object.- Any replacement parts can be specified when a service object is created. Read more about this under Service object.
- Service interval
Here the typical service interval for the object can be entered. Choose a name, interval, add articles for the service performed at this interval and add or select a template for service points.You can set multiple service intervals for the model but they must overlap, e.g. 2000, 4000, 8000, 24000. - Run time based
Should the model be run time-based? If the object’s range is calendar based only, this should not be checked. If the service intervals are calculated using run time, this must be ticked. - Custom information
Select an info template or add information points by clicking +Add information - Save
Upload document
Here, documents for the current object can be uploaded, spare parts lists, manuals, etc. Uploaded files are also displayed on linked service objects with the model name in parentheses.
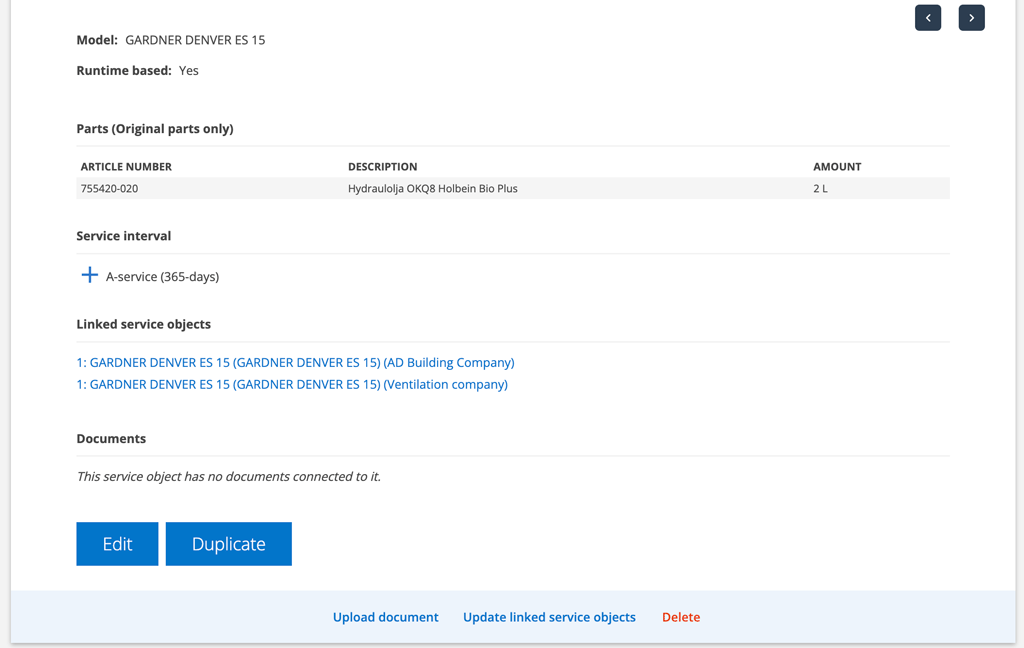
When you have chosen to “link”, i.e. select the model in the dropdown list when you add a service object, the object will be listed under the model.
On service objects you can see which model the object is linked to.
Update linked service object
If you change something, such as service intervals, on a model, you may need to update the service objects linked to the model.
ATTENTION! If you have many service objects and orders to update, we recommend that you first update the heading Affected Service objects and then Affected Orders, otherwise the update may take a long time.Do this:
(Admin permission required)
- Go to the detailed view for the model.
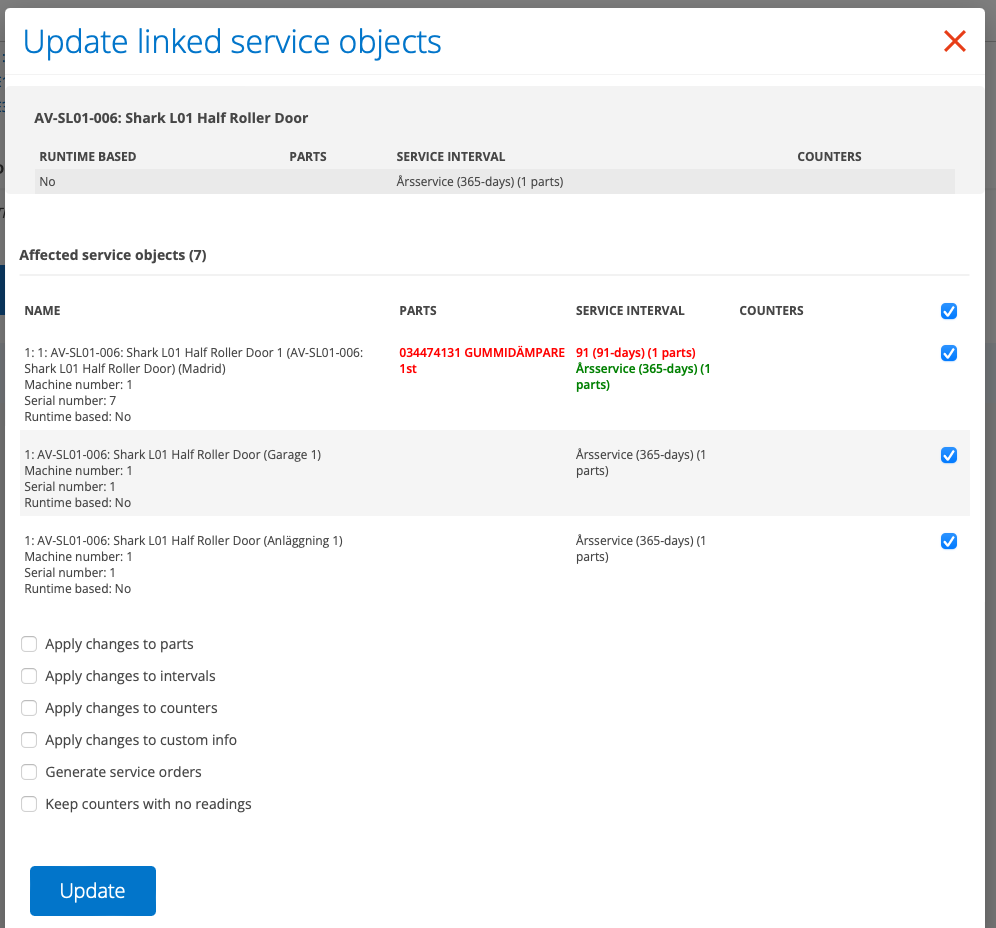
- Click the button Update linked service object.
A field opens where you can see changes to the model and can choose which parts you want to update (parts, intervals, counters…).
Update linked service intervals
Service intervals located on the service objects are marked in red.
If you select “Apply changes to intervals”, these service intervals will be overwritten by service intervals including parts and service points on the interval from the model.
Update linked counters
Existing counters on the service object (ie not on the model) are marked in red in the list. If you choose “Apply changes to counters”, these are removed if there are no readings on the object. To prevent this select “Keep counters with no readings.”
If there is no counter on the object, the counter from the model is added.
Apply changes to custom information
Select this option when you have made changes to additional information and want to update the objects. Previous information in the fields on the objects will be overwritten.
Delete a model
Click Delete at the bottom of the model. The connection to the model is removed from previously connected service objects.
Information to administrators
User permissions concerning Models (Group’s models).
View, Edit, Create, Delete, Upload, Remove/edit uploaded files