
Leak detection is a module that helps you document leaks in compressed air systems. You can also use the module to analyze and calculate the costs of the leak. There is a lot of money to be saved here by lowering your costs for energy and electricity.
By inviting your customers directly into the system, they can access the information and more easily make decisions about which measures they want.
Contact supporten if you want to activate the leak detection module. You will then find the module under the menu Function.

Add leak
Click the + sign.
Enter a name for the leak, customer and possibly facility.
Click Save. The name can for example be a date + customers name – so you easily find the leak detection documentation when needed.
Add new leak on customer
A leak name is always linked to a customer, to add more leaks on the customer just click on the leak name.
If you want to change the name, click Edit at the bottom of the page.
Click Add leak.
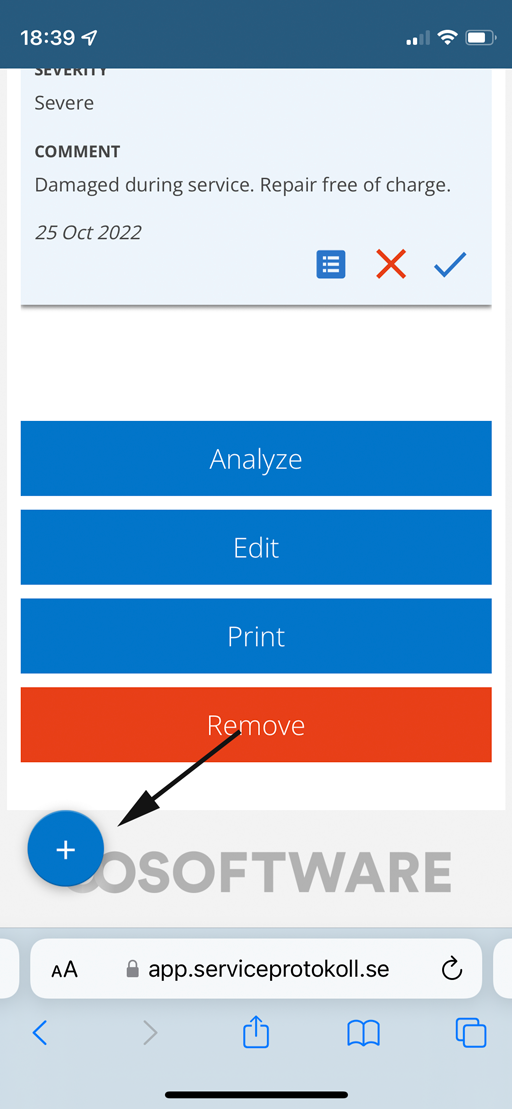
In a mobile device: Click on the +-symbol at the bottom left. See arrow in picture 1.
On PC: Click the Add Leak link.
Once you have posted a leak, the Add Leak button will be at the bottom of the page, under all your documented leaks.
Take a picture of the leak with your mobile phone. The image will be uploaded automatically. It is also possible to upload the image from a computer.
Add information. Fields that must be filled in are marked with *.
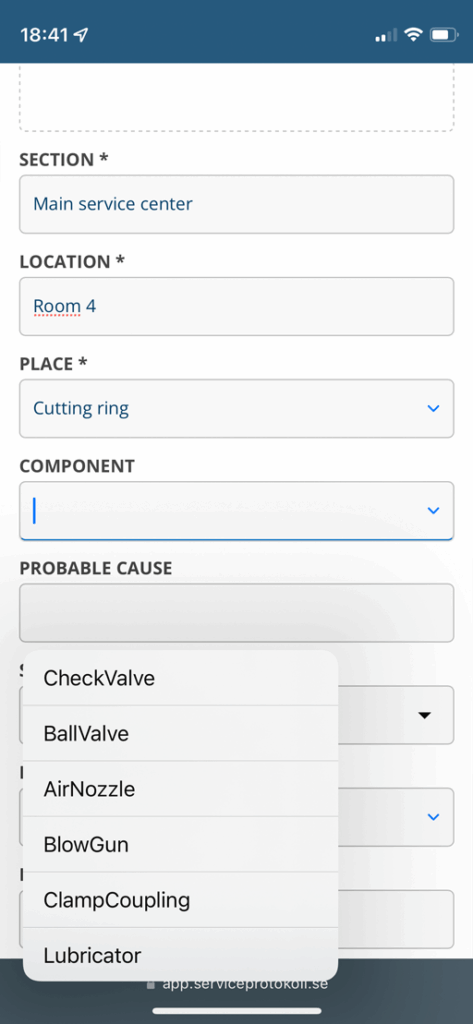
There are ready-made suggestions for several of the fields (see image 2), but if these do not fit, just enter what is missing. Your own expressions are saved and you will find them at the bottom of the list.
Save
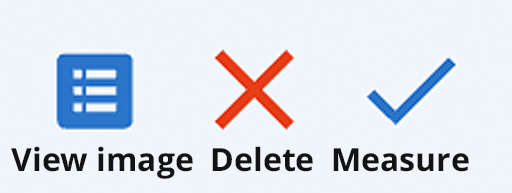
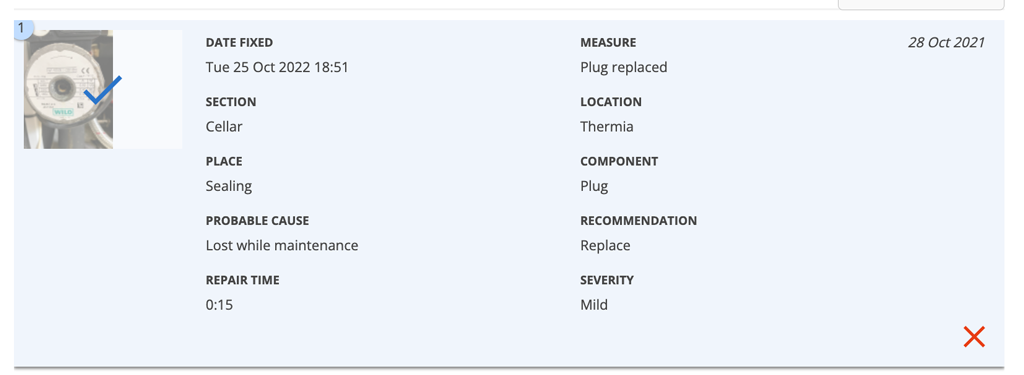
When you have completed the necessary actions, click on the blue tick. A field opens where you can enter the action. The leak is marked as fixed by placing a checkmark over the photo and adding the Action field. See image 4.
Analyze
Click Analyse at the bottom of the page to create a cost analysis of the leak.
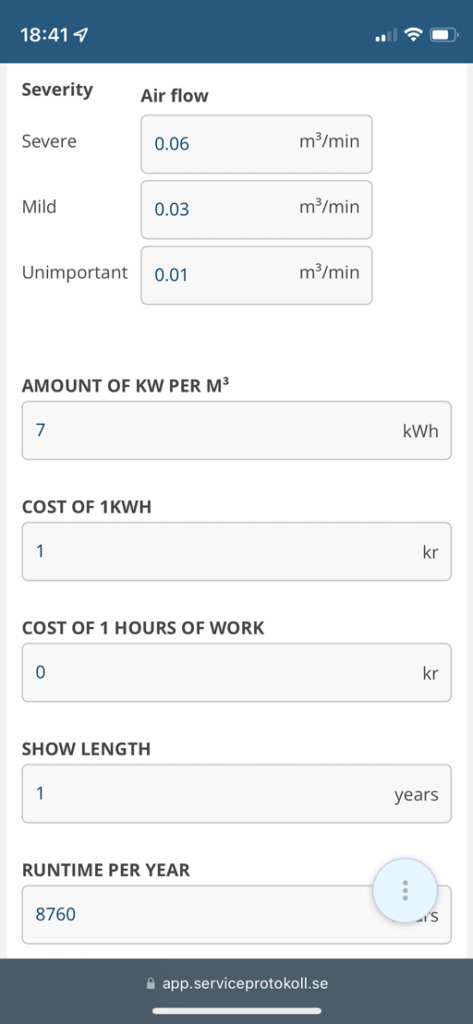
Standard/normal values are already filled in – see image 5. Change these so they match the current measured values.
If you choose to check Ignore fixed, the analysis takes all documented leaks.
Otherwise, the analysis only takes the leaks that have not been repaired (fixed) into the analysis.
Click Update.
A graph shows what you earn from fixing the leaks and how much the leak costs per year, month and day. At the bottom is a summary of all leaks under the same name. Among other things, there is a summation of wasted energy in kWh and leaked CO².