Service Protocol’s status features help you keep track of what’s happening with an order.
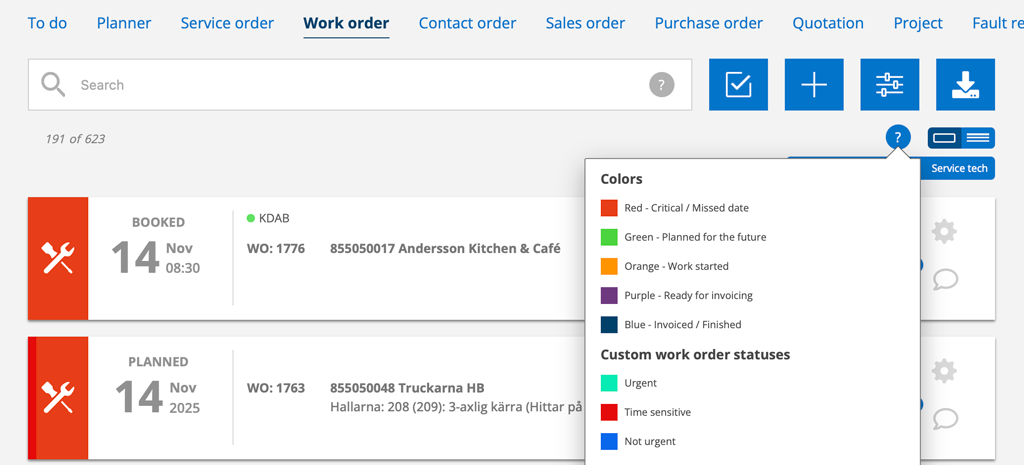
- The concepts for status and the colours show where in your work process an order is (Not handled, Started, Completed, etc.). You can read more about the different concept and colour in the article Symbols and colours.
- For service orders there is also a special set of statuses that you can use, for example, if articles need to be ordered before the order can be fulfilled. See more under Service orders in the next section.
- In addition to the standard expressions for status, you can also choose to create what we call custom statuses. For these, you choose expressions based on your needs.
The custom status function is available on service orders, work orders, sales order, fault reports and service objekt. You create your own statuses in the Module Settings for each function. This requires admin permissions.
What status is shown in the details view?
If it is a service order, the custom status is always displayed – if any. If no custom status exist the system status is shown.
If it is a work order that has a description, the description is displayed – even if it has its own status. If the work order is created from a quote, the quote’s description or service object is displayed.
If it is a sales order that has a Status, that is what is displayed. If you have a custom status and a Status, Status is displayed.
If you have not written anything in Status but a custom status, the custom status is displayed.
In the fault report, both the description and the self-defined status are displayed in the detail view.
Here is an example of what it might look like in the To Do detail view.
For service objects, custom statuses are displayed in list mode. Select “Status” in the category list.
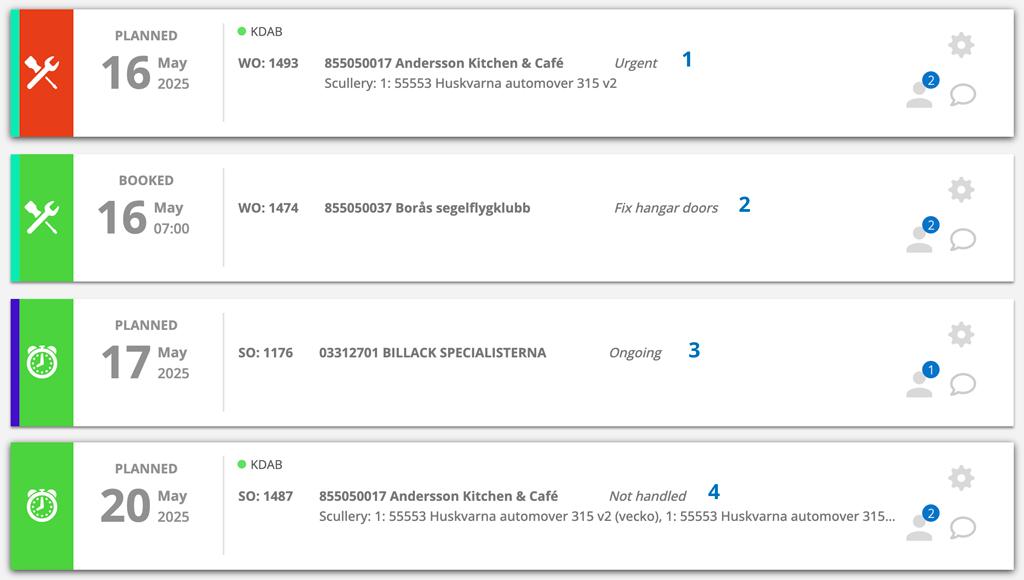
- A work order that has been assigned a custom status (Urgent).
- A work order that has a description – then the description is displayed.
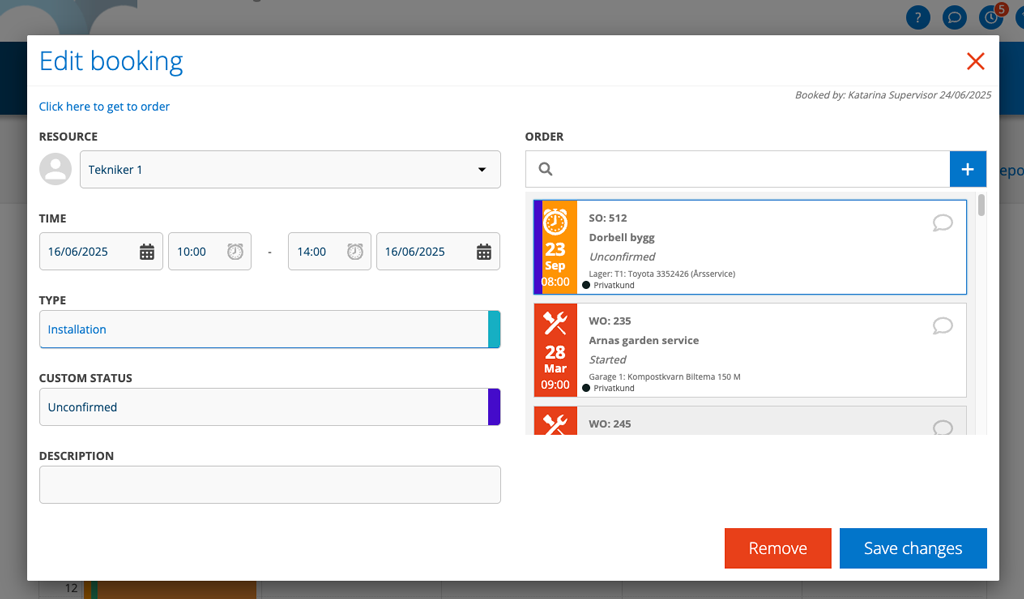
- A service order that has a custom status (Unconfirmed).
- A service order without a custom status shows the system status (Not Handled).
Service order
There are a number of preset statuses on a service order:
You will see the status bar when you have created and saved a service order and as long as you have the option to Edit.
During service, you cannot change the system default status selections.
Choose between:
- Not handled
- Waiting for delivery
- Ready for service
- Free text field where you can type in any expression you want
Not handled
An order has a status of Not Handled until you click Perform Service or select one of the other statuses.
Waiting for delivery
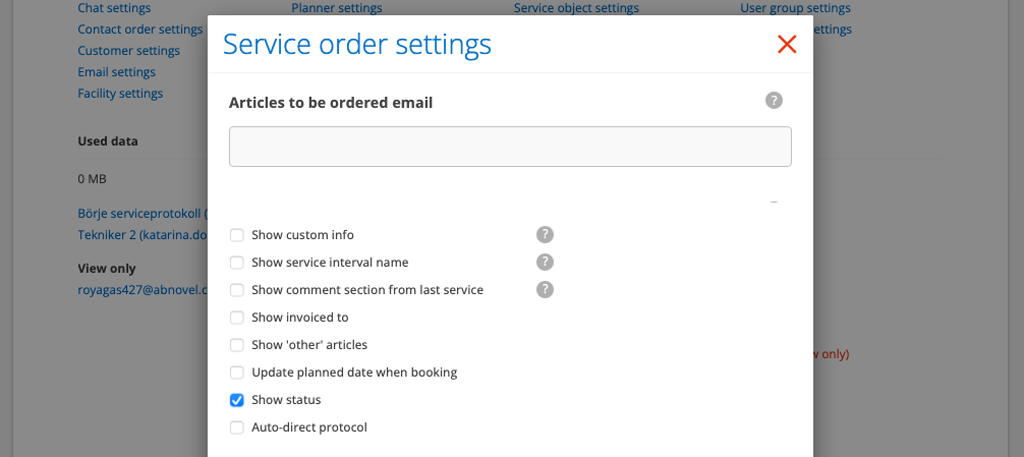
This status is used if parts need to be ordered for the order. Select Waiting for delivery and extra fields will open on Parts (under the Service object) where you can specify whether the items are ordered and if so, and specify a delivery date, if you have one. When you save the order, a message will be sent to the email address you have set under “Email for articles to order” in Service order settings for this.
Ready for service
When the articles you ordered have arrived, change to Ready for service.
Free text field
Mark the button and enter optional text.
You can use the filter function to search for orders for which you have selected a free text status by clicking on the “Own status” option under SHOW ONLY.
Settings you can make for service orders and status
Depending on what you have chosen for service order settings, you can see:
- the system’s Status field (see Image 1). This setting is the default.
- system Status and OWN STATUS (custom status). Once you have created your own status, both the system status and fields for your own status are displayed.
- only OWN STATUS (custom status). If you only want to see your own custom statuses, uncheck “View status” in Service Order Settings. Requires admin permissions.
Custom status
You can create custom statuses for work orders, service orders, fault reports, sales orders and service object (Service object status). You can define the expressions for these based on your needs.
Creating your own statuses requires admin permissions.
- Go to Group Settings – Module Settings and click on the function you want to create a custom status for. Scroll down until you see the Custom Statuses field. For service objects, the function is called Service Object Status.
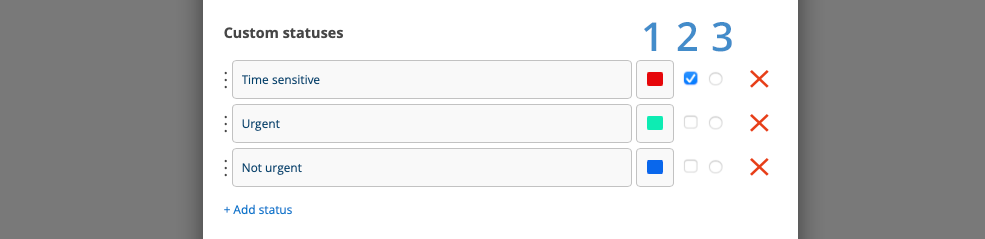
- Click +Add status. In a text field, enter the different status expressions you want to use.
- Select a color (1) for the status by clicking on the color box. You can either drag the sliders or enter an RBG code. The color is added as a narrow strip on the symbol for the order – see example of a work order in the image/symbol below and as a dot after the status of an order.
- Choose whether the status should have the setting “Requires permission” (no. 2 in image 4 abowe).
This information only applies to Work Orders, Service Orders and Sales orders.
The function can be used to control who can see and search for orders in the list views and in the Planner with a certain status.
If you mark a status as “Requires permission”, only users with the permission to see all statuses can see and search for it. The user simply does not get any hits when searching.
If you do not mark “Requires permission”, everyone will see the status regardless of the user’s permission settings. The default setting is that you see all statuses.
Two steps are therefore required to hide orders with a certain status for certain users. Do this:- Step 1:
Select which status(es) will require permission to view and search for this status by clicking in the white empty box on the far right. If you hover your mouse pointer over the box, it will say “Requires permission”. - Step 2:
Click on the user in Group settings.
Select Edit permissions.
Uncheck under Work order and/or Service the choose “See all custom statuses”
Save.
- Step 1:
- Choose which status should be the default (no. 3 in image 4 abowe) – i.e. added automatically to created orders.
- You can change the order of the status suggestions by dragging the three dots on the left.
- SAVE.
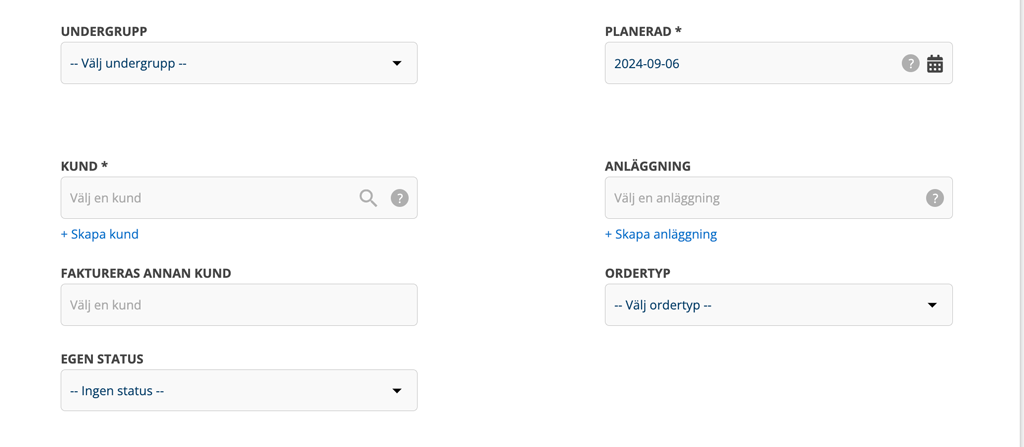
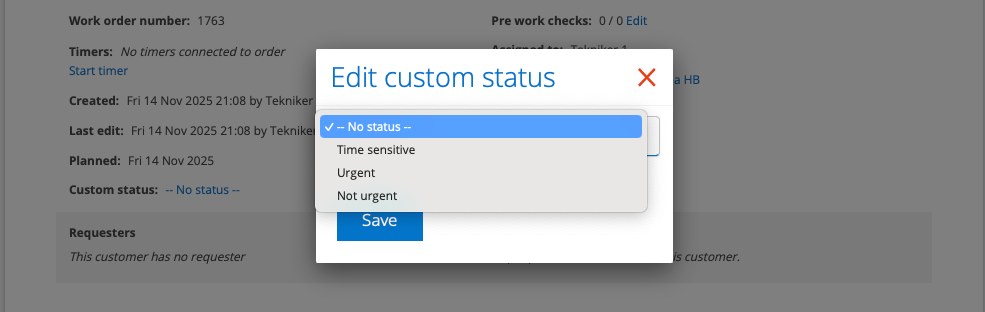
Now you have a new field for CUSTOM STATUS. Click “No status” (or if you already have selected one – on the selected status) and a popup will open where you can choose from your preset status suggestions.
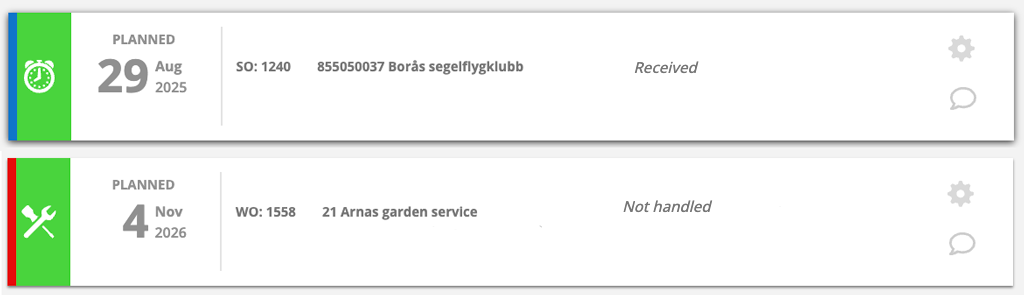
When there is a custom status on an order, a narrow coloured strip with your chosen color for the status is added to the left, in the image a red stripe on a work order and a blue stripe on a service order.
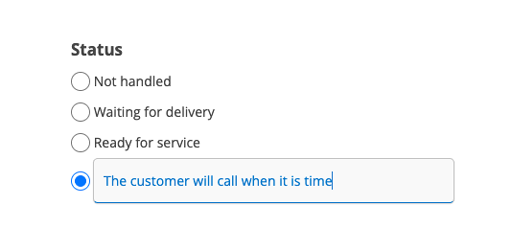
On the service order, you will also see on the right “The customer will call when it is time” – this text is entered in the system’s free text status field. See image 2.
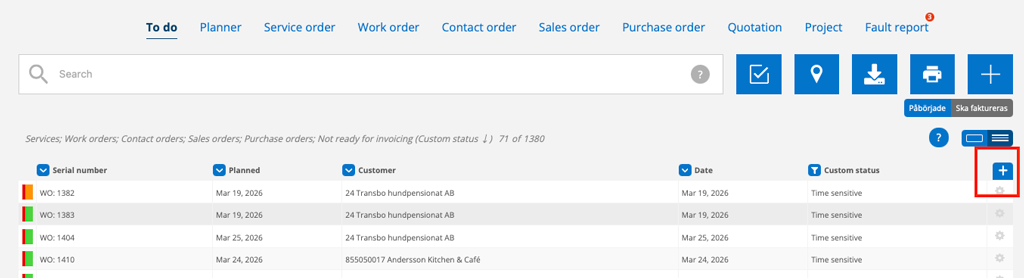
In the list view, you can choose to display the category Custom status. You select categories by clicking on the small + symbol on the far right (see image 7). This option is also available in To Do.
Where can I find Custom status?
- On an order.
- In the Planner when making a booking.
- Custom status can also be selected as a category in the list views for the orders. Click on the small cross on the far right of the list view.
- In the detail view as a narrow stripe on the left.
- Via the search function (blue button with the check mark) you can quickly sort/filter the orders based on status. All your statuses are listed here.
Error report and status
If the status you choose for a error report matches (i.e. is exactly the same as) a status expression you have entered in Work order settings, this status will be automatically set on the work orders when you generate a work order from the Error report.
Example: You have Work Order Settings – Custom Status: URGENT and Error Report Settings – Custom Status: URGENT.
You select “URGENT” on the error report.
Generates a work order.
The work order’s Custom Status will then automatically be “URGENT”.
However, if you write “urgent” in one of the places, the system will not understand it.
Work order settings concerning status
In Work Order Settings, there are a number of choices to make regarding status.
- Under View settings Include custom status on PDF (i.e. the protocol)
- Required custom status to save order
You cannot save the order without choosing a custom status. - Under Signature Settings
Require custom status to sign the order.
You cannot sign the order without selecting a custom status.
Show status colour in the Planner
In Planner settings, you can set whether you want to use the color of your own status as the text color.
- Set custom status as text color

When you make a booking in the Planner, you can choose a custom status or change the selected custom status.