

With the timer function, you can easily register and keep track of travel time, working time, overtime and kilometers for different orders. Start the clock and let it handle the calculation!
Which possibilities you have depends on the settings you have made in Timer settings for kilometers, travel time, working time and overtime. If no settings have been made, the timer is not displayed at all. See more under Information for administrators.
For overtime registration to work, you must have working hours entered in your user settings. To set it up, admin permissions are required.

As soon as you start a timer, it is shown by a red exclamation point together with the timer symbol. The number above the exclamation mark shows how many Unexpired timers you have i.e. logs that are not linked to an order yet. See how to do this under Link a timer to a order.
You can see the timer symbol in the upper right corner (on a computer).
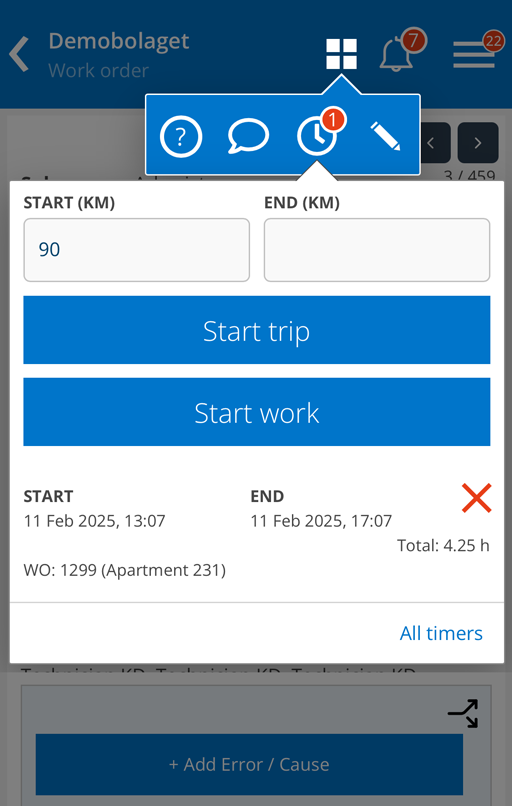
Here’s how to see the timer on a mobile device (the clock icon in the middle).
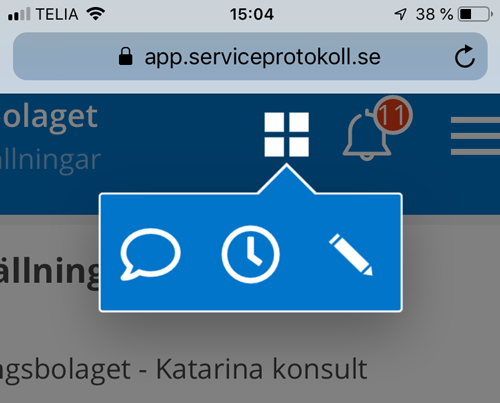
Click on the timer symbol to record kilometers and start or stop the clock for your working time or overtime. A new tab will pop up.
Trip
- Enter the meter reading when you start your journey.
- Click Start trip.
- Upon arrival. Fill in the current meter reading. The final meter reading will then be filled in at the start of the next trip.
- Click End trip
Working time
- Click Start work.
- When done click Stop work.
Start the timer associated with a work order or service protocol as follows:
Option 1
- Go to the work order or service order you want to perform without opening it (i.e., do not click Edit or Perform Service).
- Click Start timer.
- The timers box will open where you select Start trip or Start work. You may need to refresh the page to see that the timer is running.
- When you are finished with the trip/work, click the Start timer again link or the timer symbol and select Finish work. Click on the assignment or Other to which the time should be linked. The time is now registered on the order.

Option 2
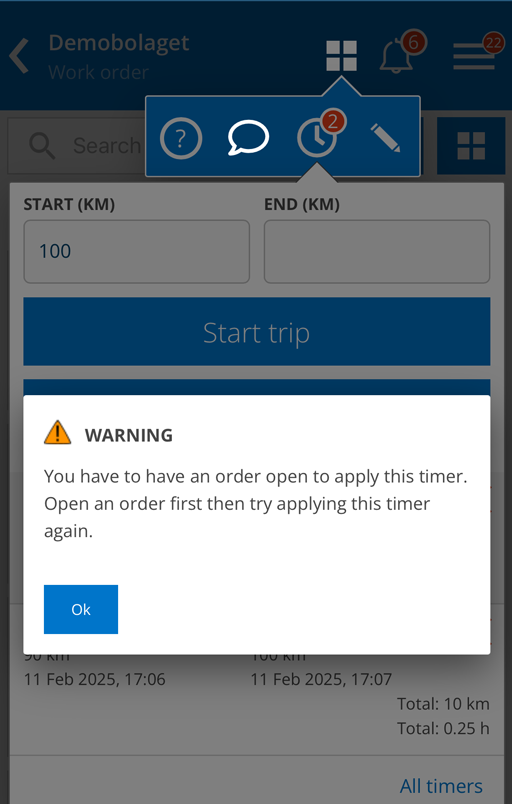
- Click on the order you want to connect a timer to so you have it open in your browser. You don’t need to click Edit.
- Click on the timer icon. If you work on a mobile device, it is found under the symbol with “four squares”.
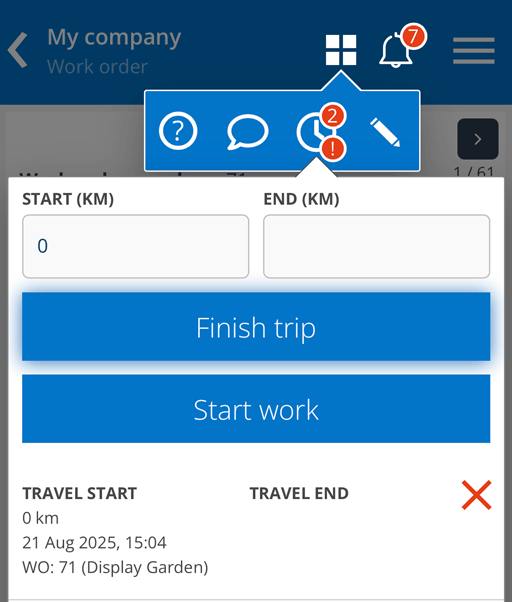
- Click on Start trip option Start work (image 1). The previous meter reading is displayed in the START field.
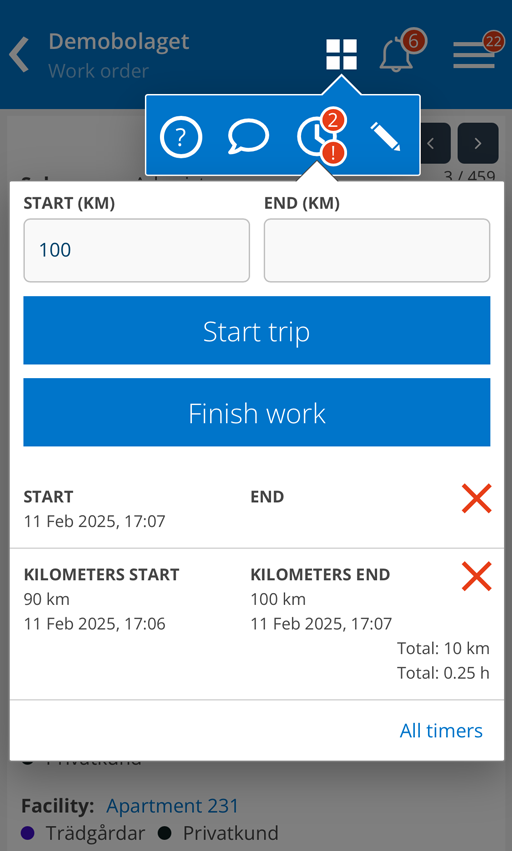
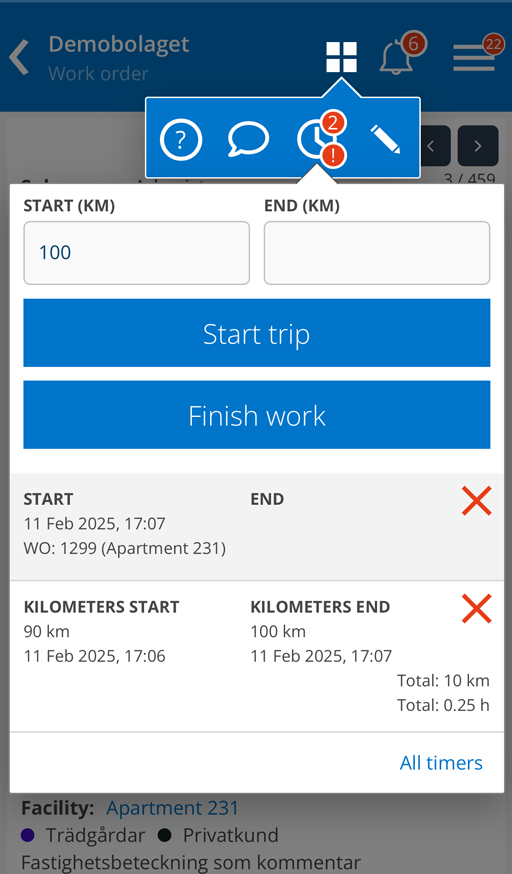
- Click once on the started timer so that the order number (and, if applicable, the facility’s name) is added to the timer (see picture 2).
- Now you can start your journey or continue working on the order.
- When you are finished and have the order in the browser, click on the timer symbol again so that your timers are displayed.
- Stop the timer by clicking Finish trip or Finish work. If it is a trip, fill in the meter reading in km before clicking Finish trip.
- Click on the timer you started for the order.
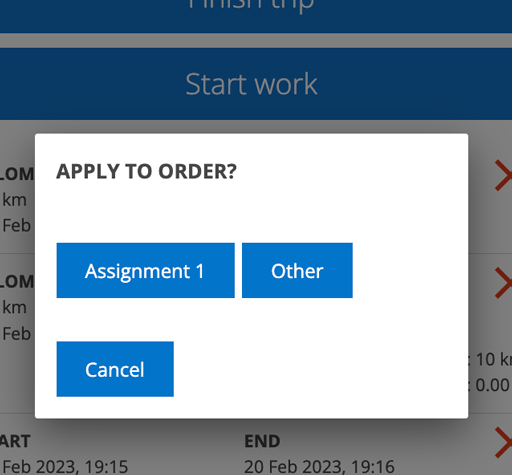
- Answer Yes that you want to link the timer to the order (see picture 4).
- If necessary, choose which assignment/service object you want to connect the timer to (picture 5). Which choices come up depend on the settings your group has made to, for example, report time.
- The working time is now added to the order.
Did you choose the wrong timer?
To remove a time or number of kilometers from an order, click Edit at the bottom of the order. Click the red cross after the task you want to delete and then Save changes. The timer is added back to the timer list.
Remove timer
If you want to delete a trip or working time for any reason, click on the red cross. The ones you removed will remain in the list of all logs with the notation Removed.
All timers
If you want to see the history of all timers and notes or change a timer, click on the text All timers at the bottom of the timers list. Here you can change times and kilometers and see which order a timer is linked to.
Edit timer
If you want to change a timer, click on All timers at the bottom of the timer list. Only logs that have not yet been placed on an order can be changed. Click Edit to the right of the timer. Make your changes and click Save.
If you need to change a timer that is already linked to an order, you must first add the timer back to the timer list (ie remove it/them from the order), then correct the kilometer or time and then select it on the order again.
Where does the information end up on the order?
The information ends up, by default, under the heading Articles, but you can set that the working hours/kilometers are put under the heading Time instead. Requires admin rights See more under Information for administrators.
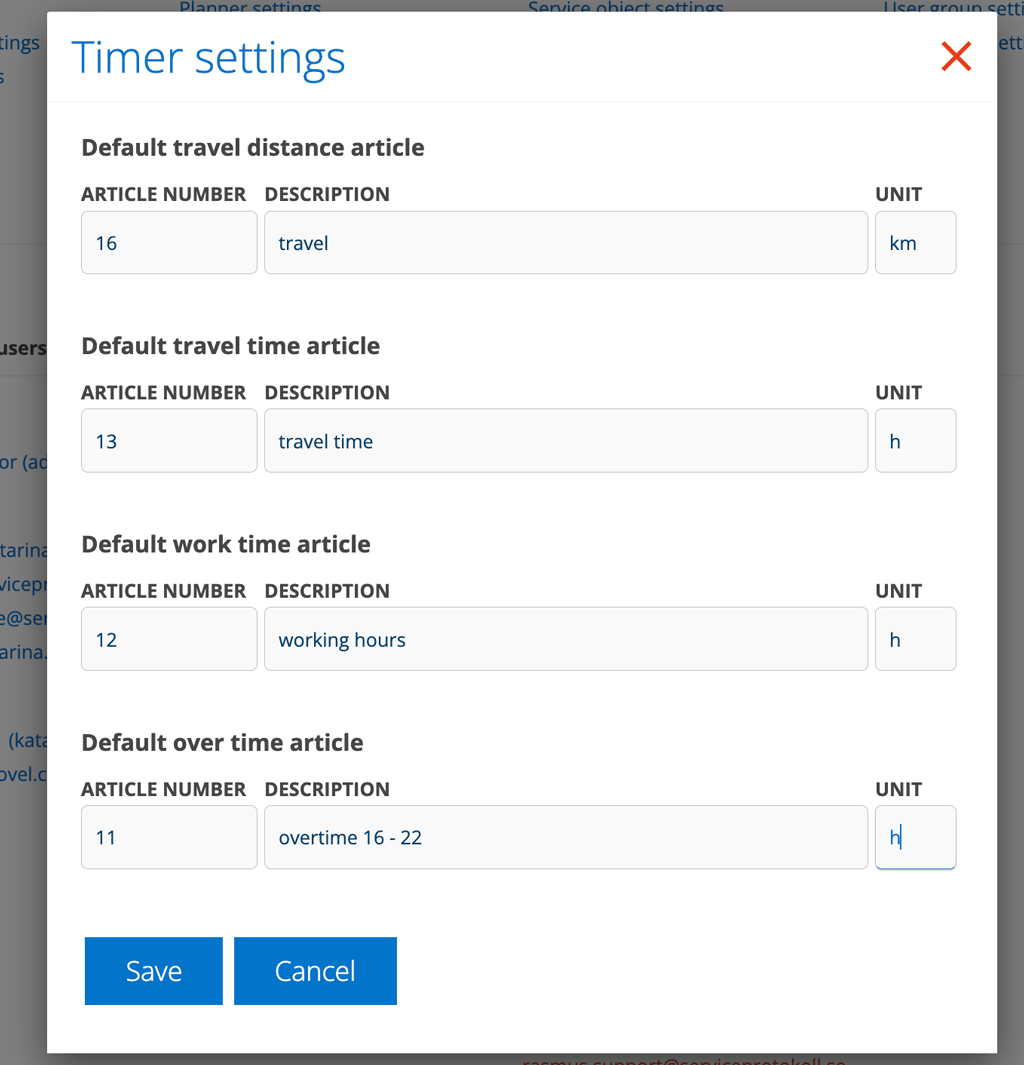
Which articles are used for travel time, working time, overtime and mileage compensation are also set with admin permission. If you have your working hours entered in your user settings, any overtime is automatically added to the order.
Information to administrators
With admin permissions, you set which articles should be the default article (article number) for kilometer cost, travel time, working time and overtime for the timer under Timer Settings.
If this is not set, you will not see the timer.
If you have set the Article setting “Separate time report articles”, the working hours/kilometers are added under the Time heading instead.
Time rounding
Time rounding allows you to customize how the system displays added timers. If you do not make any settings, the default values are used as in the image below, i.e. 15 minute interval, “Round up” and 2 decimal places. See the example at the bottom of the image.
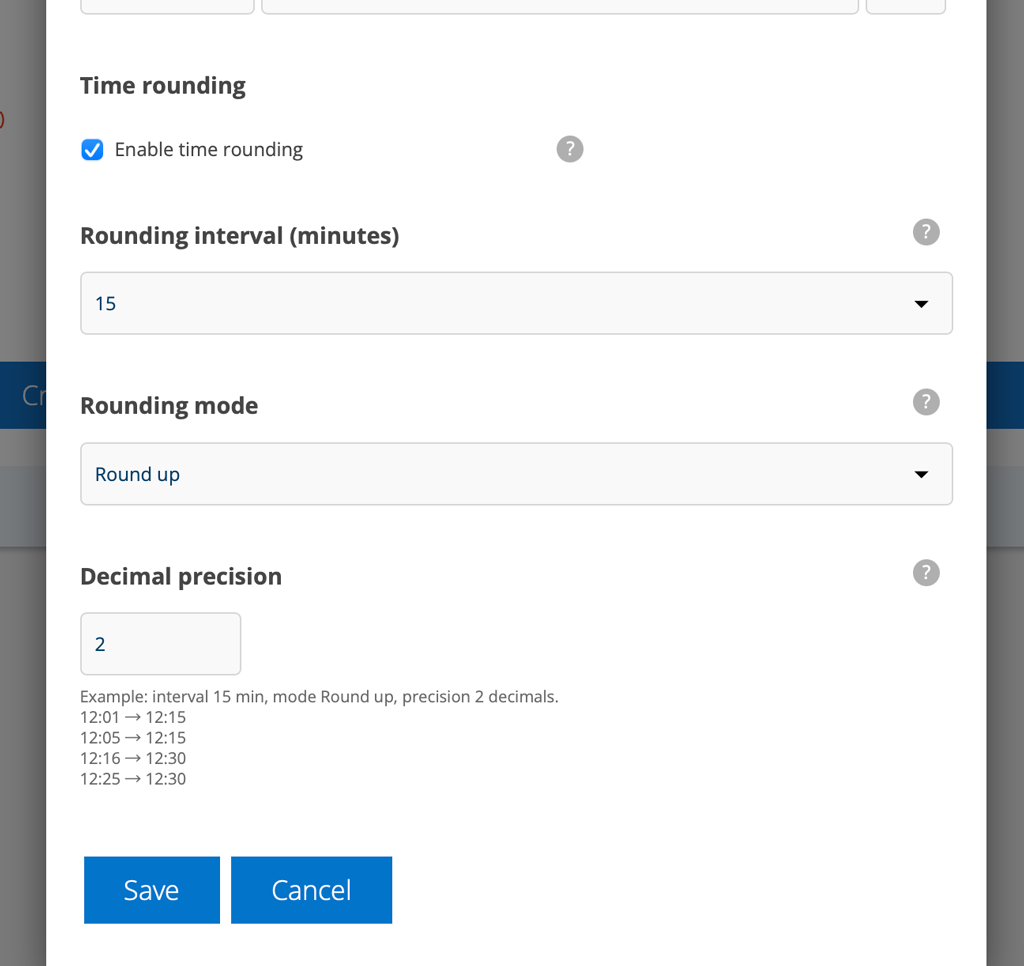
Enable time rounding
By default this is checked. Default values are as shown in the image.
If you uncheck the option, use the exact time you registered.
Rounding interval (minutes)
Here you specify the interval to which the time is rounded. Select from the set minutes in the drop-down list.
Example:
- 15 = a quarter
- 30 = half an hour
- 6 = 0,1 hour
Choose how the time should be rounded.
- Round up – always up to the next interval
- Round down – always down to the previous interval
- Round to nearest – nearest interval. Selecting this opens another selection:
- Minutes before rounding up
Here you specify how many minutes into the interval must pass before rounding up occurs.
Example: If you choose 30 min interval and 5 min threshold, the effect will be as follows:
12:01 → 12:00
12:05 → 12:30
- Minutes before rounding up
Decimal precision
Here you determine how many decimal places to use when the final rounded time in hours is saved and displayed. Example: 1 hour 15 minutes = 1.25 (2 decimal places). This setting does not change the rounding interval or the threshold value.
Tags to include timers on printouts from service orders, service protocols, etc. work orders
Create a table as shown below. You can use the tags below.
| {Timers} {Start} = Start time for booking {End} = End time for booking {User} = User {SocialSecurityNumber} = Social Security number of the user retrieved from the user’s account settings. {StartDayOfWeek} = Day of the week the work started {EndDayOfWeek} = Day of the week the work ended |
