
Stocktaking – multipel articles or entire storage
There are two ways to inventory several articles or the entire storage.

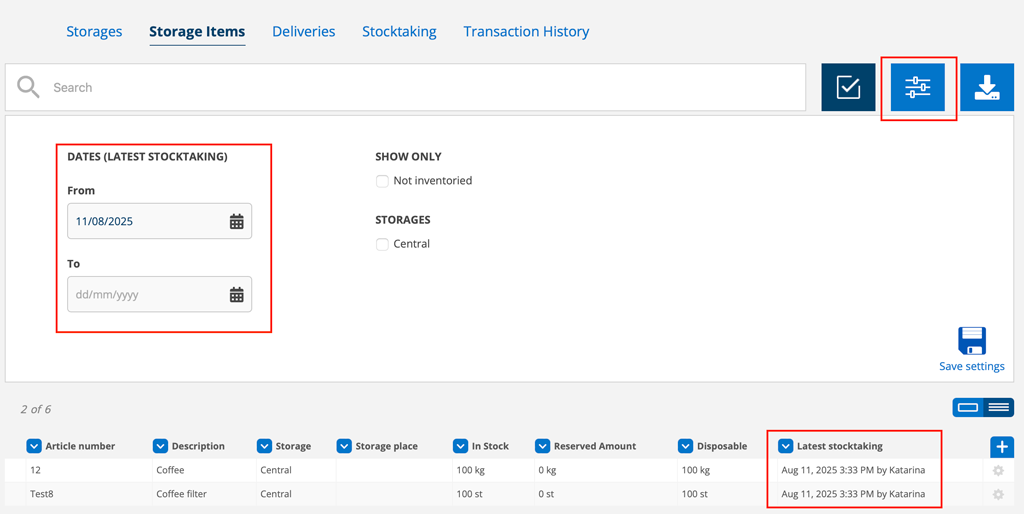
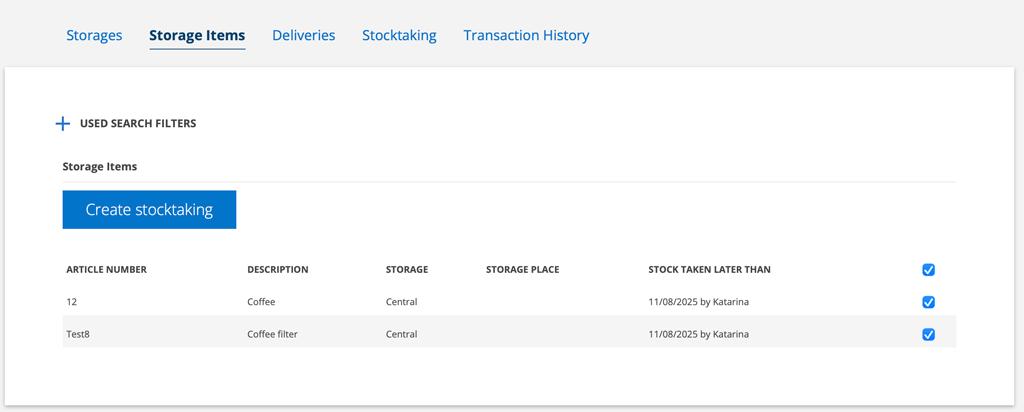
Option 1. Click on this symbol in the Storage Items tab. Select all articles (top box) or select which articles you want to inventory. You can filter your list by selecting storage, set date or make a search.
Option 2. Go to the Stocktaking tab and click the + sign. Select all (by clicking the top box) or select the articles you want to inventory.
Click Create Stocktaking.
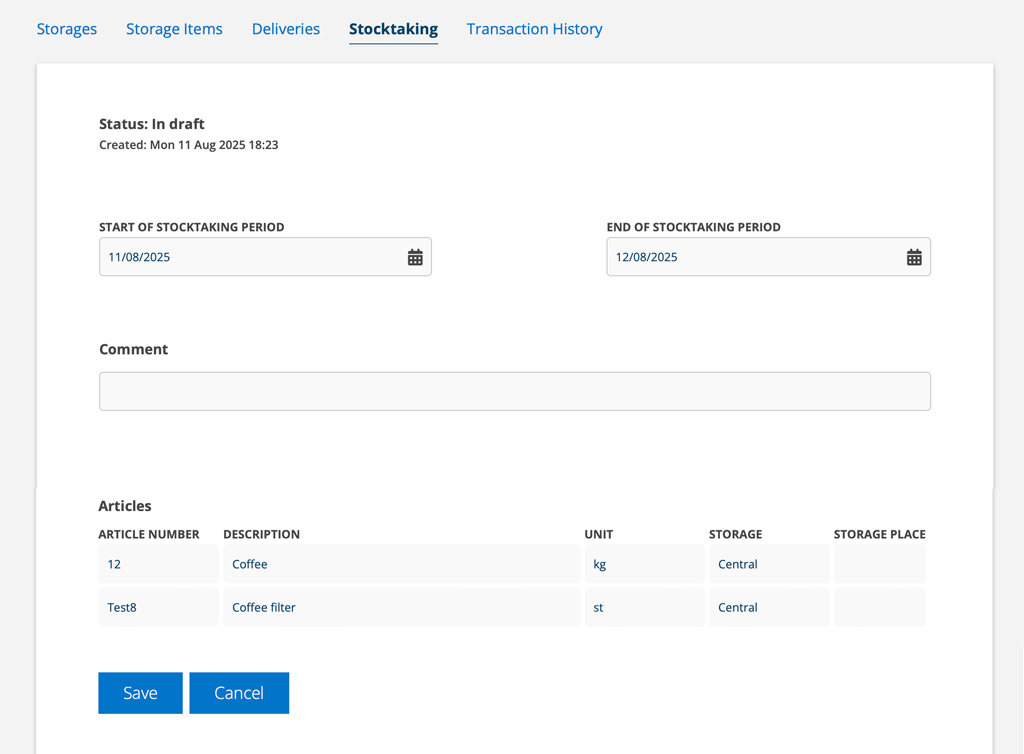
You can now specify a time period for the inventory and add comments.
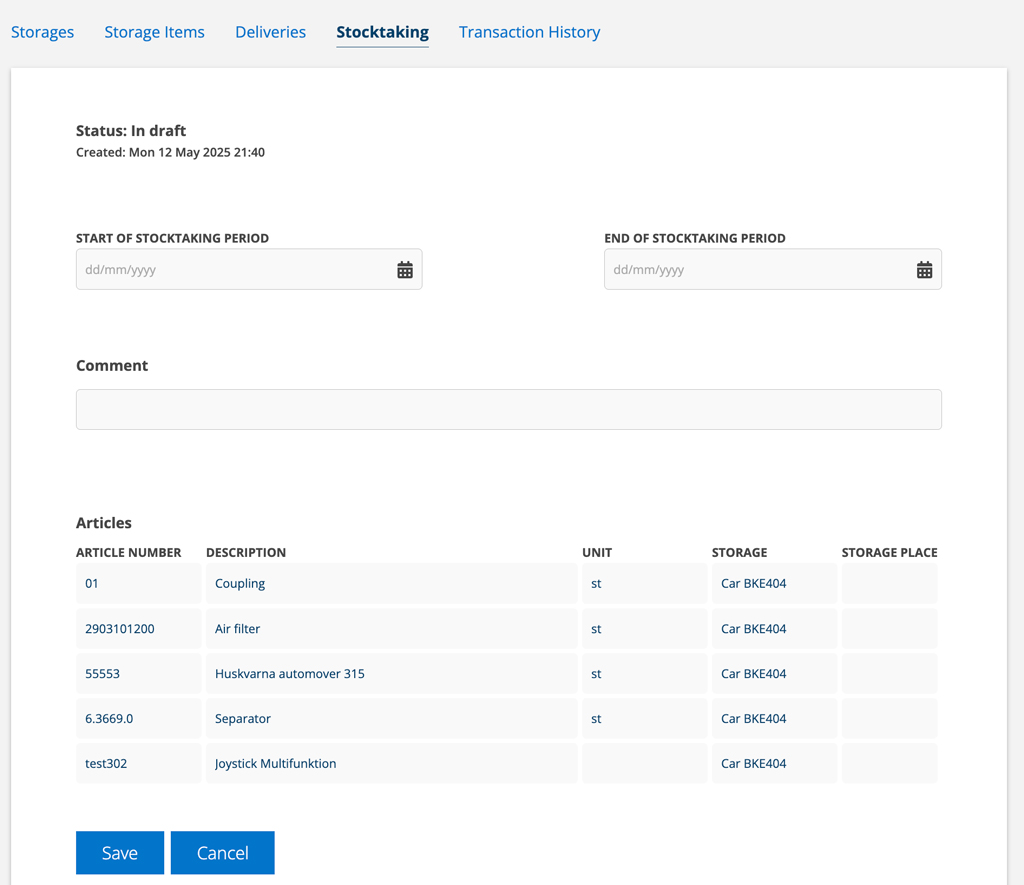
If you want to remove articles from the inventory, click on the red cross after the item. If you want to undo a deletion, click on the “spin arrow” at the bottom left and the article will be added again!
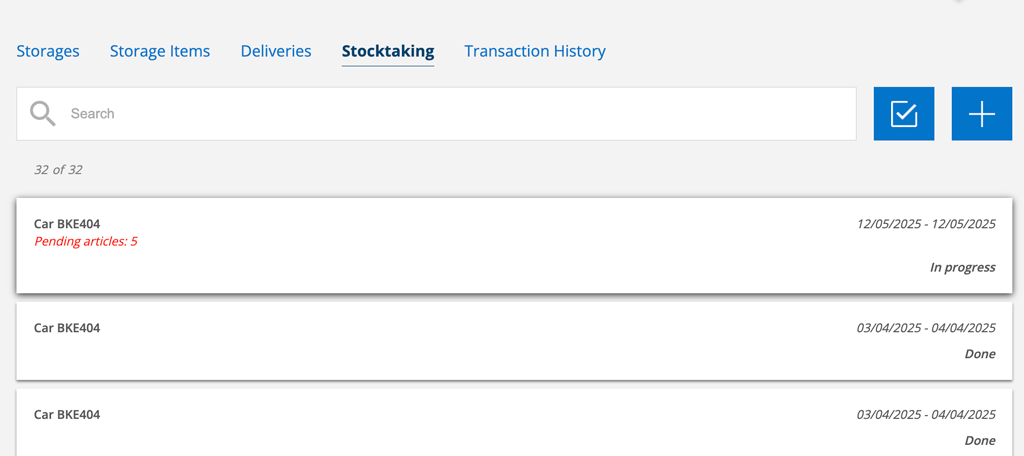
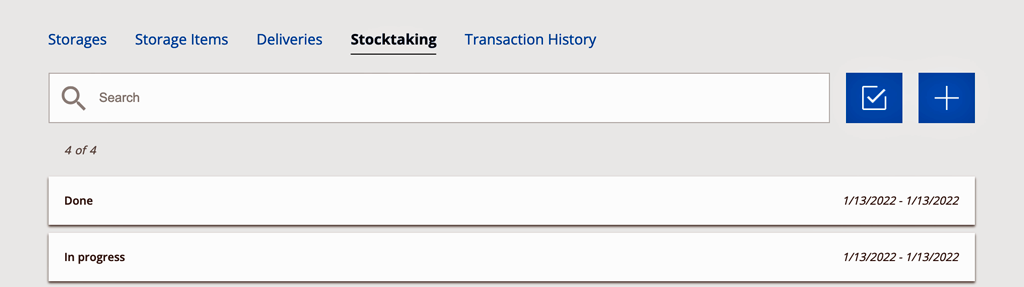
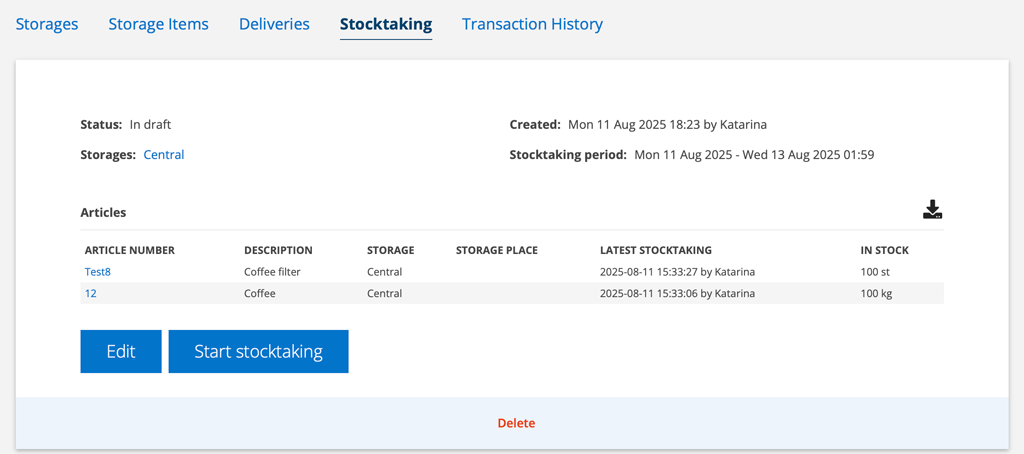
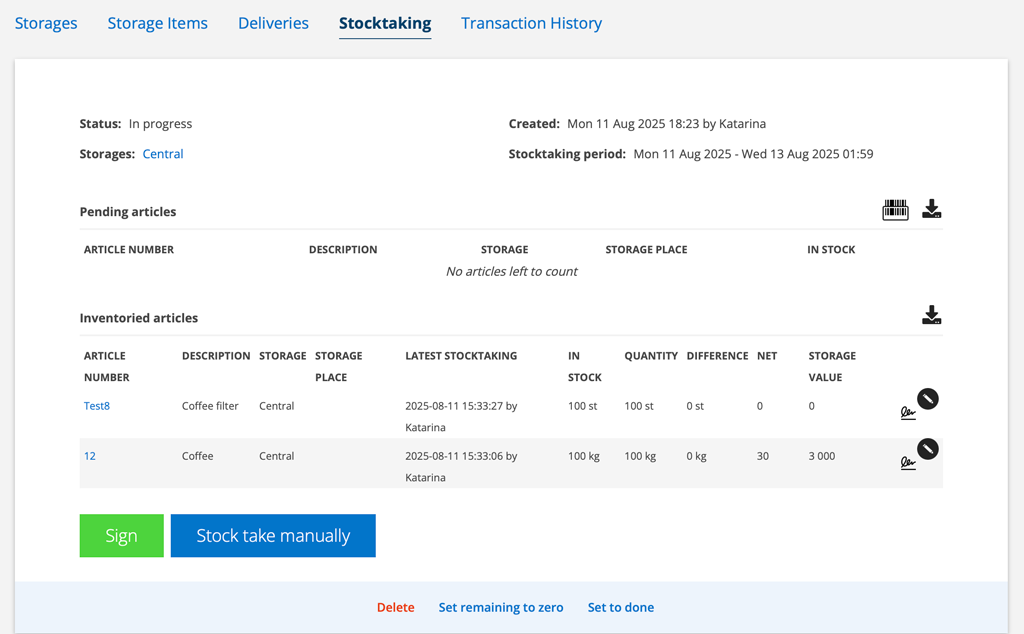
Stocktakings you have made can be found under Stocktakings with status:
In draft (not started).
In progress (started but not completed).
Done (signed and ready).
How to make an inventory
Alt 1:
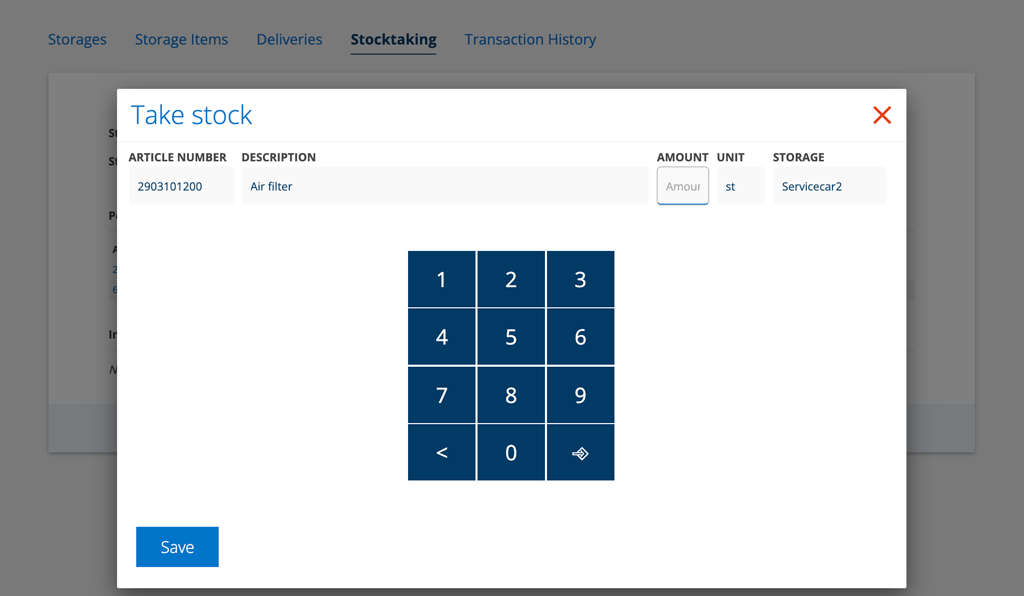
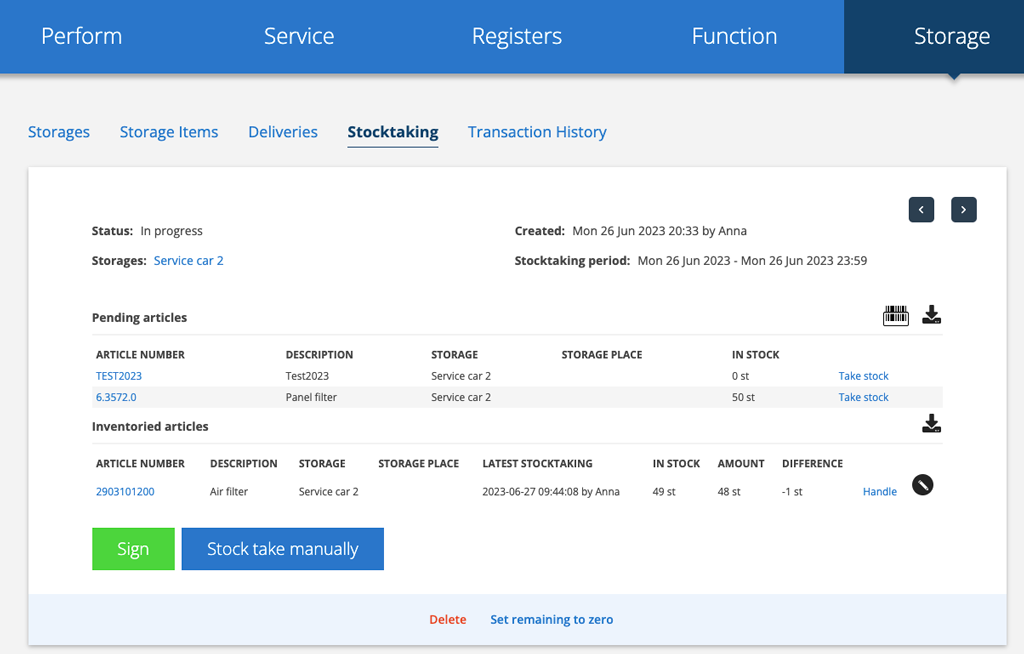
- Click on Inventory at the far right of an article. A popup will open where you fill in the quantity and then click on Save.
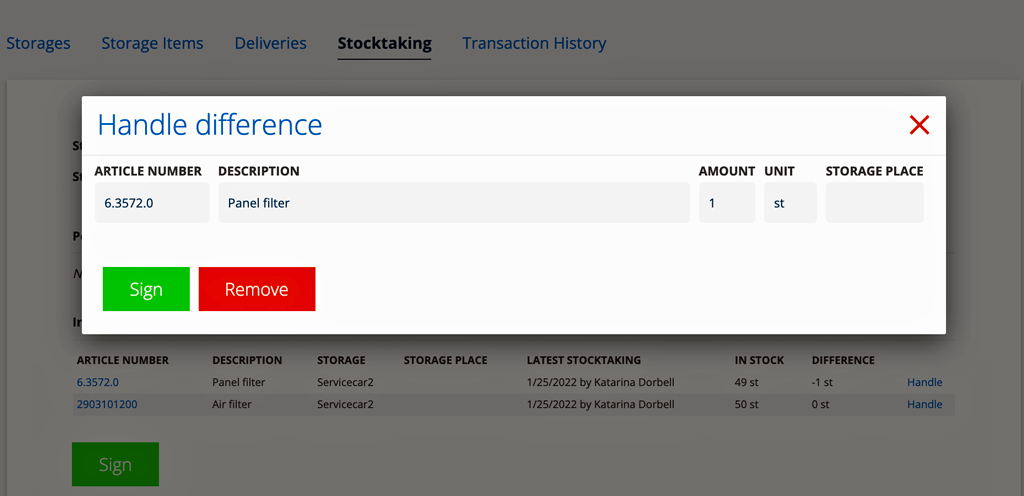
- If there is a deviation, this can be seen in the list. To handle the deviation, click on Handle to the right of the article. If there is a discrepancy, this will be visible in the list. To manage the discrepancy, click Manage to the right of the article. A popup will open where you can correct the discrepancy or select Delete. Delete means that you remove the inventory on the article.
- If you need to change the inventory, click on the pen symbol.
- Is an article missing from the list? Click on Stock take manually and you can add it from the article register.
- If you now have a list of articles that are not in stock, you can quickly “zero” these by clicking on the Set remaining to zero link.
- When all articles are inventoried, you sign the inventory and it is set to Done.
Alt 2:
Use a hand scanner (with Bluetooth connection to computer/mobile) and scan the barcode on the article. A new box will open in the system where you can fill in the quantity. See image 13.
Otherwise, the steps are the same as in Option 1.
Sign
When all articles are inventoried, you sign the stocktaking. Each deviation is signed separately when you handle the deviation. The amount is updated and the inventory is set to Done.
Any diviations?
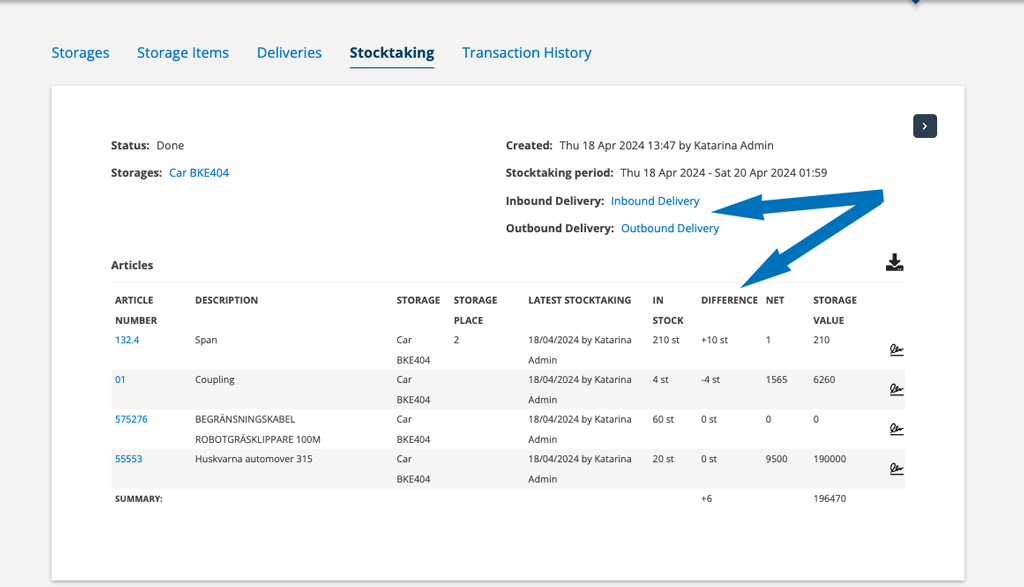
If you did not handle the discrepancies during the inventory, you can create an incoming or outgoing delivery after signing by clicking the links for Inbound delivery or Outbound delivery. If there are no discrepancies, you will not see these links.
Stocktaking – individual article
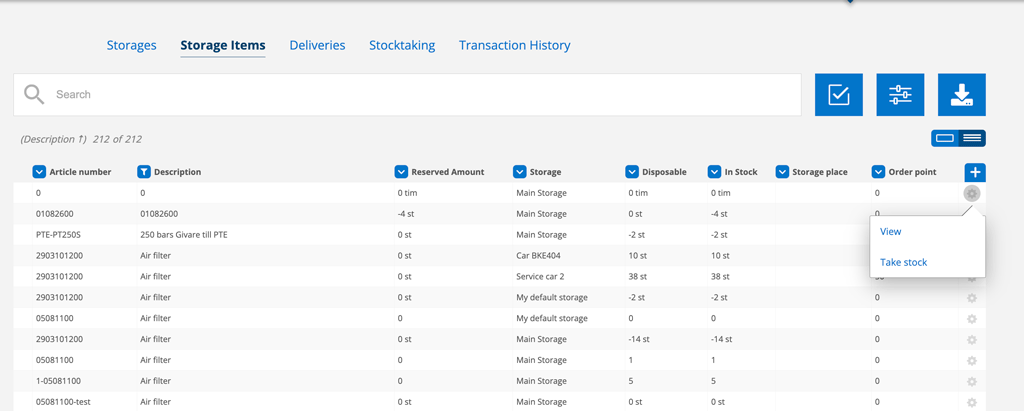
If you want to make a stocktaking of individual articles, click on the gear to the right of the article in the Storage Items tab.The idea here is that you should be able to take an ongoing inventory. When it is then time to inventory an entire storage, these goods will be marked with latest inventoried date and you will not have to inventory them again.
The amount will not be updated until you have created an inventory by clicking Create stocktaking and signed the inventory. So you still have to follow these steps:
Find the items by, for example, searching by date or choosing to display the category (header) Latest stocktaking and sort or search in it.
Then click on the Collection function.
Mark the items that are already inventoried and that you will sign.
Click on Create stocktaking.
The inventory will now open in a new tab (Inventory). Check and change the date range for the stocktaking, if applicable. You can also write a comment about the stocktaking. Click Save.
Click on Start stocktaking.
You do not need to click Handle on the already inventoried items.
Click on Sign.
The stock balance is now updated according to your inventory.
Storage value
When you have made an inventory and signed it, a storage value is automatically created. You get storage value for all your storages. This means that you can quickly find out the value of the storage in a technician’s car, for example.