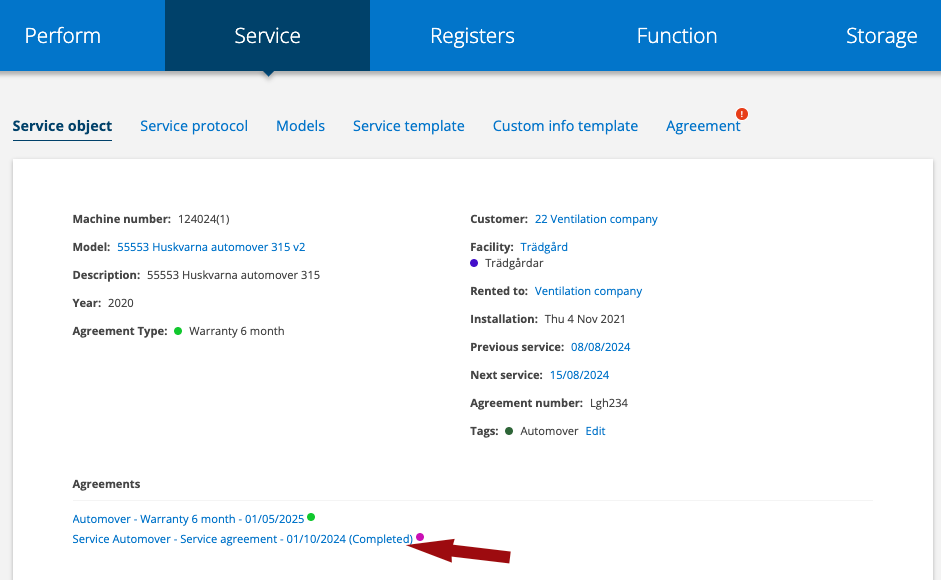
You use agreement types to make it clearer what kind of agreement is on an object. You create your own types and color the “dot” that follows the agreement type to further signal which type it is. The agreement type is displayed in a number of places and is available as a selectable category in list views etc.
Step 1 Create agreement types
This step requires admin permission
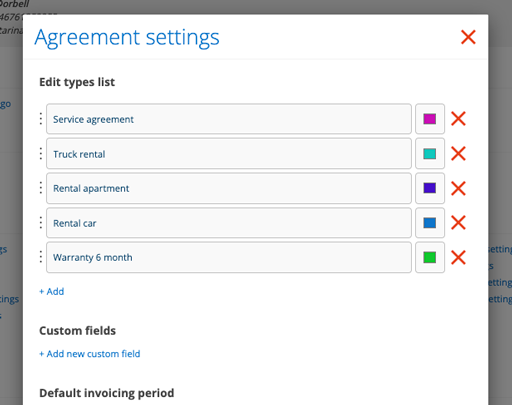
- Go to Group settings – Agreement settings.
- Create your agreement types by clicking + Add under Edit types list.
- You can change the default color of the type. Click on the color box. A popup will open where you can select a color. How the popup looks depends on which browser you use. The color will appear as a small dot after the name of the agreement type.
- Save your settings.
Step 2 Select agreement type on the agreement
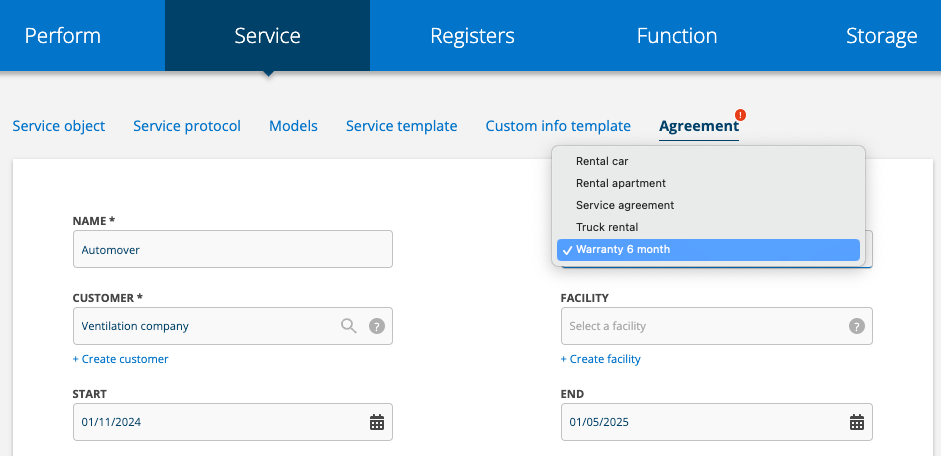
- Go to the agreement you want to add Agreement types on.
- Click Edit.
- Click in the Agreement type field and select a type.
- Save.
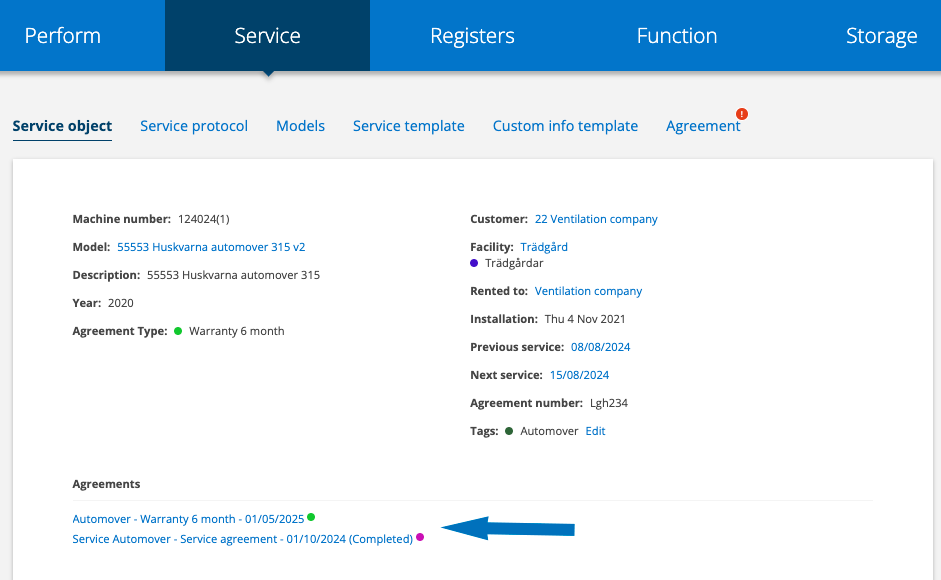
Where are the agreement types displayed?
- On customer. Both in the upper part of the customer cart and under the heading Agreement.
- On service objects under the heading Agreement.
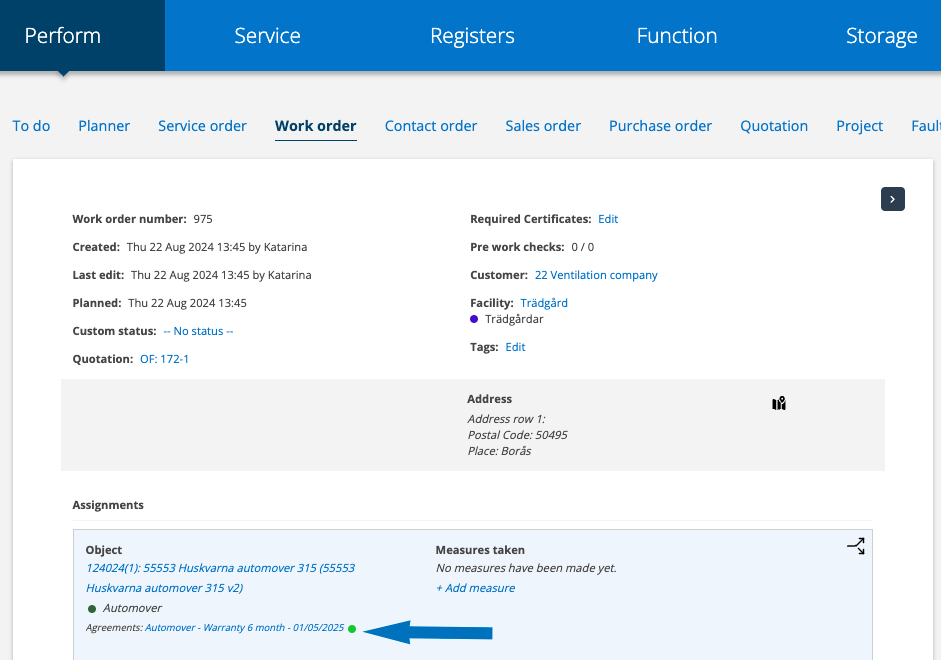
- On order together with the information about the service object.
Search agreement types

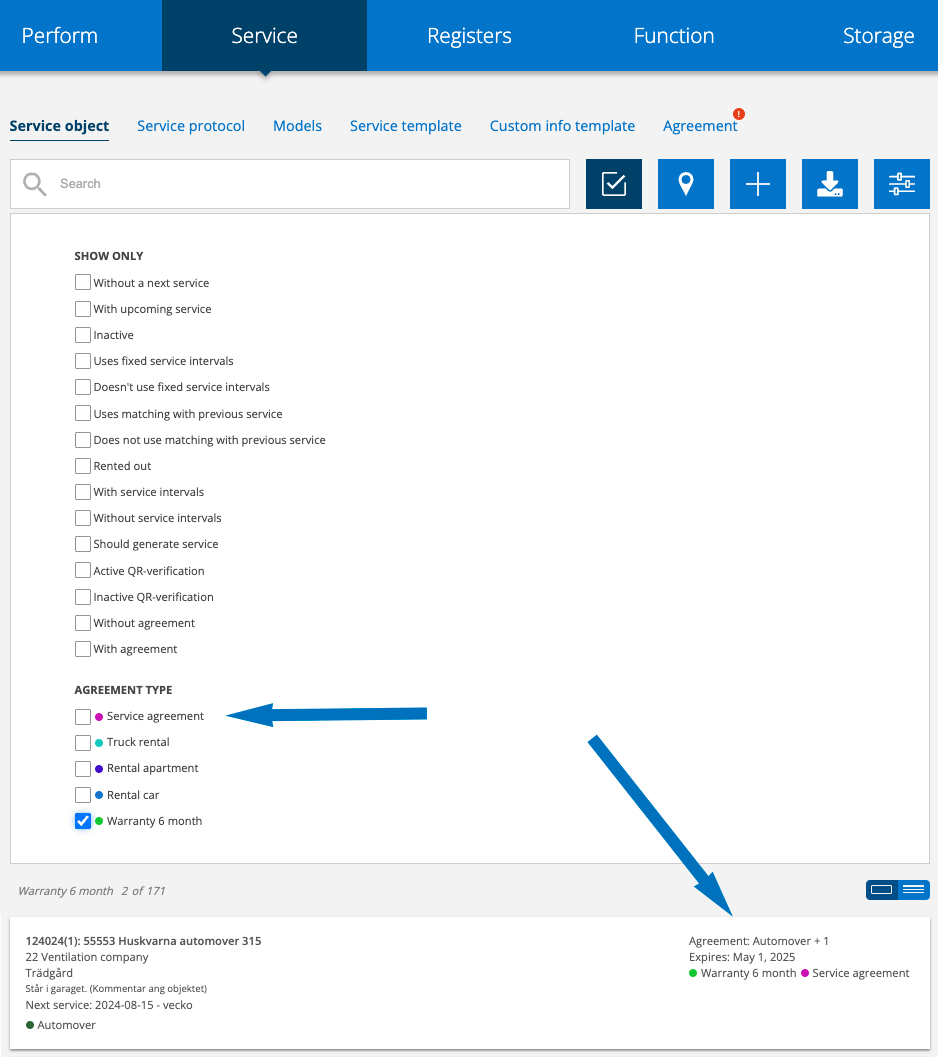
You can filter on agreement types in the registers of customers and service objects. Click on the filter symbol and you will find a list of your agreement types.
How do I see that an agreement has been terminated?
Terminated agreements are marked with the text (Completed) and the date when the agreement ended. This applies to the customer card and the service object.
In lists you see an expiry date. If there is no date, the agreement has expired. See picture above.
Completed agreements are not displayed on an order.
