On the Account Settings page, you can change the name that will be visible in the system, change your password, connect to a Google account, upload a profile picture, add a signature, choose your starting page and language, view your Activity Log and Message Log, etc.
Here you also choose how you want to receive notifications from the system.
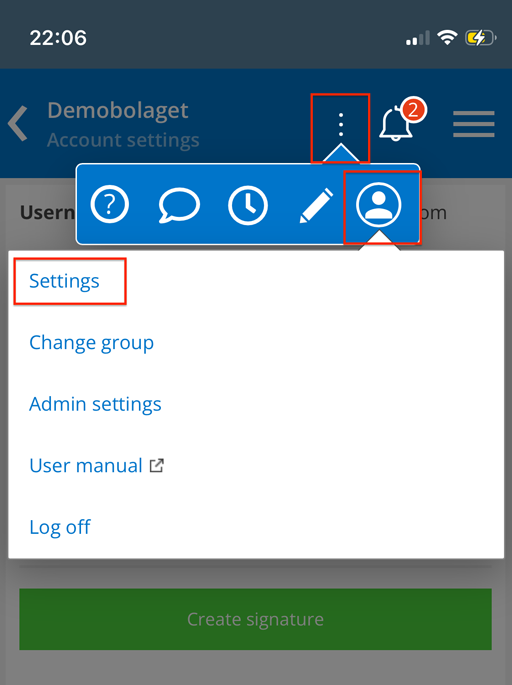
To access your account settings, click on your username in the upper right corner if you are using a computer. If you are using a mobile device, click on the three dots, then the account symbol, and finally “Settings” (see image 1).
Which setting options you see depends on what permissions you have. If you have questions about it, talk to your administrator.
Change name
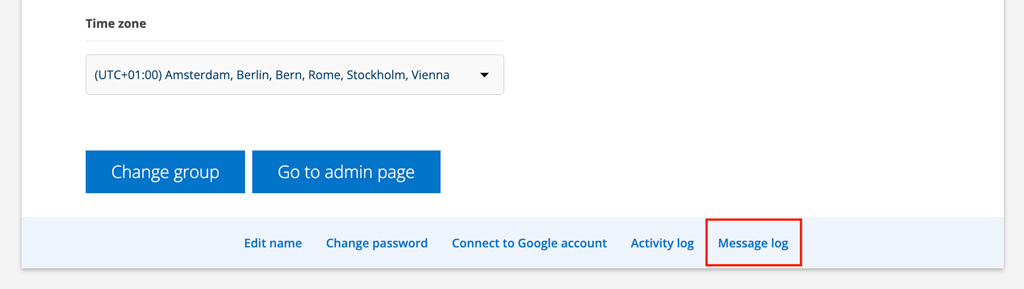
To change your name, scroll to the bottom of the page.
- Click Edit name
- The page opens the name field so you can change your name.
- Click anywhere on the page to save the change.
You can only change your display name. Your username cannot be changed. If you need it because the company changes its email address, for example, contact us and we will help you.
Upload a profile picture
Click +Upload picture. If you want to change the picture, upload a new one. If you want to delete the image, click on Remove picture.
Change password
- Click Change Password at the bottom of the page.
- Enter current password
- Enter the new password
- Confirm
- Click Change Password.
Activity log
At the bottom of the page you will find the activity log. In the log, all your activities are saved in the system, one day is listed but you can set a time interval for your search. With admin permissions for the Activity log, Show all, you can see everyone’s log files this way.
Message log
The message log lists all the e-mails you have sent. You can find the log at the bottom of the page.
If you have admin permissions (Activity log, Show all) you can also choose which user you want to see the log for, just like in the activity log and time report.
Save your signature
Tired of writing your signature? Save the signature in your account settings and it will be added automatically when you click sign.
Do this:
- Click Create a signature. The standard signing box opens.
- Enter your signature.
- Save.
If you are not satisfied, just redo it.
Forgotten password
If you have forgotten your password click on the link “Have you forgotten your password?” in the login box. Fill in your user name. The recovery link message will be sent to the email address associated with your user account. A user’s name is always an email address.
Change group
Are you an administrator for several groups / companies? Click Change Group located at the bottom of the page. You will then come to the start page – Select portal – and can choose which group you want to change basic settings etc. for.
Does your employer/company collaborate with other companies that also use Serviceprotocol.com?
To avoid paying for double licenses, you need to make a setting in your Account Settings.
You can be a user in multiple groups/companies that use Serviceprotocol.com but only pay for a license in Serviceprotocol.com via “your group”, i.e. the group/company where you are employed.
This is how you do it:
- Agree with your partner to add you as a user.
- They set what permissions you should have in their group.
- When this is done, select the group from the drop-down list “Main group” that your license will be charged to, i.e. the group/company where you are employed. If this is not done, the license will be charged for both accounts.
The image below is not available in English – sorry about that! “Main group” = “Huvudgrupp”.
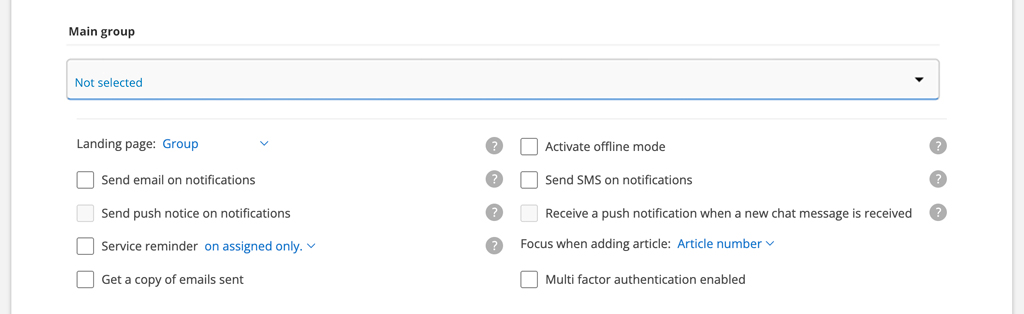
Settings that can be made under “Preferences”.
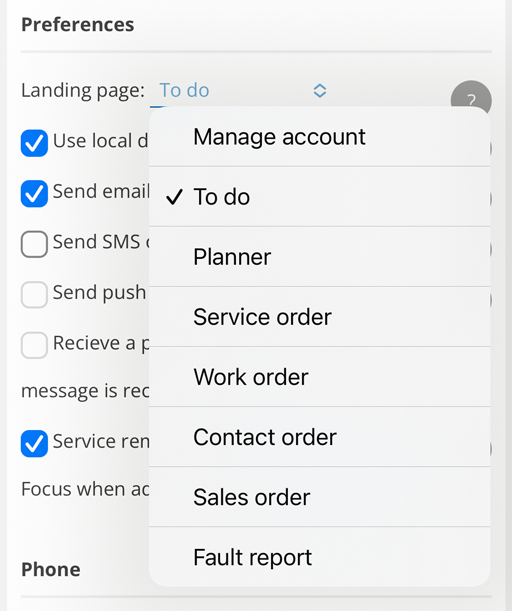
Choose starting page
Choose which page is your “home” page when you sign in to serviceprotokoll.se. If you are part of several groups, you can select the start page for each individual group. The default homepage is To do. If your company has chosen not to use the To Do-function the landing page is by default Work Order.
If you have chosen a start page that you do not have access to (e.g. if your permissions have changed), you will end up on the My account Settings page so you can choose a new start page.
If you have admin permissions, you can also select Group to start on the Group Settings page. You also get a quick way to group settings – click on your logo or company name in the top left!
Activate offline mode
This setting is used to save records on your local device. If the check box is checked, the supported registers will be downloaded and stored locally on your device. This means that you can access, for example, the To-do list and your settings in list views even if you do not have Internet access.
Learn about Off-line mode here.
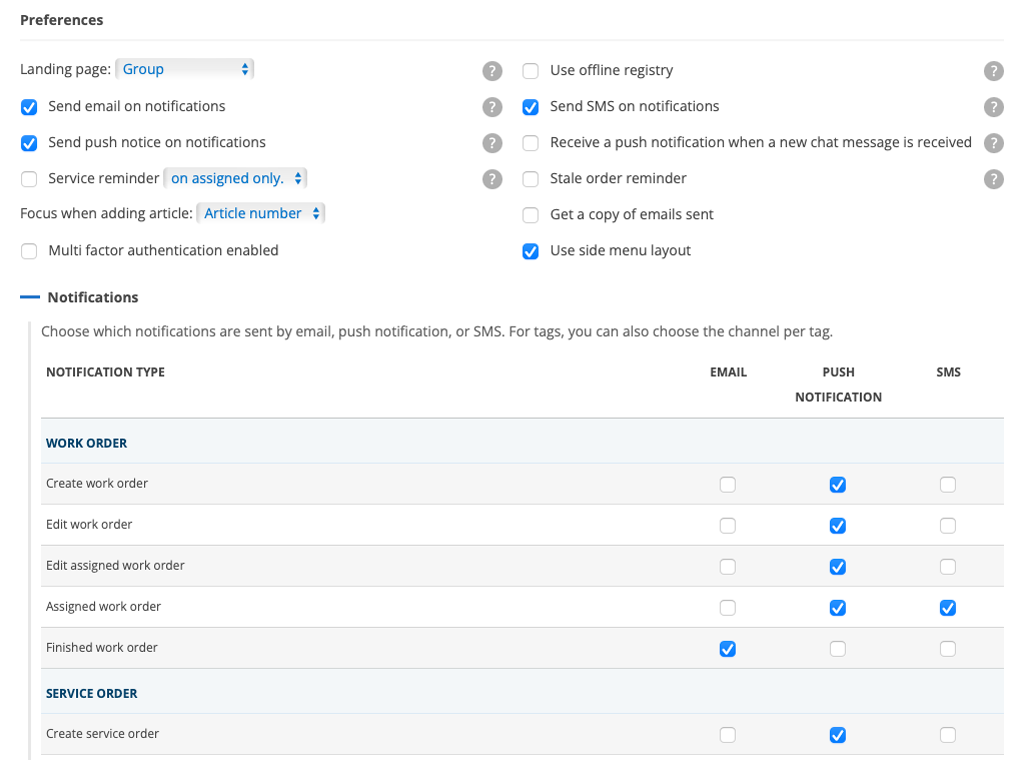
Set which notifications you want and how
For each function you can choose how you want to be notified – email, SMS or push notification. When it comes to notifications for orders, information about which order it concerns and, if applicable, the customer is sent.
For tag notifications via SMS, a short message is sent, e.g. “AO1234 has been tagged with EMERGENCY”.
Start by specifying how you want notifications – see image 5 below where all the variants are highlighted. Then click the + symbol after the Notifications heading to open the list of possible choices. Only the methods you have marked can be selected, i.e. if you have not marked “Send email on notification”, the boxes for that selection will not be displayed.
“Completed” is an order when you have marked it complete, i.e. set it to Ready for invoicing.
An administrator can also set which notifications you receive. In this case, this is done via Edit user settings.
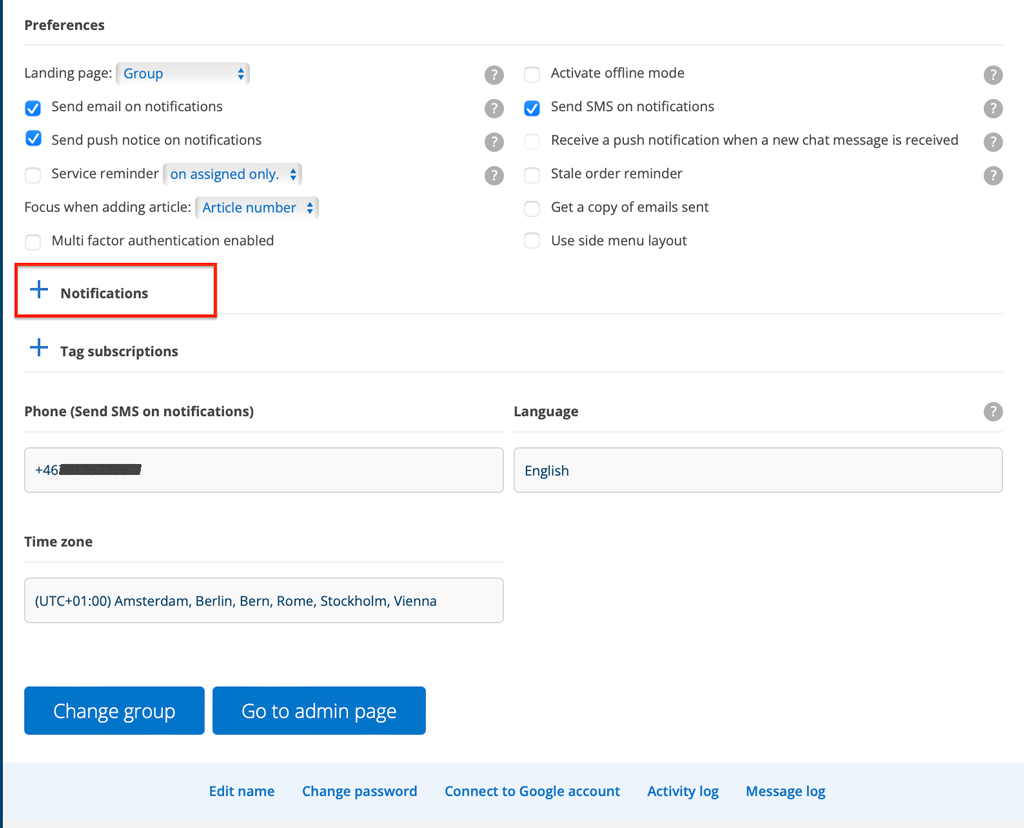
Send email when notified
Sends an email to your email address when a new notification is created.
Send SMS (text) upon notification
Enter your mobile number in the Phone field. The number must include the country code with a “+” before it, but if you do not enter the country code, the system will add it for you.
You will receive an SMS confirming that notifications are enabled.
Change mobile number?
If you need to change the phone number to this::
- deactivate SMS-notifications
- change you phone number
- check again enable SMS notifications
Send push notification upon notification.
Enables push notifications for your device. This allows the system to send notifications even when you are not signed in to the system.
NOTE: This only works on some browsers and phones. If the box is “greyed out”, you have either denied permission for notifications or your browser / phone is not yet supported.
Comments regarding notifications
The “Finished work order” notification is sent when the work order is set to Ready for invoicing, not when an individual technician simply marks their assignment as complete.
Subscribe to tags
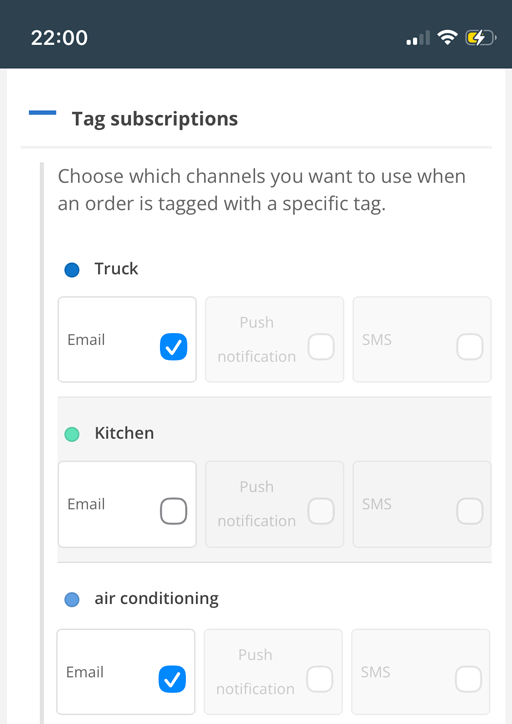
Click + Tag Subscriptions to set which tags you want to subscribe to and how you want to be notified when a tag is used. You will not receive a notification if a tag is removed. You mark your selections in the same way as for Notifications – see image 6.
A user with admin permission can view and change your tag subscription settings.
Notifications that don’t require setup
The notifications always appear at the top right of the screen when you are signed in to the system. These are default and no special permission or setting is needed.
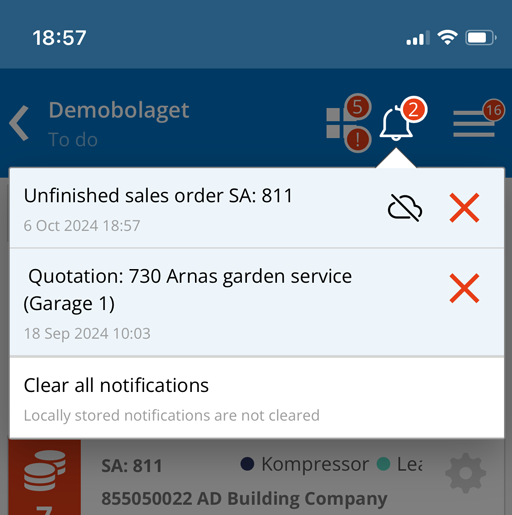
Click on the symbol to see all your notifications. Delete a notification by clicking on the red cross.
At the bottom of the notification list is also a Clear all notifications button. Locally saved orders are not deleted, you must save them first. Click on the order and you will be taken to it and can complete and save.
Unsaved orders are marked with the symbol that looks like a crossed-out cloud.
Stale order reminder
Activates a reminder in the form of a notification that appears for open orders that have not been changed in over a week. This also includes orders that have not been changed since the creation date.
If you have checked “Send email on notification”, you will also receive an email with the information.
You will receive a notification or email (if you have chosen to do so) for work orders and one for service orders.
Service reminder
Activates a reminder in the form of a notification. It will be shown one week before a scheduled and unbooked service occurs. Service reminders can be obtained on assigned service orders or on all service orders.
Here you can also set whether you want the focus (i.e. where the cursor is positioned) on the article number or the article description.
Get a copy of emails sent
Emails that you send out from the system always get your email address as Reply-to. If you want a copy of the email, click the box.
Multi factor authentication
To increase your and the system’s security, you are required to activate multi factor authentication. Fill in your mobile number in the Phone field. You will receive a code via SMS to your mobile when you log in. If you do not have a mobile number specified, the message will be sent to your email address (same as your username).
If you work regularly in the system, you probably won’t notice this much, but after a longer absence, you will be required to log in with multi factor authentication.
Check “Remember this device”, this will save you from having to enter the code as often. A “trusted device” is valid for 30 days.
If you change your mobile phone, computer or switch to a different browser (Chrome, Safari, Edge, etc.), you will receive a new code.
Use side menu layout
The side menu is still under development, but feel free to try it out if you’re curious. The feature places all menus on the left instead of at the top.
Language
The system recognises the language you have selected for your computer/mobile. If you want to change it, do so here, on your account settings page. Changing the language will change it for all pages and all functions.
This is not changed:
– texts that you have written yourself on an order or in your module settings will not change language.
– if you have saved a work order etc. and then change language, notifications linked to that order will not be translated.
– chosen categories in list views are not translated. To change you need to first unselect categories and then choose categories again.
Time zone
Set your time zone
Connect with a google account or outlook
- Click the “Connect with Google” link at the bottom of the page.
- Follow the instructions from Google. Google will write a warning that the app is not verified yet. Click on advance and approve the connection.
- Options in iPhone: Copy the link, click Calendars – Add Calendar – Add Subscribed Calendar. This will open a field where you can paste the link.
To enable syncing again, just click the “Connect with Google Account” link again.
Outlook
Do this:
- Copy the link.
- Look for “Add Subscribed Calendar” or “Subscribe to Calendar” in your calendar service – depending on which service you use.
- Paste the link into your calendar service.
When the month comes to an end, you will receive a notification when you log in that the syncing has stopped.
Which account you have connected with and how long it is valid for is displayed under your name at the top of account settings.
Information to administrators
Permissions for users related to activity log.
View all

