Use tags to quickly see, find and sort customers, facilities, service objects, articles etc.
Tags you apply to the customer, facility, fault report, quote and/or object are included in orders. You can set this yourself by selecting “Can be inherited”. For example, if you apply a tag to a customer, orders, facility and service objects will receive the same tag.
Tags can also be placed on Work Orders, Service Orders, Sales Orders, Purchase Orders, Fault report, Quotations and Contact Orders – everywhere you see Tags: Edit.
Choose which tags you want to use. It is recommended that you use a standard within your work area and create a list for your specific needs before you start adding tags to the system.
Step 1 – Add tags
Do this:
(Admin permission is required)
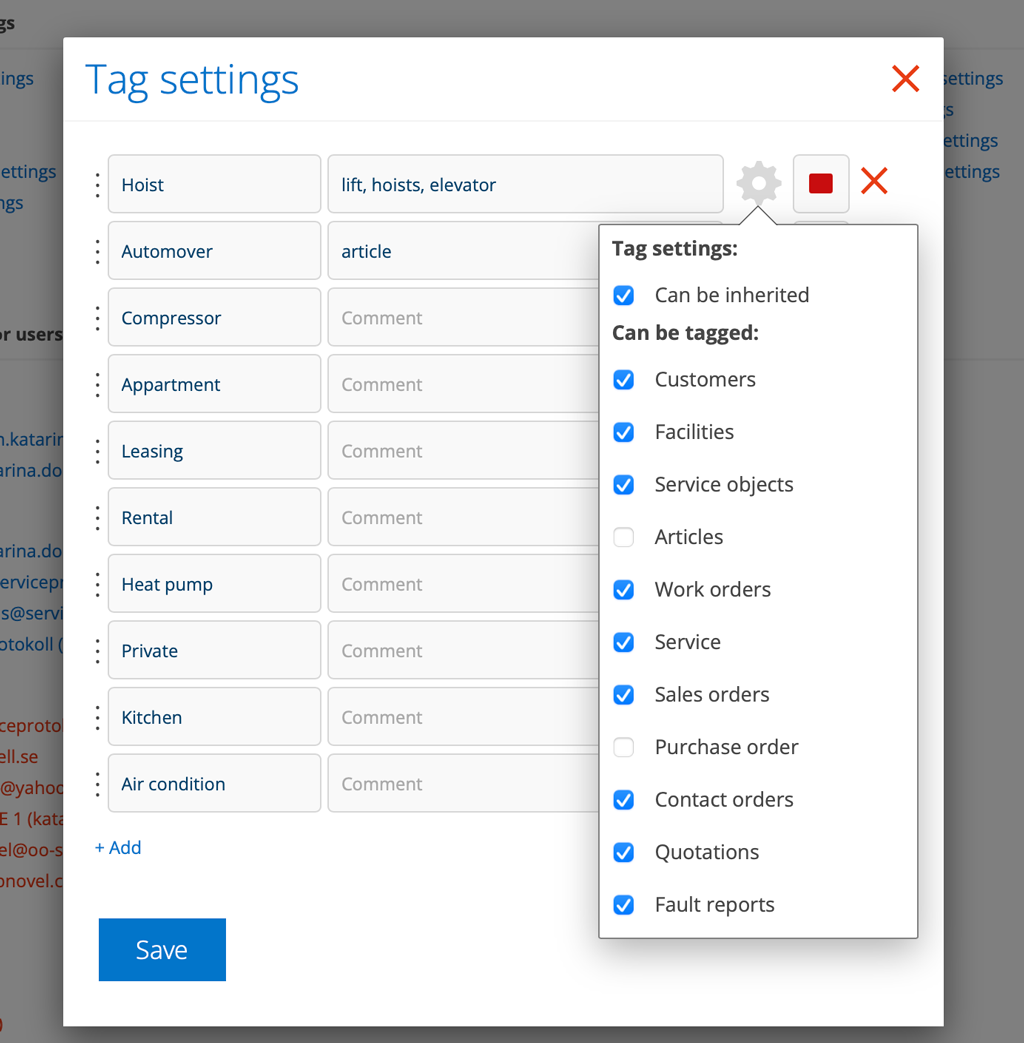
- Go to Group settings and click on Tag settings.
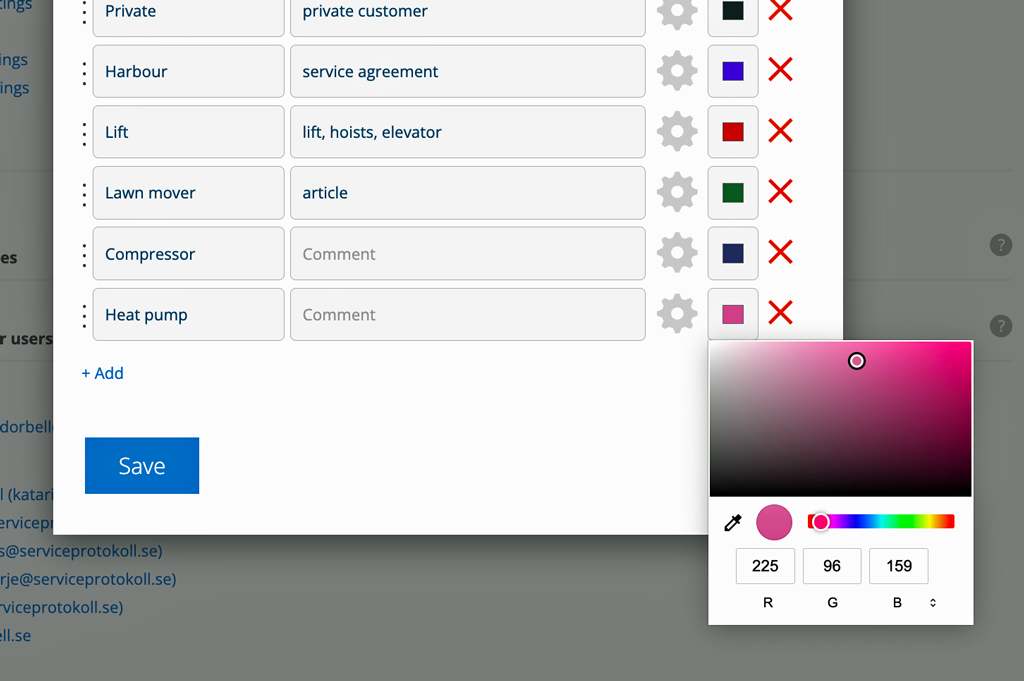
- Fill in your tags. For each tag you can choose to enter a comment and choose a color. The comment is displayed when you select a tag in a function and if you hover over a tag.
- Click the gear and choose where the tag can be used. The tag is only selectable in the places you have selected. If you want the tag to be included (inherited) when you generate orders from a customer, facility or service object, select “Can be inherited”.
- Click Save.
The tags can be sorted by dragging the three dots with the mouse pointer.
Step 2 – Set tags
Under the detail view you find the field Tags. Click Edit to enter or change tags. All tags entered for the current registry are displayed in a dropdown list. Select the tags you want. The tags are automatically saved on the record.
Click on the red cross to close.

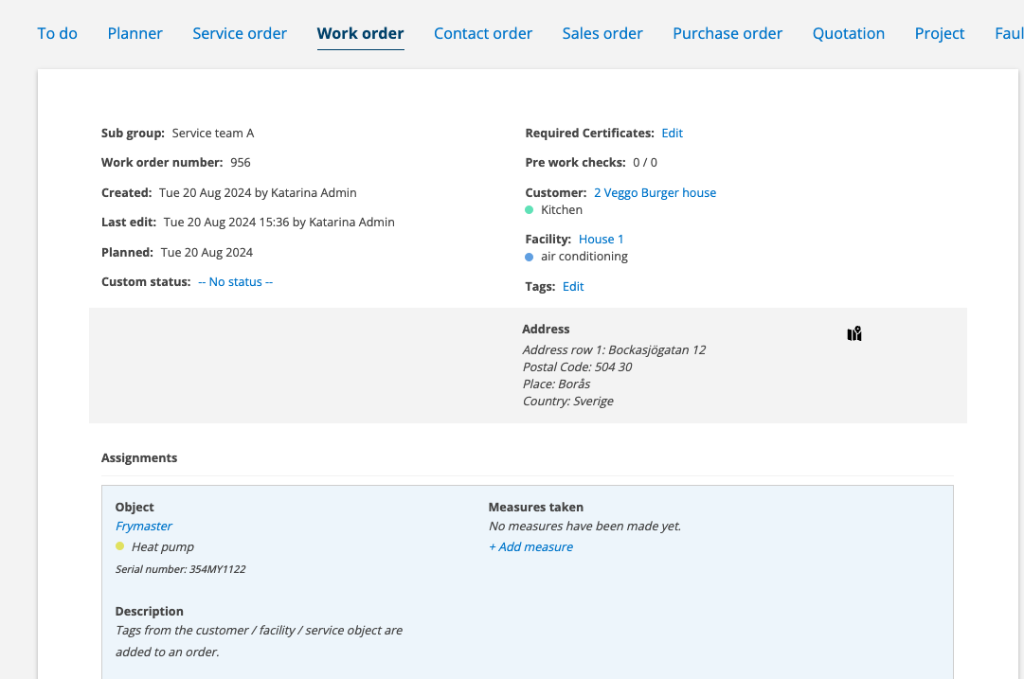
Step 3 – Show the category Tags
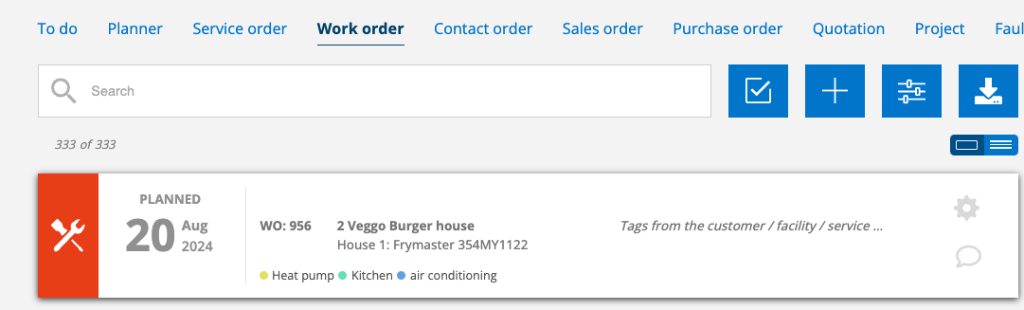
Tags are shown on a record when you have selected the detail list view.

Tags from customer, facility, and service object are also displayed in detail mode.
Search and filter tags

Click on the Filter-symbol and select under “TAGS” which tags you want to display in the list.
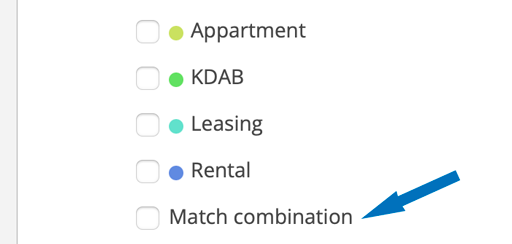
To combine tags also select Match combination.
Match combination does not count tags that are in other registers, e.g. if you are in the Customer Register, tags from the service object will not be displayed.
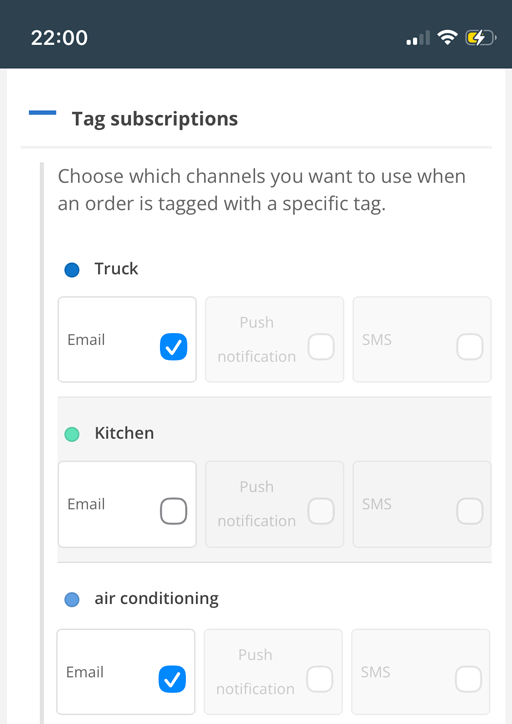
Subscribe on tags
Set which tags you want to subscribe to in your Account Settings and you will receive a notification when a tag is used. Click + Tag Subscriptions to set which tags you want to subscribe to and how you want to be notified when a tag is used. You will not receive a notification if a tag is removed.
For tag notifications via SMS, a short message is sent, e.g. “AO1234 has been tagged with EMERGENCY”.
If you have admin permissions, you can view and change tag subscription settings for another user by clicking on the user’s name in Group Settings and selecting Edit User Settings.