
Before you start using the time report, a number of settings need to be made. All settings described here require admin permissions.
Step 1
Set time report permissions to your self
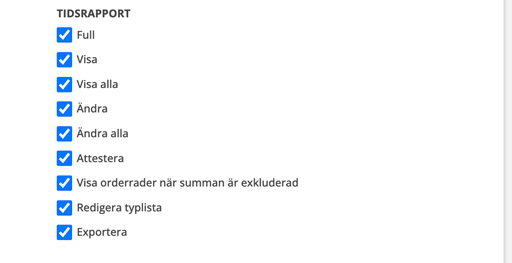
Go to the Group Settings page and click on your username. Look for the heading TIME REPORT. If you need to have all permissions, click on Full.
Step 2
Choose Time report settings
Go to the Group Settings page and click Time Report Settings under the Module Settings heading.
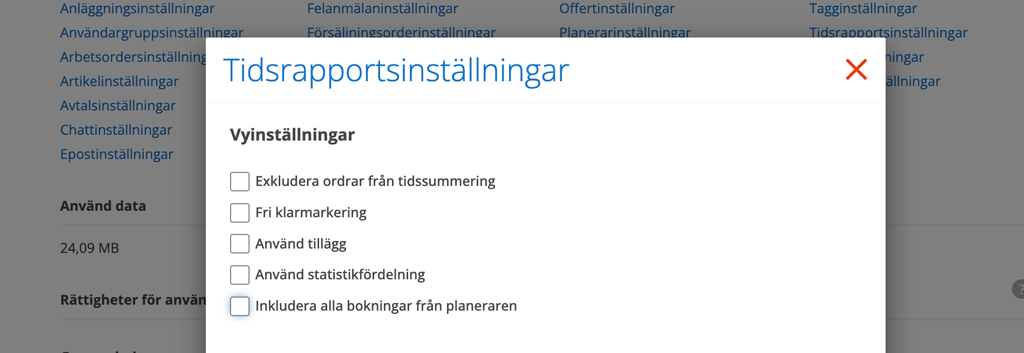
View settings
Exclude orders from time summation
Select this if time on orders is to be excluded from the time summary. Working time on orders is shown in the time report, but you cannot change the time type and the times are not summed up.
Free mark as completed
Free mark as complete means that everyone can remove a completion marking (i.e. click out of Completed) to, for example, change the time report even if the entered time worked does not match the specified working hours.
Without “Free mark as complete”, the day is locked when marked as completed. However, with admin permissions you can remove the completion marking and change the day.
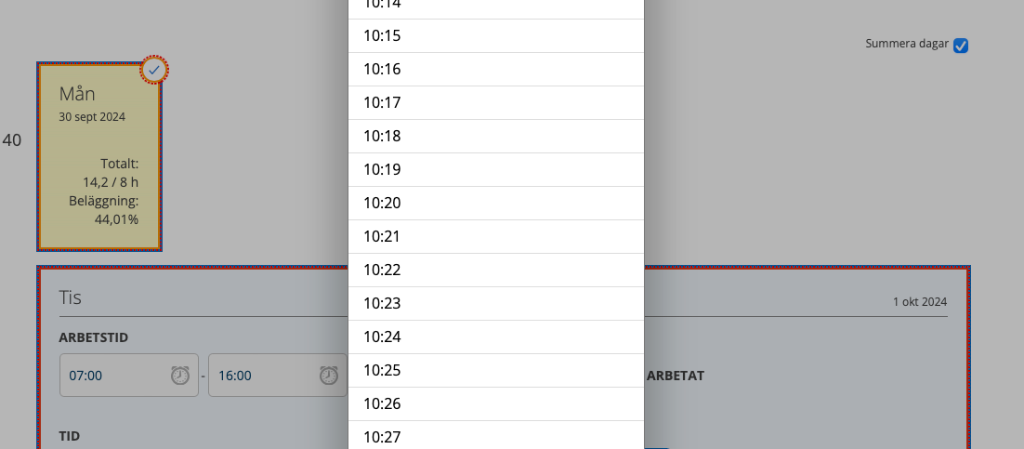
The fact that you have selected “Free mark as completed” is indicated by the frame around the day being a line. If it is dotted, you do not have “Free mark as completed”.
Use Additions – only Fortnox users
Adds an ADDITIONAL field in time report where you can enter time codes from Fortnox. Mostly used to be able to specify NUMBER instead of TIME.
Use statistics split
ATTENTION! This is a special solution and before choosing this setting we recommend that you contact us for more information.
Include all bookings from the planner
This setting records all bookings on orders and/or made in the Planner in the time report. Number of booked hours is indicated. Time entered as an article on an order appears in the time report as a separate record.
With this setting, breaks set in user settings are not deducted from the time worked.
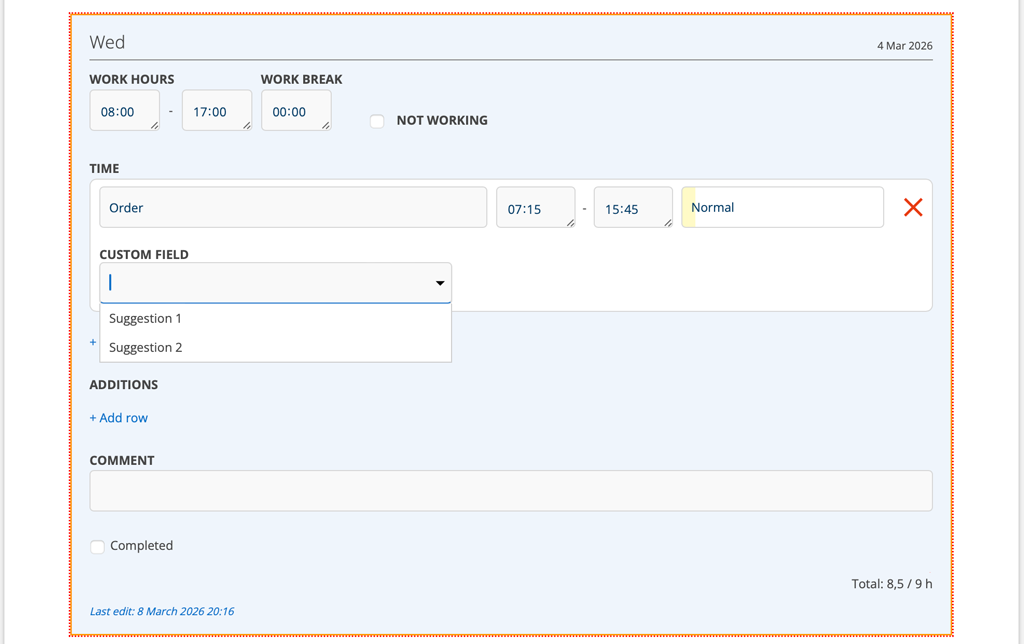
Enter time using start and end
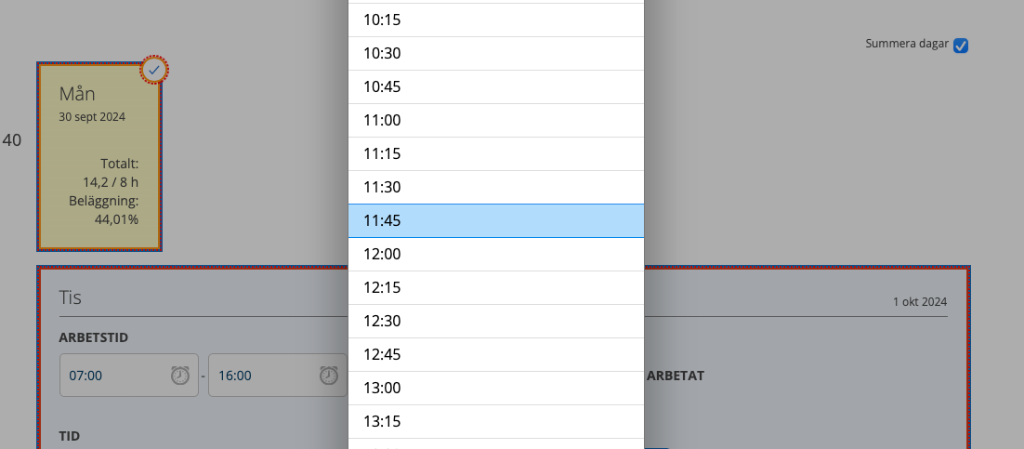
With this setting, you specify a time with a start and end instead of a number of hours, e.g. 07:15 – 15:45. This setting is usefully combined with the Article setting – “Enter quantity in hours and minutes”. Note that with this setting, the system cannot take into account set breaks.
Custom fields
Create custom fields in your time reports. Learn more about custom fields here.
Step size
Here you enter the minimum time intervals in your time reports. Default is 0.25, i.e. 15 min.
Example:
0.5 = minimum time is 30-minute intervals in time report.
1 = minimum time is 1 hour
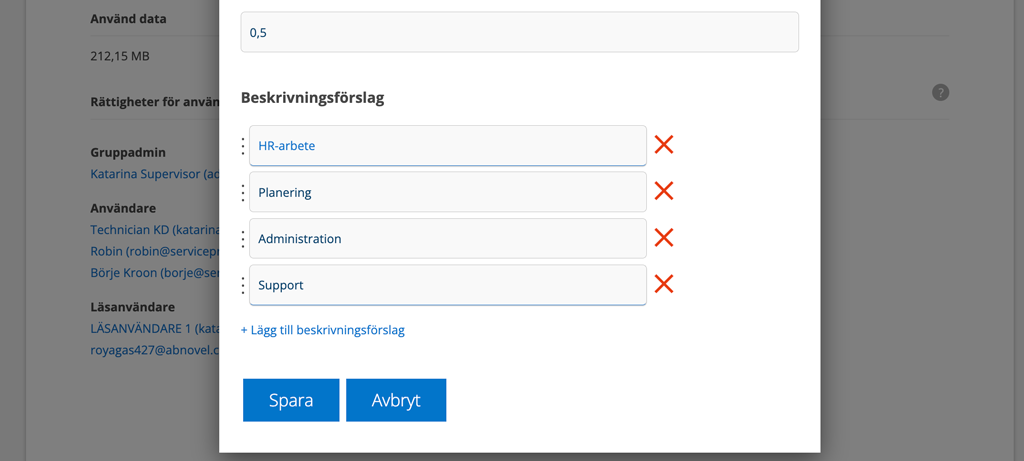
Description suggestions
To simplify and speed up the registration of working time, you can add description suggestions for tasks by clicking Edit description suggestion at the bottom of the time report page. Click +Add description suggestion. If there are already description suggestions, it says Edit description suggestion instead.
Do you want to change the order of the suggestions? Hover over the three dots. Drag and drop the field where you want it. (This only works on computer, not on mobile.)
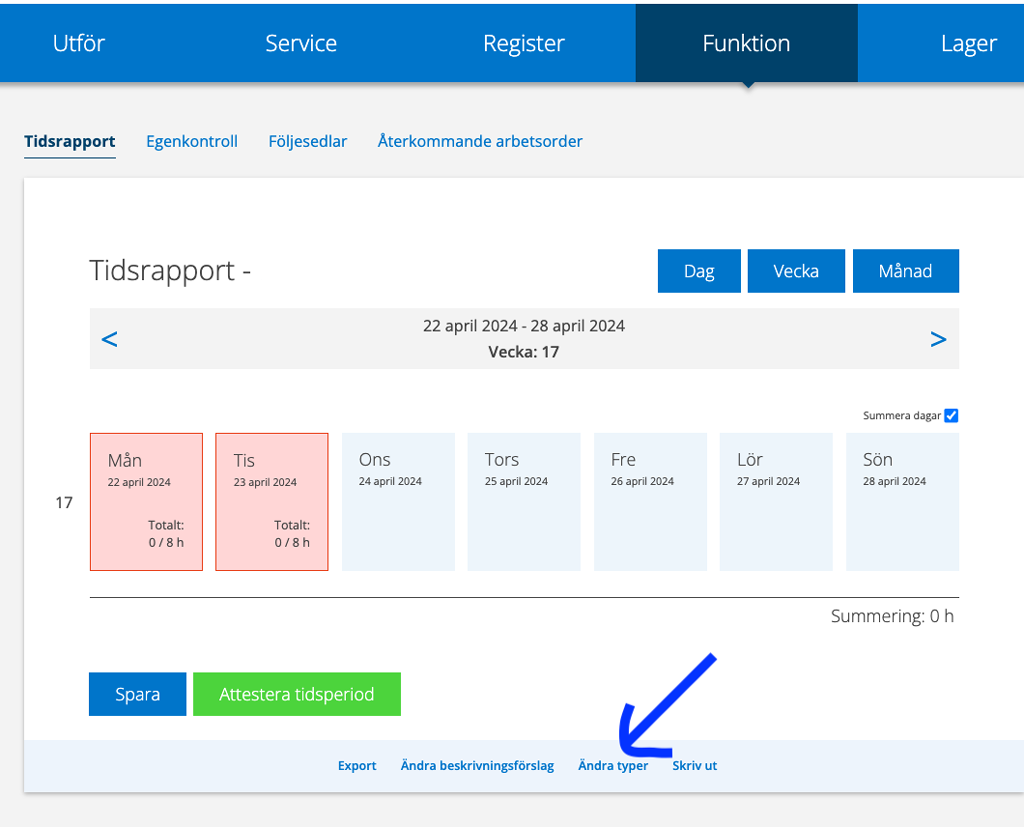
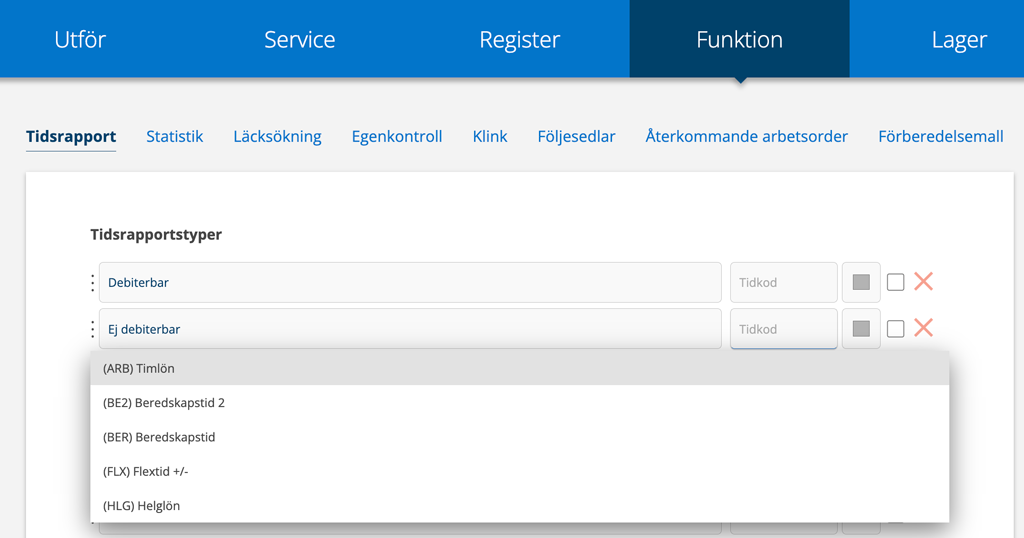
The description suggestions can also be changed and added to the Time report page if you have the Time report – Edit type list user permission (see image 1). Go to Function – Time report, scroll to the bottom and click on the link Edit description suggestions and Edit types.
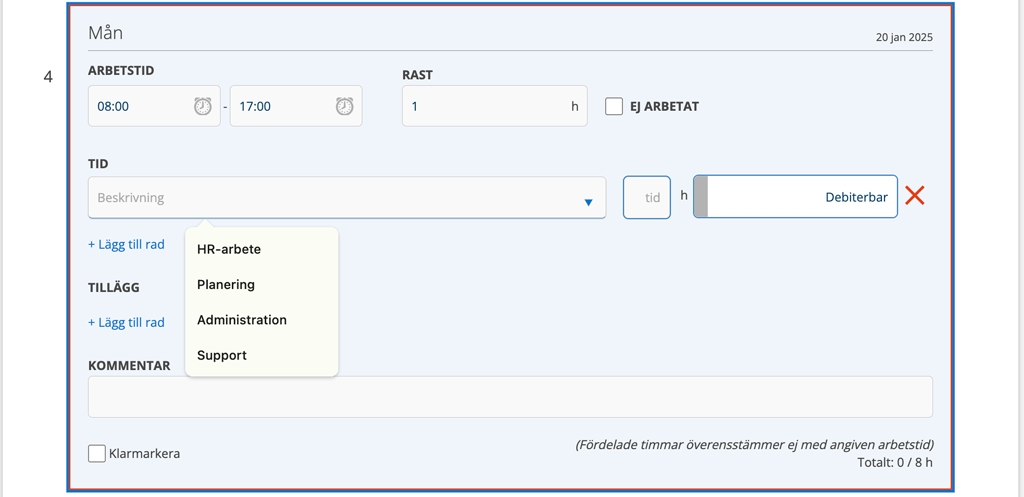
The description suggestions appear when you add time to a day. You can then choose between these to describe your work. Click on +Add row and put the cursor in the field and you will get the description suggestions. Of course, it is also possible to write freely.
Step 4
Time report type – name and color
Included in the system from the start are a number of suggestions for time report types. You can change the name, selected color, order, add new ones. Do you want to remove some? It works fine before they have been used in a time report. After that they are locked and the red cross has become a weaker color and cannot be clicked.
The time report types (eg parental leave, overtime, travel time) have different colors. The colors are also shown in the Planner when you have selected a time report type there. If you want to choose other colors than the preset ones, do this:
- Click Edit Types at the bottom of Time Report.
- Click the color bar for the type you want to change. Drag the color markers to the desired color or enter an RBG code.
- Click Save.
Here you also set the time codes you want to use for worked time, vacation, illness, etc. See more under Integration with administration systems.
Integration with an administration system
If you have integration with an administration system and want times to be forwarded to this, you need to set Time report types so that they correspond to your administration system’s codes.
Regarding Fortnox: Place the cursor in the Time types field and all entered register types from Fortnox will be listed. Unfortunately, subtypes in Fortnox cannot be linked.
- Click Edit Types at the bottom of Time Report.
- Put the cursor in the time type you want to connect. A scrolling list appears with all the time codes from your administration system.
Addition connected to Fortnox Lön (only for Swedish users)
(only for Swedish users)
(only for Swedish users)
(only for Swedish users)
The box to the far right of a type is only used if you have chosen to use the statistics split function.
Step 5
Connection Time report and planner
The time report types are also displayed in the scheduler and are then given the color you set for the type. If, on the other hand, you have chosen to use your own Booking types, the time types from the Time Report are no longer used, but only your own types, and their colors are then displayed.
Step 6
Set time articles
Only articles designated as Time Articles download to the time report. User permission Article – Set time report info is needed to set time articles.
Learn how to set Time articles.
Step 7
Time to give other users the permission to Time report
User permissions concerning Time report
Under Edit permissions for a user, you set, among other things, whether they should have the permission to see and use the time report function and be able to edit time report types.
View, View all (all users in your group), Edit, Edit all (all users in your group), Attest, Edit type list, Export, View order rows when sum is excluded (Orders are listed in the time report but hours arb not shown and are not added up and must be entered manually.
To be able to view History the user needs the setting under Other – View History.
Set warning to be displayed if you have not reported
You make the setting by clicking on a user and selecting User permissions.
For each user, a number of days can be specified before filling in their Time Report – TIME REPORT DAYS UNTIL WARNING and TIME REPORT DAYS UNTIL LOCKED. If the user exceeds that number of days, a warning first appears and then the system is locked if time is not reported.

The number of days is checked only when you log in.
Saturday and Sunday do not count. Holidays count.
Regarding self-entered holidays
In the time report, self-entered holidays in Planner settings are marked, but the days are not deducted from working hours when exporting reported time.