
Do you want to use your own types for bookings in the Planner?
This function is for you who want to be able to separate different types of work and orders in the Planner.
For example, if you want to be able to post planning in the planner without the hours being moved to the time report, you can use this function by creating a booking type that you call “Rough planning”, for example.
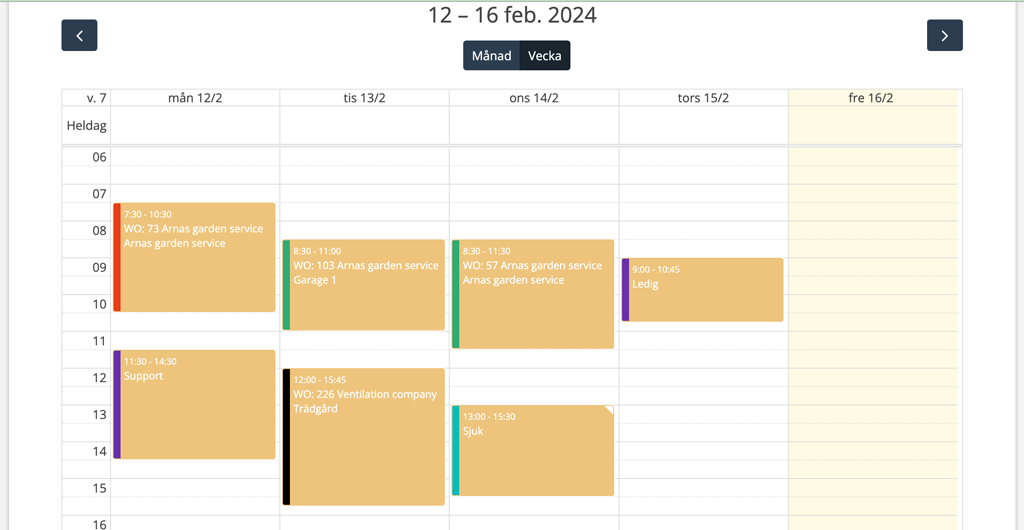
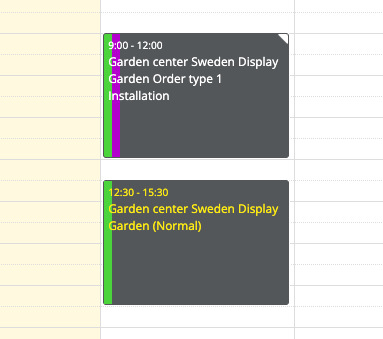
By assigning a color to each type, you can quickly identify the type of work a booking is for. The color is displayed as a border to the left of the booking together with any color codes from your own status on the order.
When using this function, the default types in the system (order, overtime, sick, vacation, etc.) are ignored, so you must enter all the variants needed.Order or Other time?
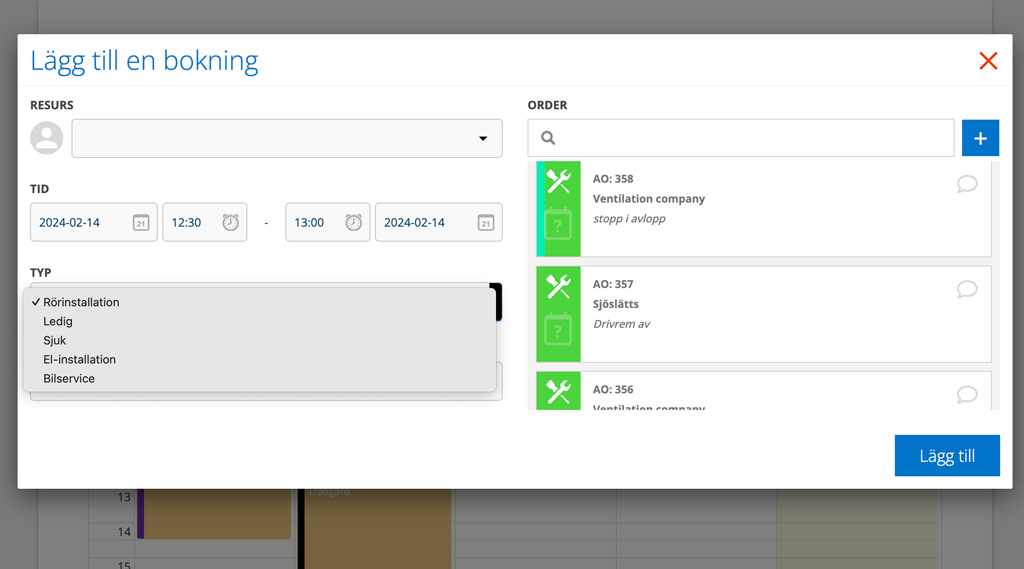
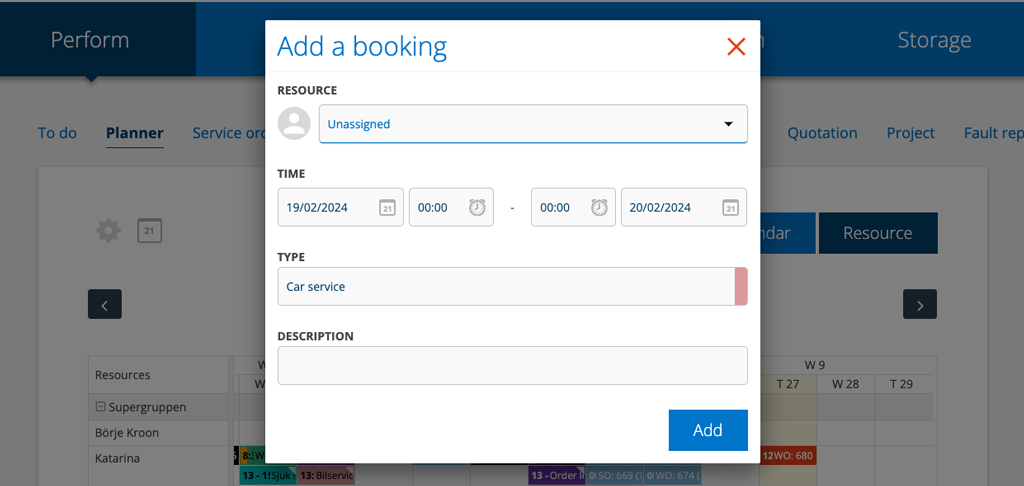
You can choose whether a booking type should be Order or Other type. If it is Other type, the list of orders is closed.
You set how Other type should be entered in the time report as usual in the Planner settings under the heading Other type. For example, if you specify that Other type should be entered as “normal”, all booking types that you mark as Other type will be entered as normal in the time report.
The function is therefore not optimal together with Time report as it cannot be connected with the different time types in the time report.
“Always show description”
By, in the Planner settings, selecting Always show description the description field can be used as a free text field.
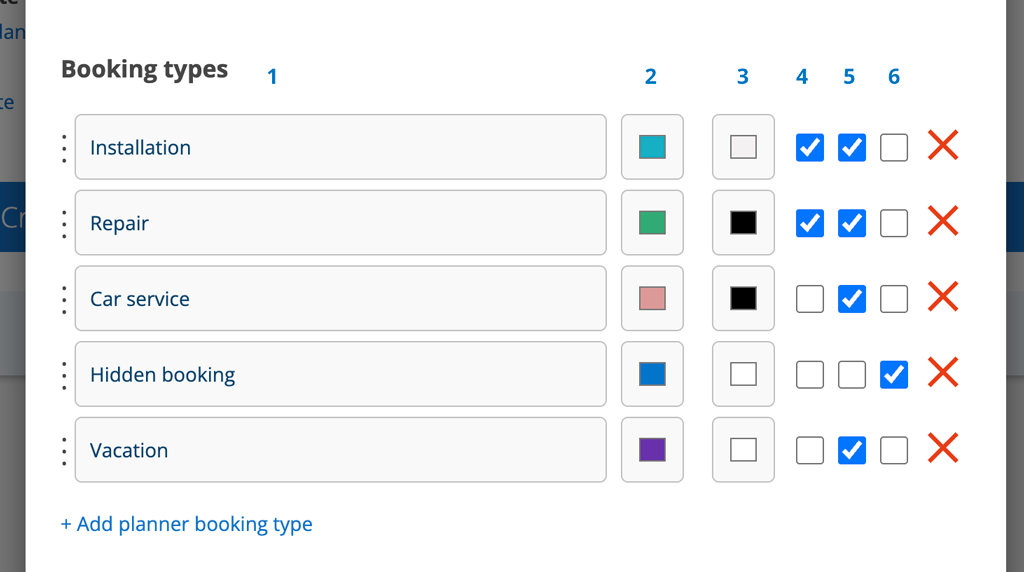
To create Booking types:
Go to Planner settings – Booking types (admin permission is required.
- Enter a name for the type.
- Select color for the type.
- Select text color
- Check the box if the list of orders should open in the planner. See image 2. If the type is Other time, leave the box blank. See image 3.
- Choose whether the booking type should be moved to time report or not. By default, move to time report is checked. The option to choose not to move a booking type to time report can be used if you want to plan the work without it affecting the time report.
- Makes the booking hidden for user’s without the user permission under Planner – “Show hidden”.
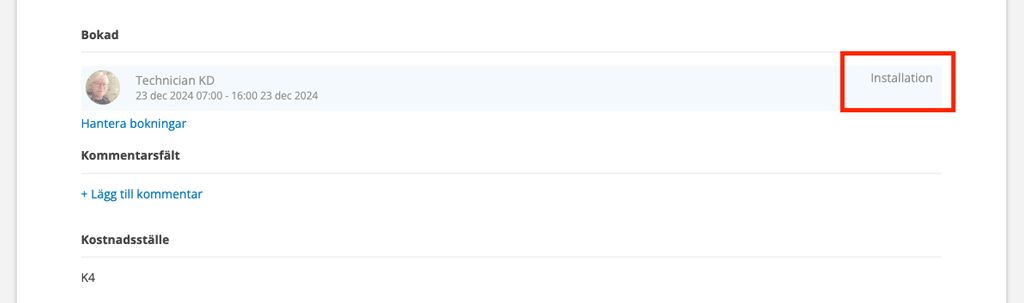
Booking type is shown on the order
When you select a booking type in the planner for an order, the type is also displayed on the order.
In what order are the colors/types?
Calendar from the left: status / booking type / order type */ technician color as the large field.
Resource from the left: booking type / order type* / status as the main field.
In the default mode, the fields are like this:
Calendar from the left: status / order type* / technician color as the large field.
Resource from the left: order type* / status as the large field.
Setting options for displaying the colors in the Planner
In the Planner settings – View settings you can control whether you want to use the colors of the booking types as background colors instead of the default colors.
If you choose this setting, it overwrites the default settings such as the technician’s color as background in Calendar and the order status in Resource.
- Show booking type as background color
You may also need to take into account the “Show custom status as text color” setting when choosing colors and if you use order types.
*If you chose to use order types. Read about Order types.