For work orders and service orders, you can enter your own order types and set colors for these to easily distinguish different types of work.
Admin permissions are required to create order types.
To add order types
- Go to Group settings.
- Select Work order settings or Service order settings. Settings can be done on one or both places and can be different for work order and service order.
- Scroll to the bottom of the popup.
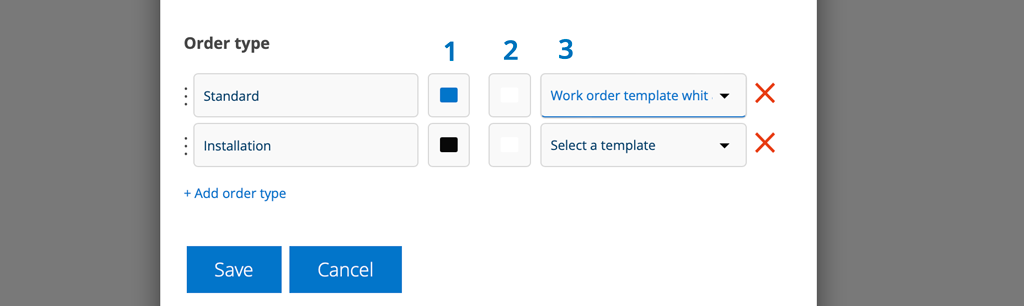
- Enter a name for the order type. Select color from the stripe and dot (1). Color (2) is text color and does not need to be set.
- You can control which of your own print templates will be used depending on the order type. Select a template under “Select a template” (3). This print template has priority over the print template you have chosen to “star”.
- Click + Add order type to enter more.
- Click Save.
Where is order type displayed?
A new dropdown field is added to the order. Here you choose the order type, if desired.
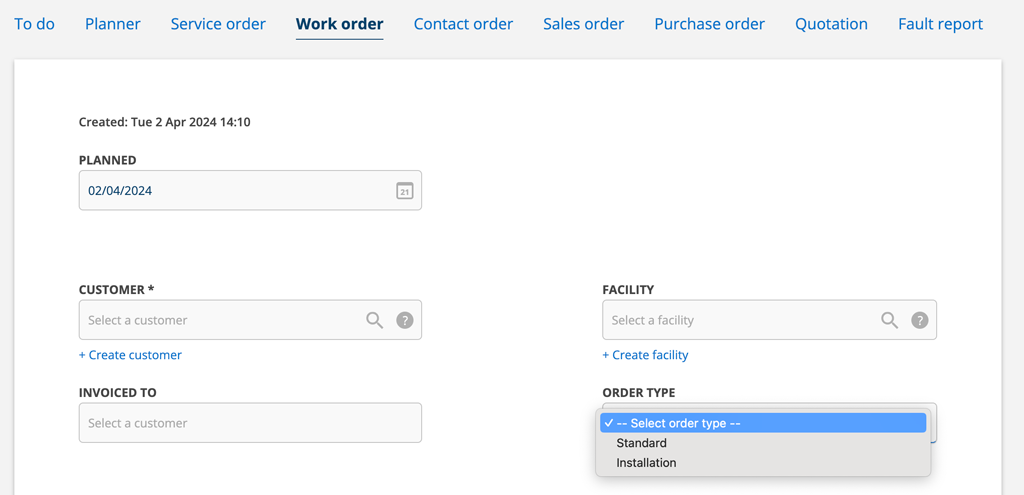
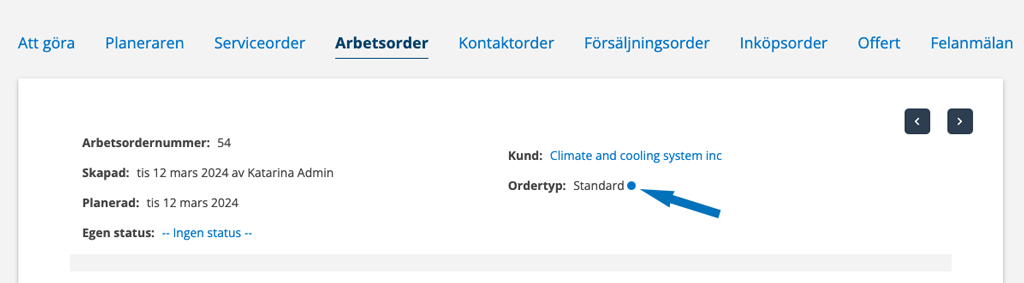
The color you selected will appear as a dot after the order type on the order.
The color you selected will also appear in the list views.
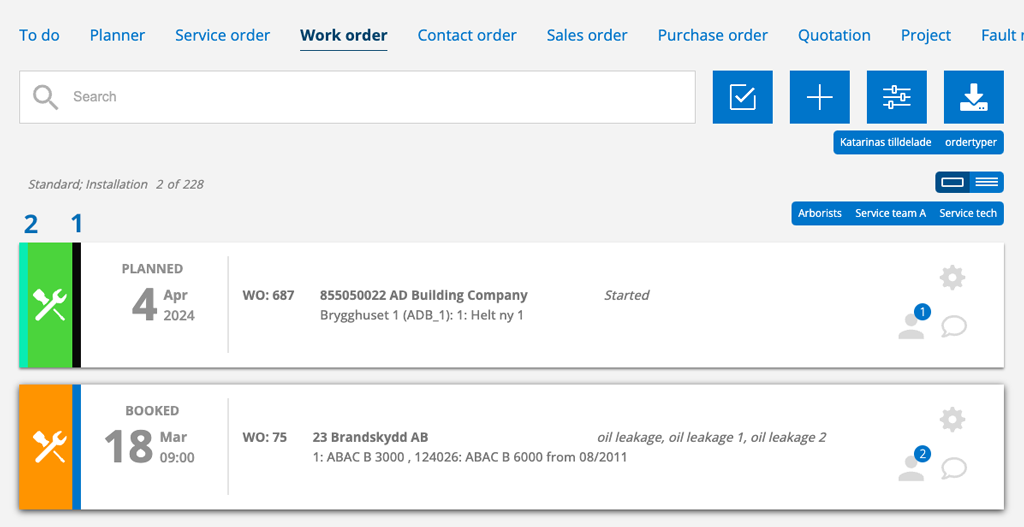
Below is an example from the work order list. The field to the right of the green status field (see number 1 in the picture) shows the color of the order type.
The field on the left (2) is, as before, the color for your custom status.
Search orders with a certain order type
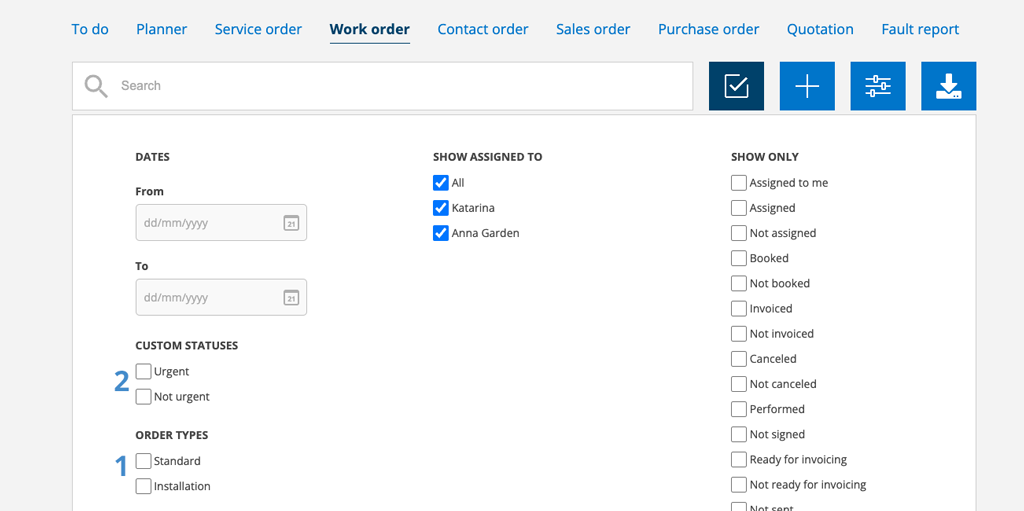
Click on filter (the tick to the right of the search field). Mark the order type you want to search for.
Planner settings
Requires admin permissions.
In Planner settings – View settingsyou can control whether you want to use the colors of the order types as background colors instead of the standard colors.
If you choose this setting, it overwrites the default settings with the technician’s color as background in Calendar and the order status in Resource. Note that if an order has not been assigned an order type, default settings are still displayed.
- Set order type as background

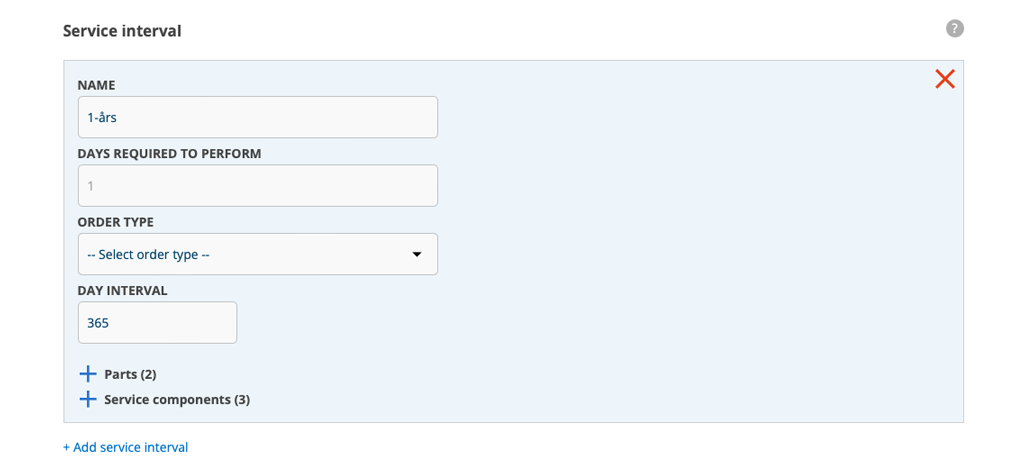
Add order type to service interval
In order for order types for service orders to be included in new generated service orders, the order type needs to be on the service interval.
When you enter new service items, there is a field where you select the order type.
To add order type to service objects you already have, do as follows:
- Enter a service object
- Click Edit
- Scroll down to Service interval
- Choose order type and Save.
- As usual, you will be asked if you want to update the next service, answer yes.
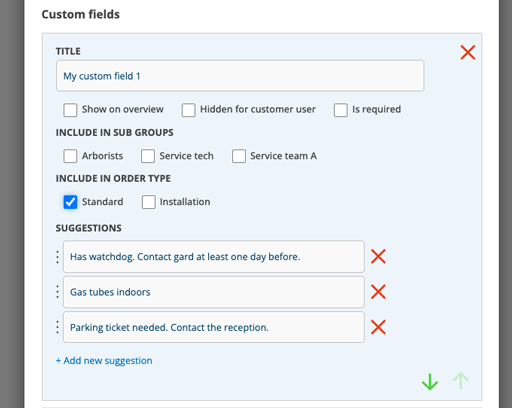
Order types in Custom fields
The order types can be linked to your custom fields in Service order settings and Work order settings. This means that you can control which self-defined fields are to be displayed when you have selected a specific order type.
Select the order type that should control which custom fields are to be displayed – “INCLUDE IN SUBGROUPS”. In the example below, the custom field will appear if you select the order type Standard on the order.
If you do not select an order type, the field is displayed on all orders.
If you select all order types, the field appears on all your orders with one of your order types selected.