
The system has a number of symbols and colors as standard to make it easier for you.
If you don’t see one or more of these symbols, you don’t have permissions for that part of the system.
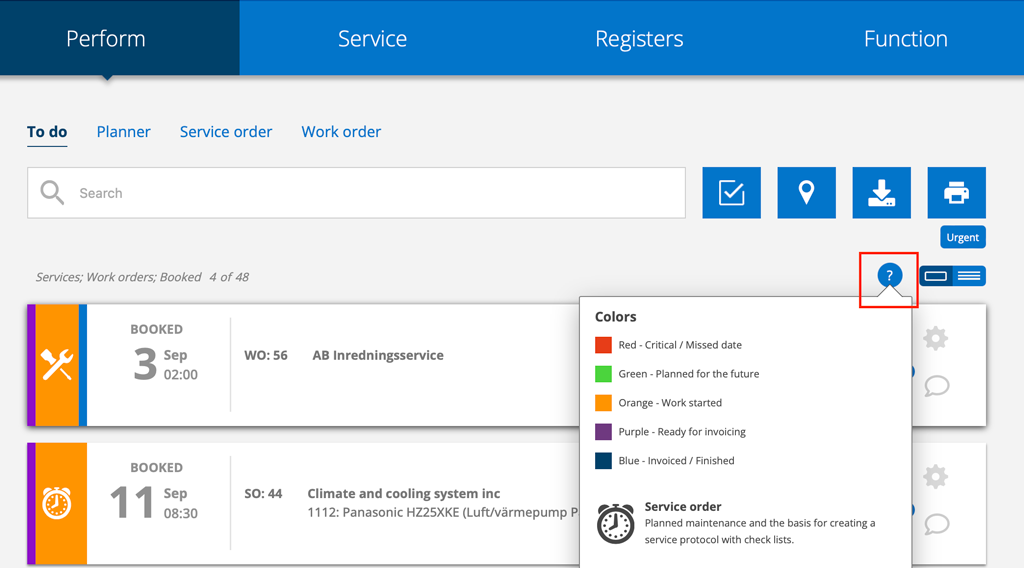
In several functions, you can click on the question mark (?) and an information box will pop up where you will get help with explanations of colors and symbols.
Colors
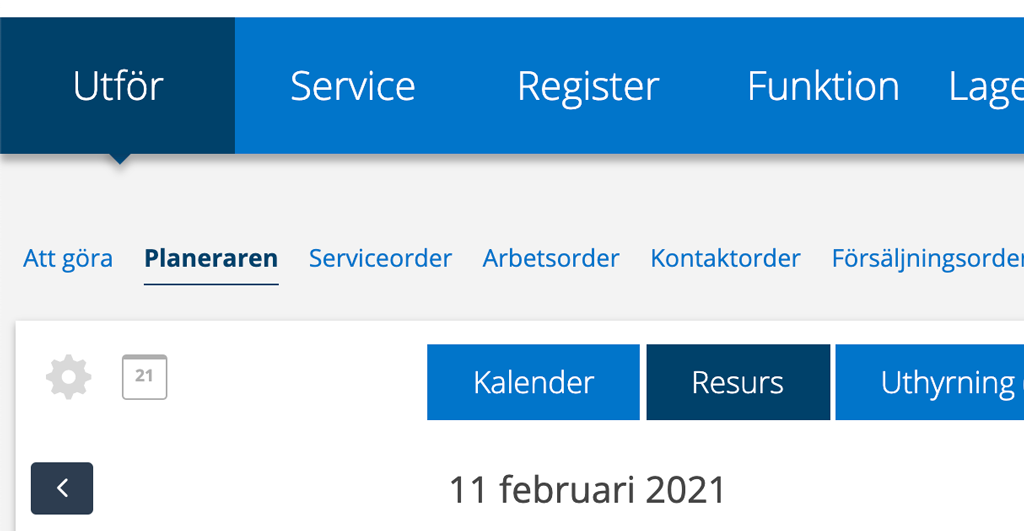
Dark blue color shows where you are in the Menu. Here you have clicked on Execute – Planner – Resource.
The colors in an order list
Green – a future date
Orange – started
Red – missed date
Purple – performed/ready for invoicing
Blue – performed/invoiced
When is an order started? That is, when does the color change from green to orange?
Work order: When you added a measure and saved.
Do you want the color to change when you add articles or time and save? Select Work Order Settings – List Mode Settings – Set begun on added articles.
Writing a comment or changing contact information does not change the status.
Service order: When clicking on Perform.
Colors in the Planner and Timesheet
With admin permission you can specify custom colors for individual resources/employees and colour-code the different time report types (e.g., time off, overtime, travel time).. Learn more here.

Concept
Planned Order – this is a date when the order should be executed.
Booked Order – a technician/user should execute the order and on a specific day and time booked.
Assigned order – a technician/user is assigned to an order and should carry out the order, alternatively is responsible for the order. Read here about Assign.
Symbols

Contact order – CO

Service order – SO

Work order – WO

Purchase order – PO

Sales order – SA

Quotation – Q

Two-color work order
The narrow coloured stripe on the left of a work order indicates a Custom status. You can set the color and value for the status with admin permissions under Module Settings – Work Order Settings.

Search order, filter
Click on the symbol and you will see a number of different filters such as time interval, certain types of orders, assigned to a certain person, booked or not booked, etc. The filters are slightly different depending on the type of order in question.
Click on Save Settings if you want to keep the settings. The settings you have chosen will then appear in text just below the Search field. See image 2.
You can also save your sorting choice (see Display mode – change the view) by clicking Save settings.

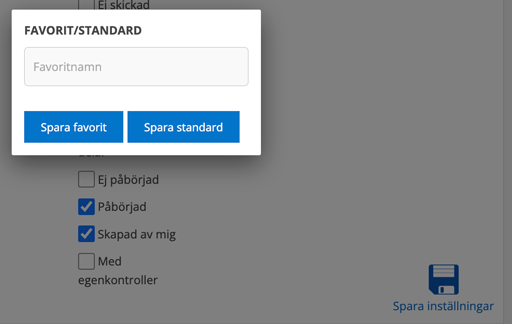
Save filter as Favorite
You can create favorites in all places where there is the option to set a filter and a Save Settings button – To Do, Work Order, Service Order, Sales Order…
You can create as many favorites as you want and have room for them.
Do this:
- Click on the Filter symbol (image 1) and choose your filter settings.
- Click on Save settings
- Write a name for your Favorite.
- Click on Save as favorite.
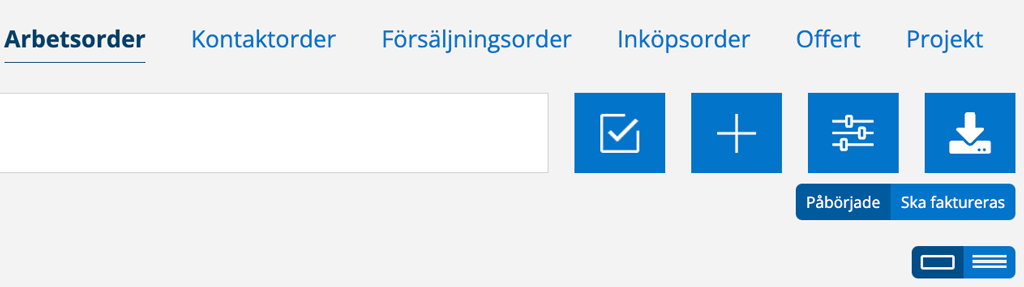
The favorite buttons appear on the right as in the image below with the Started and To be invoiced buttons.
To return to your previously (default) saved filter, reload the page.
To see what settings a Favorite has, click on the favorite and then on the filter symbol (image 1).
A favorite cannot be edited. Delete the outdated one and create a new one.
Remove a filter: Click on the filter symbol (image 1) and then on your Favorite. Click on Remove.

Plus
Plus means the possibility to add something – an order, a model, a fault report…

Collection function
This symbol means that you can create a list of some kind. For example, a list of work orders where you can quickly manage multiple orders at once – print, sign or send for invoicing. The possibilities are slightly different in the different functions.

Cogwheel
Quick way to change or delete an order and assign the order to yourself or another resource. In Storage, the gear wheel leads to an inventory.

Map
Click to see orders or service objects on the map. The orders get their position from Facilities if you have selected it on the facility.

View mode – change the view
Choose how you want the list to be displayed. As a simple list view or a slightly larger list with images.

Select categories to be displayed as headings in the list. This function is visible when you have selected list mode – the right symbol in the image above. Click the plus button to the right above the order list, select the categories you want to include in the list view. Click outside to close the category list when you have finished selecting.

Browse
Browse between orders. If you use a filter/search parameter to search for orders, you will browse between the searched orders.
(This feature is not available for Purchase Orders.)
Fast scroll

Fast scroll down

Fast scroll up.
If you have fast scrolled down in the middle of an order and then click on the up scroll, you will end up back at the same position from which you scrolled down.

Assigned
Here you can see how many people have been assigned to an order. Click on the figure to see who.

Comments added
If you can add comments, this symbol will appear. The number indicates the number of comments.

Downloaded
Shows, in the detail view list, that an order has been downloaded locally to your device. This means you can work with it without having access to the network.

Shopping cart
Create purchase orders directly in a work or service order. The list can then be emailed to coordinators or directly to suppliers.

Print – create picking list
The print icon is located under To Do. Click it to create and print a picking list for your orders. You can select which orders you want to print a picking list for by clicking the Search Orders icon.

Export list
Click on the Download symbol to create and download a list (Excel file or csv file depending on your Group settings) of orders, service protocols and agreements. Filter your selection to the list by clicking on the Search filter button and save the settings. The symbol is also available in black and white inside an order. This will create a list for that particular order.

Separate / split
If you want to create a separate work order from a job (split) or separate a service object from a service order, click this symbol. The job/object is then moved from the original order and a new order is created. You can find the symbol in the upper right corner of the job or service object.

Signed
Symbol that an order is signed.

Action required!
A red exclamation mark appears when there is a fault report to handle or an agreement to sign.

Sort
Want to change the order of a list you’ve created? If possible, you’ll see three dots to the left of the fields. Hover over the dots. Drag and drop the field where you want it.

Undo

Search
Click on the magnifying glass and in some search fields you will see a box where you can search with more details. Good if you have customers or facilities with similar names, for example.

Storage
The “Storage house” is displayed when you use the Storage function but have not selected a default storage for the article. Click on the symbol to select a storage.

Storage status
You see the star when you use the Storage function and have selected a default storage. The number indicates how many of the article you have in the storage. Click on the symbol if you want to select a different storage or no storage at all.

Uploaded documents are available
When you perform a service, this symbol shows that there are uploaded documents on the order and/or service object.
You will see these symbols in the upper right part of your screen.

Notifications
Here you can see all your notifications about assigned, booked, deleted orders, etc. A red number indicates the number of notifications. You can delete a notification by clicking on the red cross. Click on the information in a notification and you will go directly to the order.

Chat
Chat with each other. Create chat rooms, add members to the chat, choose whether it should be private or public. A red number shows that there are unread messages.

Timer
Clocks your travel and work time and helps you calculate mileage. Learn how the timer works here.

Quick note
Use Quick Note to make a quick note and you don’t have to open another program to take notes. Only you can see your notes. They are saved until you delete them yourself.

On a mobile device, you’ll find chat, timer, and quick note icons under what looks like a square window.