These instructions apply to the standard printouts that are built into the system. If you have made and are using your own printouts templates, these apply.
Here we will give you tips on the different settings for your prints that can be made and where you can find them. All settings require admin permissions.
Settings you make for the header and footer will be reflected in all your prints.
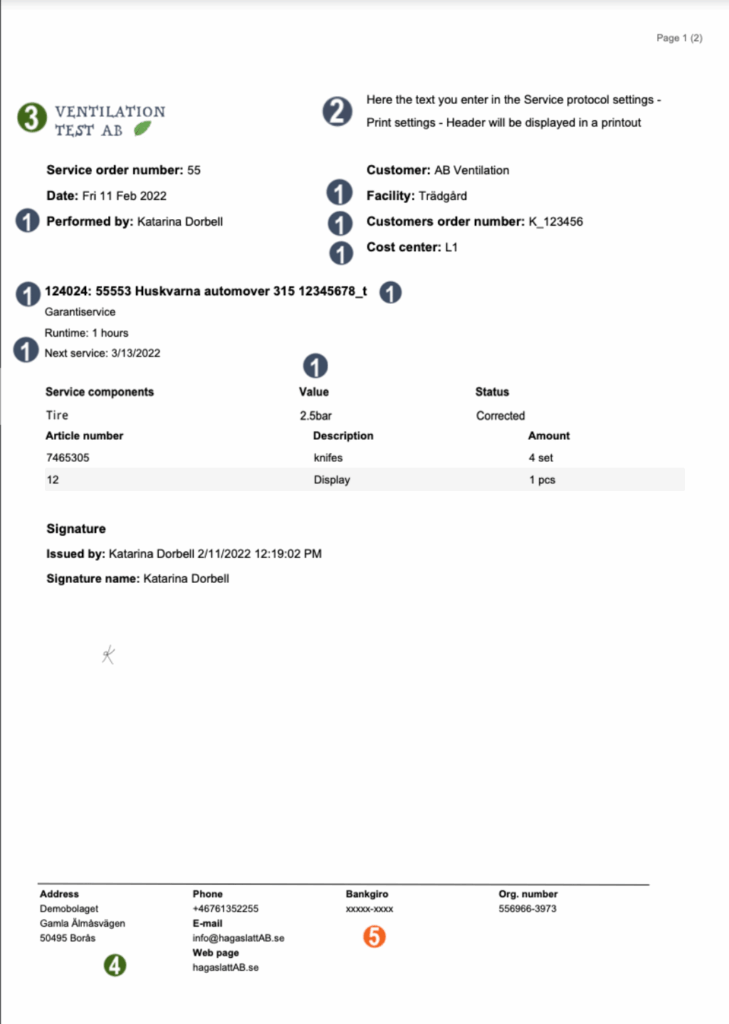
In the picture we have drawn circles and numbers in a service protocol.
Green circle
The setting is made directly on the page Group settings
The name of the group is collected from the group settings.
Number 3: Click Upload Group Logo to add your logo to the header – on all pages in the app and on all printouts.
NOTE: If you have integration with Fortnox and send invoices from there, the logo you uploaded to Fortnox will be used. However, if you send the invoice copy, the logo you uploaded with us will be used.
Number 4: Click Edit at the bottom of the page to add or change your address. You will also need to go to Print Settings to select Show Footer.
Orange circle
The setting is made under Module Settings – Print Settings.
Blue circle = Settings specifically for printing service protocols. These are made under Module Settings – Service Protocol Settings.
Number 1: under the heading Print Settings.
In the image below we have checked all the settings. The customer’s order number and cost center are displayed by default further down the page.
Number 2: under thr Header.
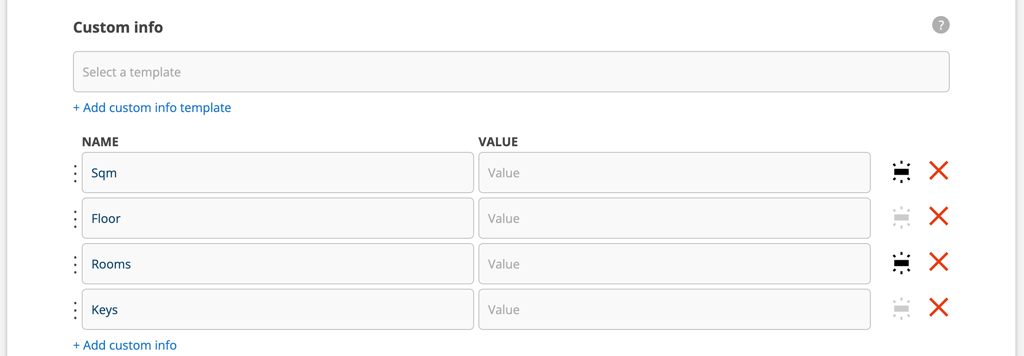
Additional (custom) information field on the service object
If you are using an info template and want the parts in the template, all or some, to be added to the protocol, do this.

Click on this symbol to activate (so it turns black) the information you want to be included in the protocol.