
Administrator account
The person who creates the group automatically receives administrator permissions. They can then grant admin permissions to any number of employees.
With admin-permissions, you can add users, set permissions for users and make a number of settings and adjustments to the system for your needs. Also read My account concerning user permissions and settings.
When new functions are added to the system, you as an administrator need to sign in and set permissions for what the users should be able to do in the new function. Stay up to date by visiting the News/updates page regularly.
Group settings
On the page Group settings you manage users in the group, add integrations, select module settings, upload your logo and add your contact information, upload registers etc
How to access Group settings:
- Click on your username in the upper right corner (on computer) or at the bottom of the menu on mobile.
- Click Go to admin page at the bottom of the page.
Upload logo
Upload logo for the group / company. The logo is added to printouts and to the login box for customer users (if you chose to use that function). The logo is also used in your e-mails if you have chosen to do so in the E-mail settings.
Subgroup logo setting
Do you want to use different logos to your subgroups?
- Go to Group settings – Module settings – Group settings.
- Click Add Image under the subgroup you want to add a logo to.
The logo will be added to prints associated with the subgroup.
Edit (at the bottom of the page)
Contact information
- Enter contact person and address for the group / company
- Add billing address
Currency and value
- Enter the price unit. The price unit is the unit that is displayed after a price, e.g. EUR, :-, kr…
- Enter currency and value for the currency if you buy via EDI from suppliers who have entered a currency other than your default. The system then takes the price on the delivery note/EDI file and multiplies it by the value you entered for the currency here.
Check with the supplier how the currency is stated on the delivery note/EDI file and enter it in the same way, e.g. EUR.
Add integrations
- Add integration with your accounting system and see which EDI connections to suppliers that have been installed.
- Select model databases. Selected model categories are displayed in the Model view and when selecting a model during the creation or modification of Service objects.
Upload registers
- Upload different types of registers. Download and use the template file for your uploads.
Add, delete and change user permissions
Add new user
Each new user generates a new license. Your charge will change automatically. Read more: Add users.
Delete user – Inactivate
Delete = Inactivate. The user remains in the system but you do not pay a license for the user (license termination). The system handles this automatically. You do not need to report that an employee/user is inactive. All history for the user is saved. If necessary (due to GDPR, for example), the user’s name can be anonymised so you can still maintain history and traceability. Contact us and we’ll fix it!
Manage user permissions
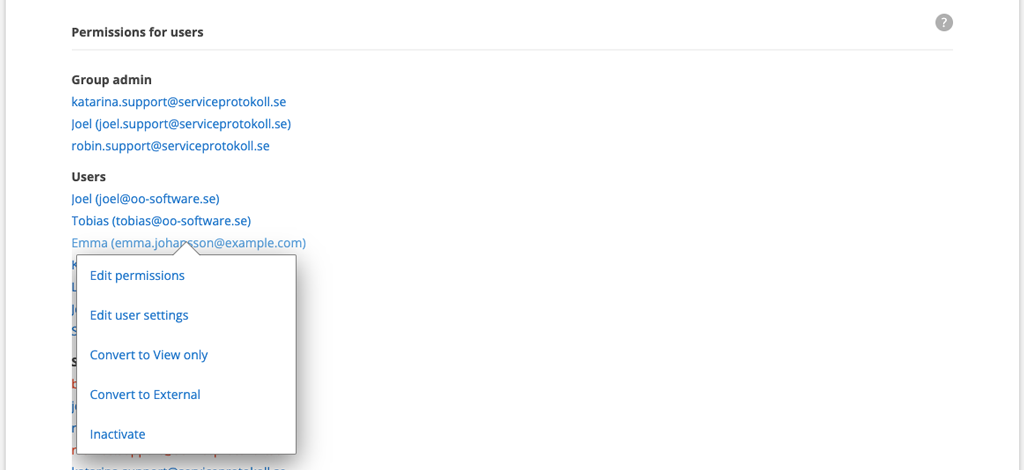
Click on the user you want to change permissions or settings for. Click on the setting you want to change. Three choices will appear:
Edit permissions
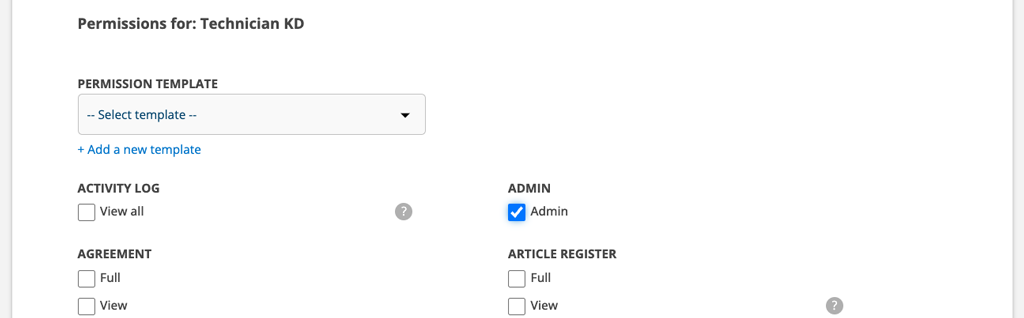
Under Edit permission there are a variety of settings for each function in Service Protocol that you can make for each employee, for example what should be shown to the employee, if he has the opportunity to create, edit or delete orders and documents.
By granting permissions, you also choose which features a user will see. We recommend that you only set permissions to the features used to reduce the menu.
Read more about user permissions and creating permission templates.
Add new administrators
Click on users who should have administrator permissions, select Edit permissions and select Admin
Edit user settings
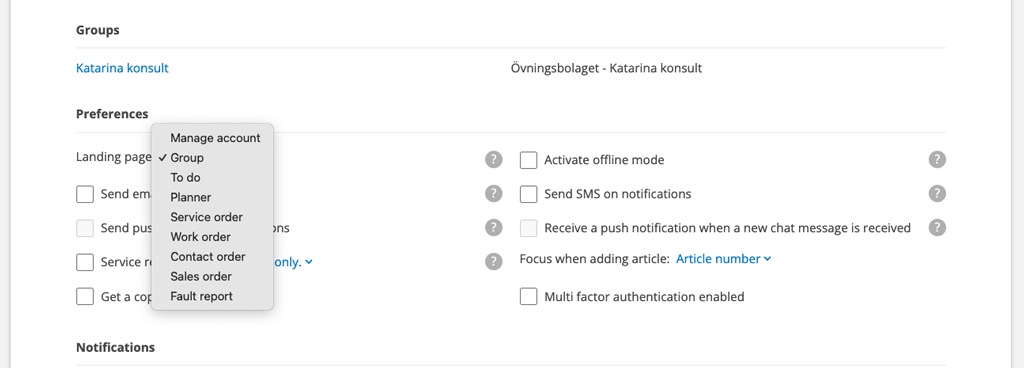
In Edit User Settings, you can specify things like working hours, employment number, notifications via email/text, etc. Here you can also give employees a color code that is then visible in the Planner.
Here you also set whether the user should:
- Removed from time report
- Remove from chat
- Remove from assign (ie the user cannot be assigned orders)
- Assign self-created orders automatically
- Assign orders edited automatically
- View and set which notifications the user should receive.
Inactivate
Inactivating means that the user remains in the system but you do not pay a license for the user (termination of license). The system handles this automatically. You do not need to report that an employee/user is inactive/terminated. All history for the user is saved. If necessary (due to GDPR, for example), the user’s name can be anonymised so you can still maintain history and traceability. Contact us and we will fix it!
Add external resource
You can add external users with limited rights to the system. These are marked with the text “(external)” in the list of users. Read more about external resource.
See also User Group Settings (under Module Settings) if you want to create groups/departments and add users to them.
Create a view only user
Should an employee or similar only be able to check in from time to time and read, not be able to add or change anything? Make the person a View only user. Click Create a view only user, fill in an email address, and accept the terms.
Adding a view user does not generate a new license and no fee.
Module settings
To adapt the system to your group’s unique needs, there are module settings. You activate these for everyone in the group, but if you have subgroups, you can choose certain settings depending on the subgroup’s specific needs.
Click on the links to get more information about the module settings.
- Facility settings
- User group settings
- Work order settings
- Article settings
- Chat settings: Remove or change name on chats.
- E-mail settings: Here you create templates for your s-mails. Read more about SMS/e-mail.
- Fault report settings
- Group settings (create and edit sub groups, comments settings and more)
- Purchase Order Settings: Here you can enter an email address where you want purchase orders to be sent by default and create Priority suggestions.
- Settings for the Planner
- Contact order settings
- Customer settings
- Storage settings
- Quotations settings
- Service object settings
- Service order settings
- Service protocol settings
- Time report settings
- Timer settings
- Print settings