
What does the Storage tab contain?
Storage contain stock lists (storage item), registration of inbound and outbound deliveries, inventory and transaction history. The system also handles updating of stock items such as those in service technicians’ cars. You can create several different storages. Articles are easily moved between the different storages by making inbound or outbound deliveries.
The Storage function is enabled by setting user permissions. Admin permission are required. See more under Settings concerning storage
What you see and can do as a user is controlled by the permissions you have been granted in the system.
Storage symbols when adding articles on orders
When using the storage feature, these symbols appear when you add articles to an order:

”The storage” symbol is displayed when the article is taken from the main storage. A number indicates the quantity in the storage.
Click on the symbol if you want to choose another or not take from a storage at all.

You will see the “star” when you have selected a default storage and you have the article in that storage. The article is automatically selected from your default storage. The number indicates the amount of the article in the storage.
Click on the symbol if you want to select a different storage or no storage at all.
Storage
Storage is found under the menu Storage.
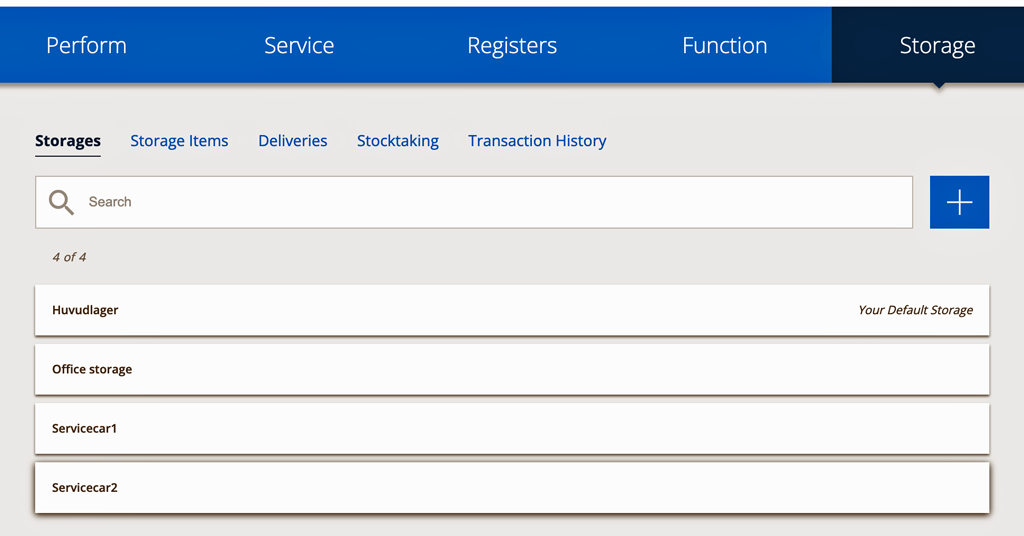
Create new storage
Click the +symbol if you want to create a new storage.
A storage can be created by importing an excel-file.
You can also create a storage by importing an stocktaking of your current storage. Read more about this under Import a storage/inventory.
Add articles to the new storage by making a delivery to your storage. Learn how to make inbound deliveries in the article Deliveries.
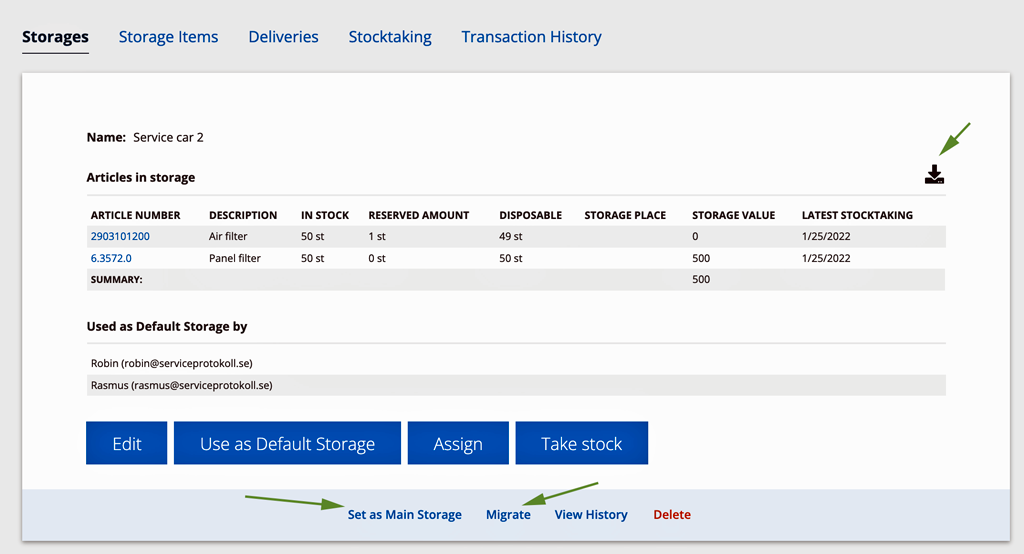
Migrate storage
You can also use the Migrate function when you have clicked on a storage. This allows you to quickly move all items in one storage to another.
Main storage
There must be a Main Storage. However, you can change the name by clicking Edit. If you want to change the main storage, click on the storage, scroll to the bottom and click Set as Main Storage.
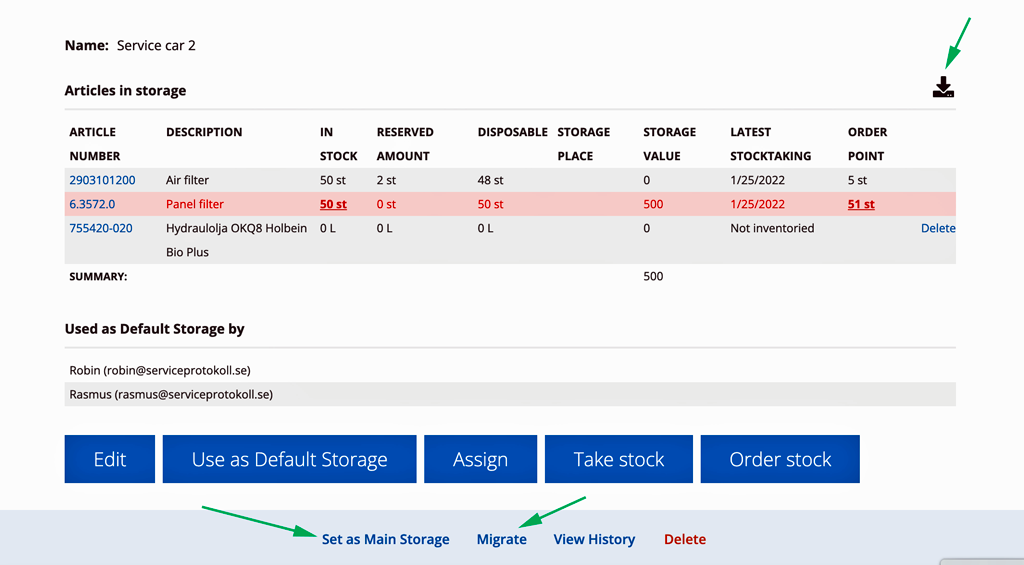
Use as default storage
When you use an item in the storage, it is taken from the main storage by default. You can change this yourself by using the default storage function as done in the example above with “Service car 2”. A default storage is the storage that you primarily take your articles from, for example the storage in your car.
Click Assign on the storage you want to set as the default storage. Select the people who should have this storage as the default storage. If you are the only one who should have the storage as the default storage, simply click the Use as Default Storage button.
By opening a Storage you will also see who else is using this storage as their default storage.
If you want to:
- change the selected default storage – choose another storage, open it and click the button Use as default storage.
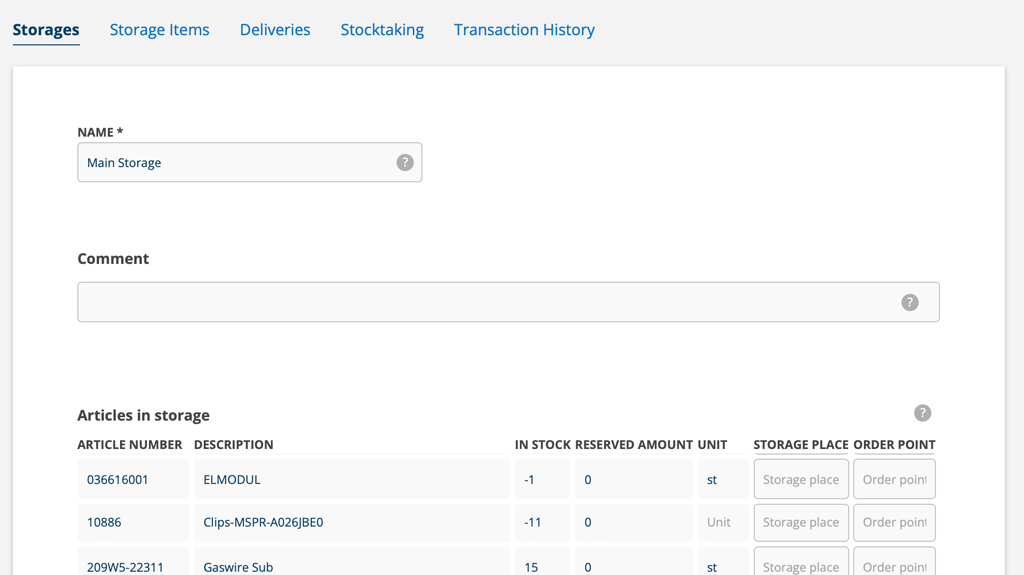
- change the name of a storage or add comments – click Edit.
- sea all history about a storage – click View history at the bottom of the page.
- remove yourself from a default storage without choosing another default storage – click on Assign and uncheck the box next to your username.
An administrator may have assigned you a default storage. In that case, you cannot change the storage selection.
Articles with stock balance 0?
Inside a storage, you can choose whether you want to see or hide articles with a stock balance of 0. The “Show empty” function is only visible if there are articles with a stock balance of 0. The article is “grayed out”.
Set storage place
Do this:
- Select a storage
- Click Edit
- Locate the article and fill in the storage place
- Save
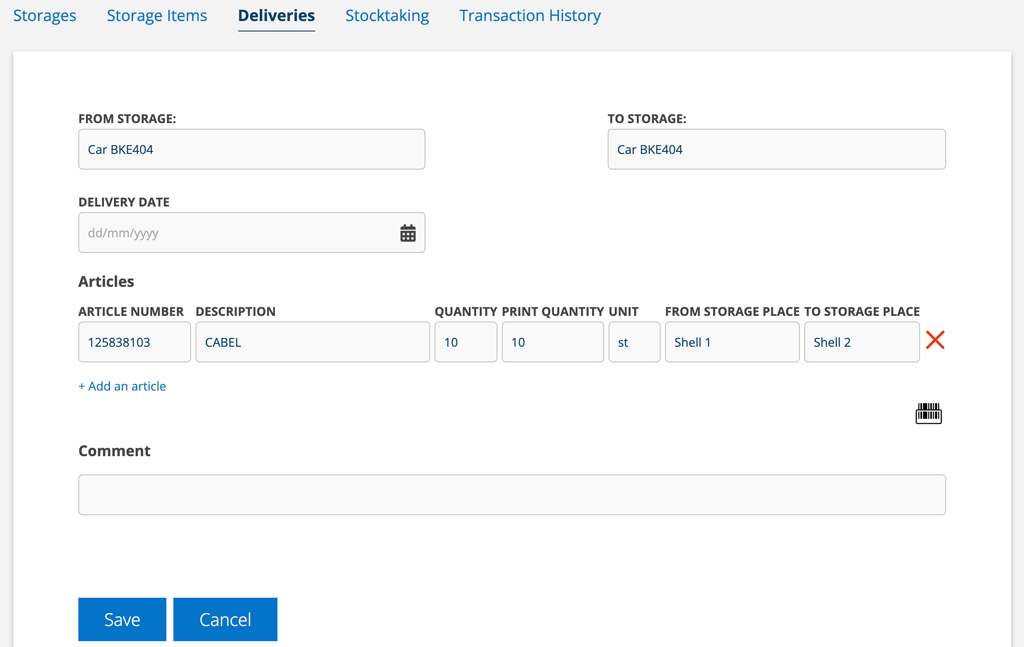
You can also specify the storage place when making an delivery (an internal storage movement). Learn more about Deliveries.
Do this:
- Go to Deliveries.
- Click +.
- Choose from which storage to which storage. Choose the same storage – unless you are moving the article between different storages at the same time.
- Locate the article you want to specify a storage location for and a field will open where you can specify the storage location.
- Save and then Sign the delivery.
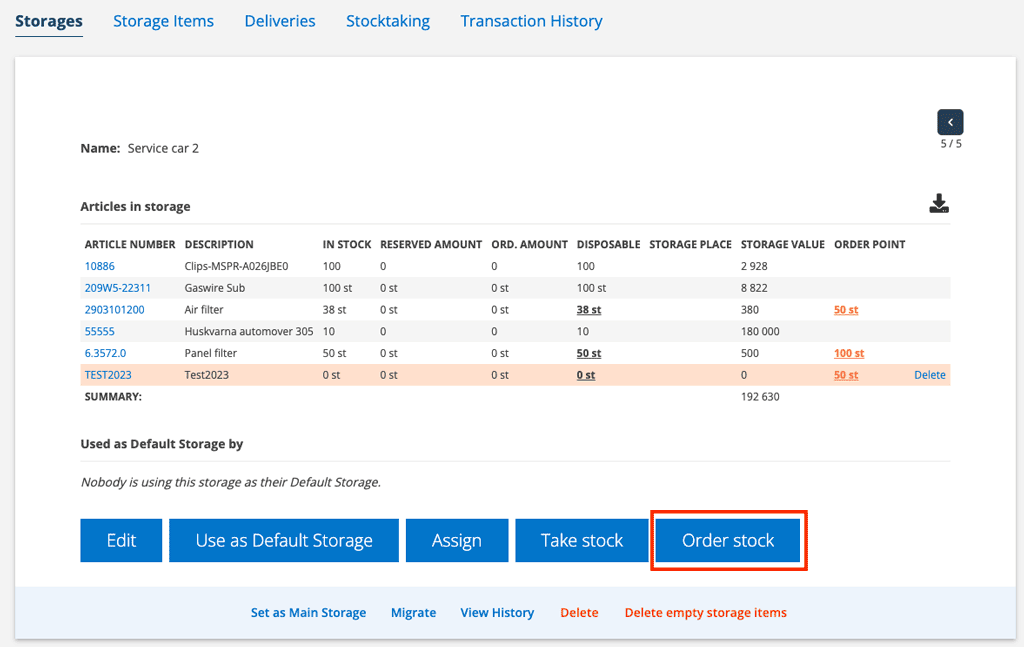
Order stock
If you see the Order stock button in a storage, there are articles that have passed their order point, i.e. the number that you have set as the minimum number that should be in your storage.
When there are articles that need to be ordered, the Storage button will be highlighted in red.

Learn how to set a order point here.
To create a purchase order for these articles, click Order Stock. A popup will open with the articles filled in.
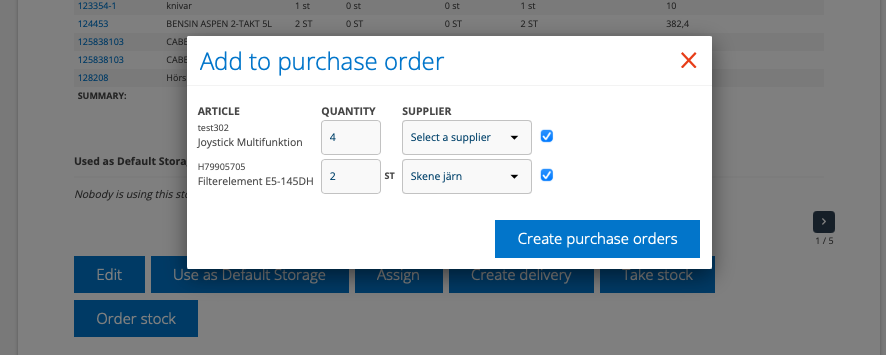
- Select the articles you want to order.
- The quantity you entered for the order articles is pre-filled. The quantity can be changed.
- If you have specified a main supplier on the article records, it is selected by default. Otherwise, select a supplier from the drop-down list. You can skip selecting a supplier and select a supplier later on the purchase order.
- Click Create purchase order. A purchase order is created per supplier. Items for which you have not selected a supplier are placed on their own purchase order.
- A popup informs you about the numbers the purchase orders have received.
- All purchase orders created in this way are listed under the respective storage..
Learn about Purchase order here.
Export a storage list
Do you want to download/export a list of a storage? Click on the storage you want to download and then click on this symbol. A xlsx-file or csv-file (depending on your Group settings) is created which you can then open in your spreadsheet program.