
Under the tab Storage items you can see and search among the articles in your storage.

By selecting the list view (the symbol to the right) you can select which categories to be shown in the list.

Click this symbol to select which categories you want to display in the list. Learn how to use and handle categories.
If you want to see more information about a storage item, click on the article. This will give you detailed information about which orders the article is reserved for, which orders the article is in, purchase orders and, if you have specified a reservation offset, which orders the article will be reserved for (Pending).
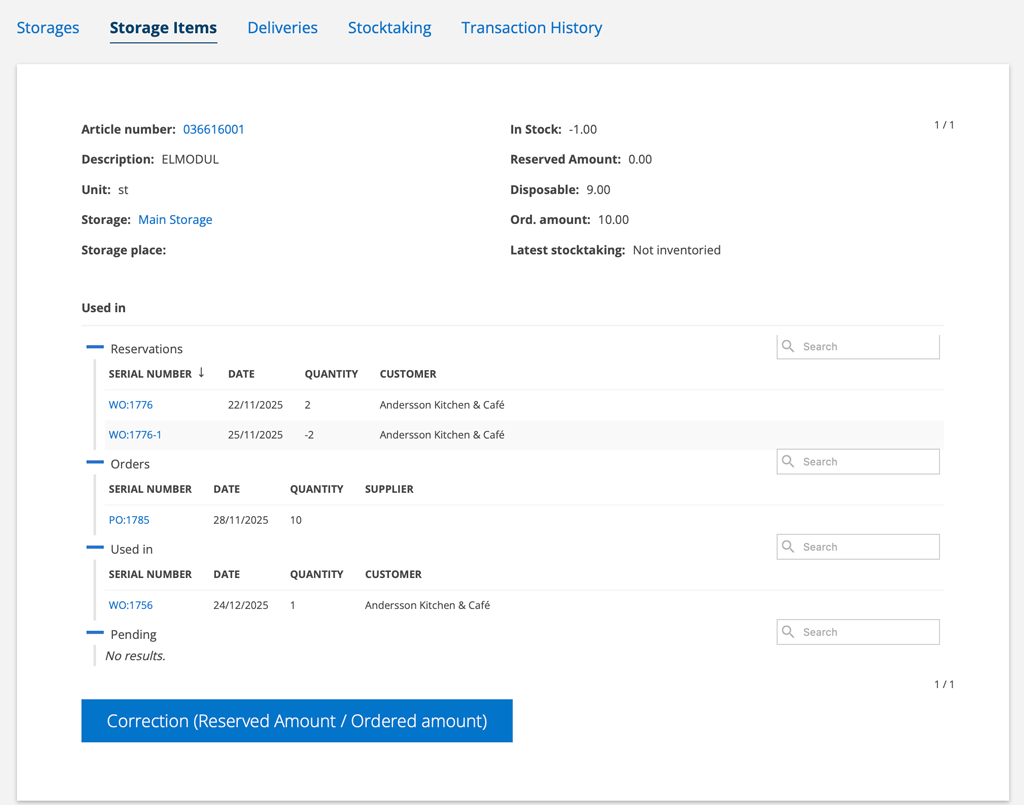
Storage items are updated continuously, but if you feel that the number is not correct (you may have just placed a purchase order that is not included), click the Correction button and the number will be updated.
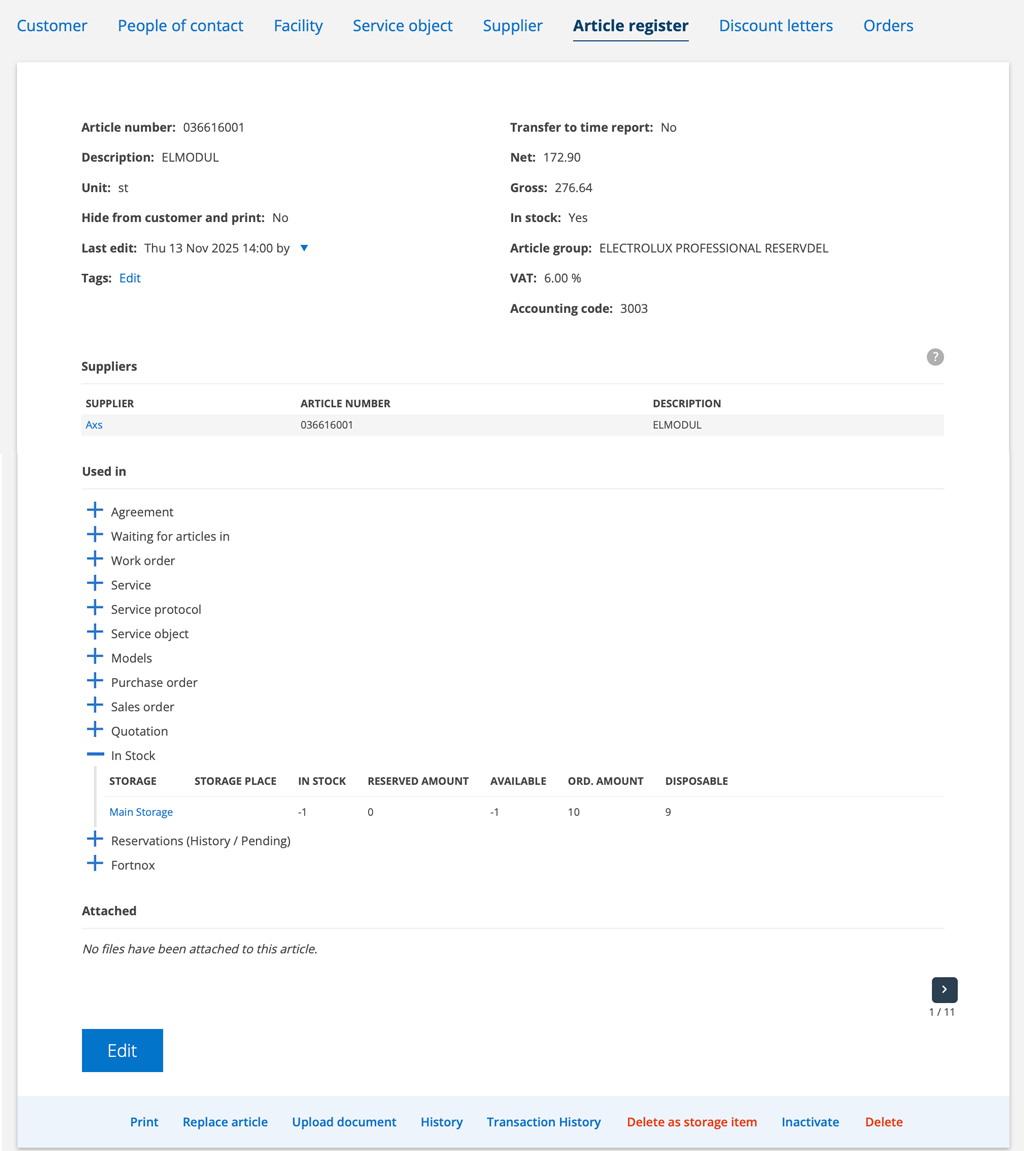
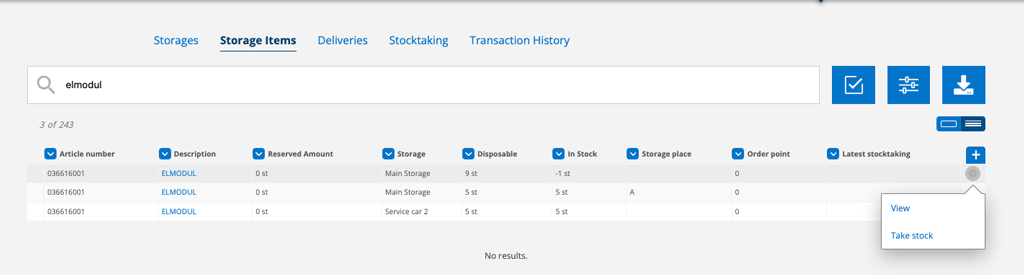
If you click on the article number when you are on an storage item (as in the image above), you will be taken to the article record in the Article Register. Under Used in – In stock you can see more inventory information about the article. Here you will find more history and transaction history about the article.
If you have the inventory function in Fortnox, click on View and the quantity, reserved quantity and available quantity in Fortnox will also be displayed.
If you want to remove an article as a storage item, you can do so on the storage item’s record or in the article register. Only articles and storage items that have not been used on any orders can be removed.
Regarding the date displayed:
Sales order = delivery date, if none is available a ? is displayed.
Work order = planned date
Service order = order date or service protocol date if available
Set storage place
Do this:
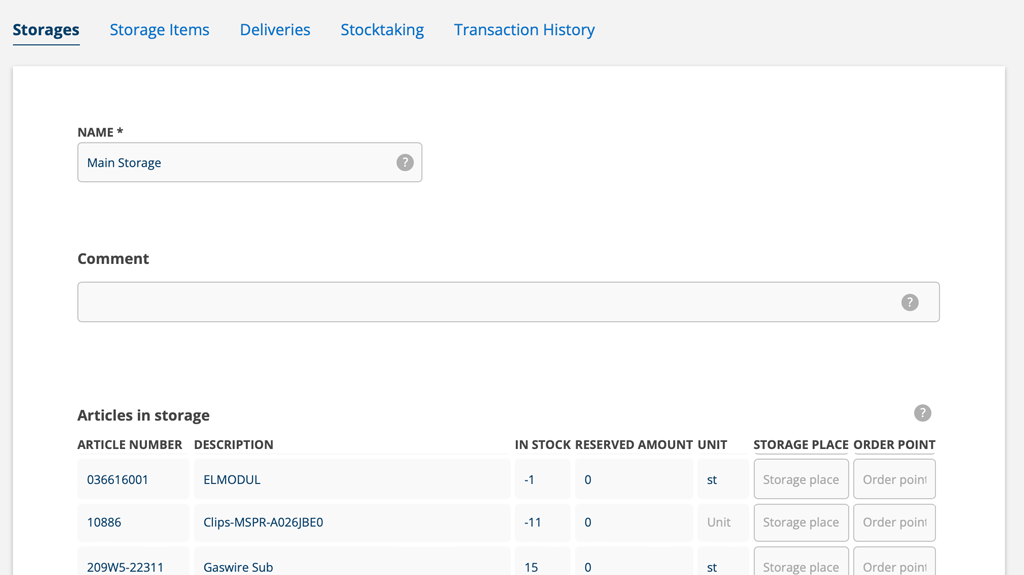
- Select a storage under Storage.
- Click Edit
- Locate the article and fill in the storage place
- Save
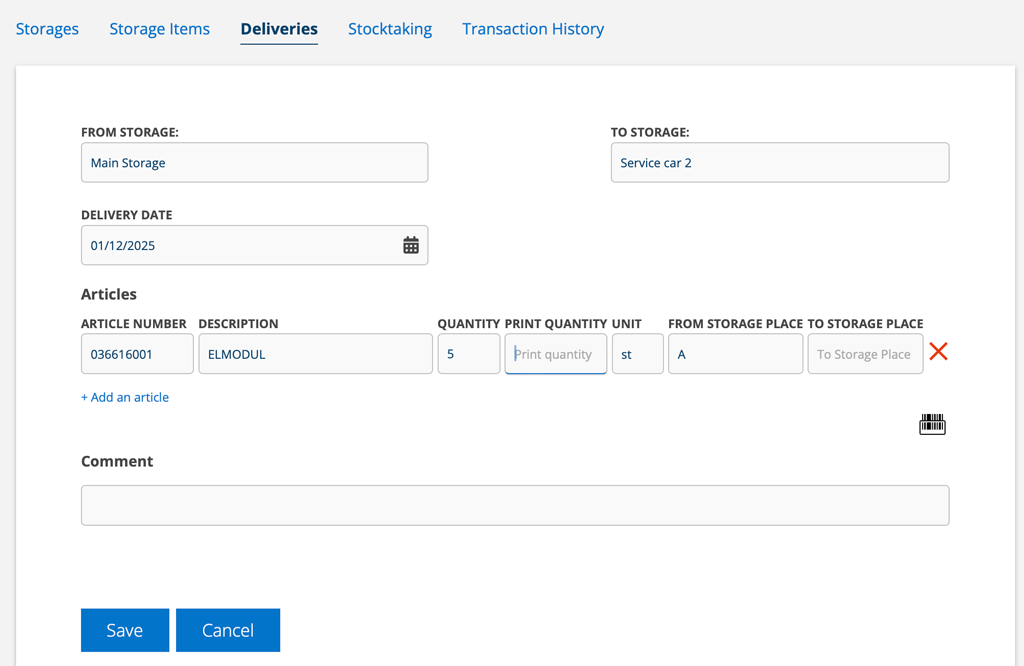
You can also specify the storage place when making an delivery (an internal storage movement). Learn more about Deliveries.
Do this:
- Click on Deliveries.
- Click on +.
- Choose from which storage to which storage. Choose the same storage – unless you are moving the article between different storages at the same time.
- Locate the article you want to specify a storage location for and a field will open where you can specify the storage location.
- Save and then Sign the delivery.
Inventory single article
If you want to take inventory of goods, you can select individual or multiple goods right here under Storage Items. Learn more in the article Inventory.
Change storage place
- Via Edit in the storage.
Go to the storage, click Edit. Find the article and change the storage location. In practice, you “rename” the storage place. If the article is in open orders, the name of the storage place is changed and the item is pulled from the new storage place. - Via inbound delivery.
Important to know: If you have open orders where the items have not yet been pulled, the items will be pulled from the old storage place as this is not updated automatically.
When is an article withdrawn from storage?
An article is reserved in the storage when it is added on a service protocol.
An article is taken out of storage when the order is signed.
Set Order Point
Set up a signal to alert you when it’s time to order more of an article in stock. When the value falls below the limit, the article will be marked red in the list view.
Do this:
- Select a storage
- Click Edit
- A field for Order point opens (see image 3). Enter a value.
- Save.
If there are articles that need to be ordered, you will find the Order Stock button at the bottom of the inventory list. Click it and a purchase order will be created with the articles. Learn more about order stock here.
Deliveries
Read about in- and outbound deliveries and moving articles between storages here.