
See also: Basic guide for technician
A work order is a job that should be performed, but does not count as a recurring service. Used in e.g. repairs and installations.
NOTE! There are a variety of settings to customise work orders to your company’s needs. Therefore, the documentation here is one (1) version of what it might look like and if you do not see features presented here it is due to the settings you have chosen. All setting options can be found in the Work Order Settings article Work order settings.
Create a Work order
A Work order can be created in several ways:
- From a customer card or facility by scrolling to the bottom and clicking Add. Customer and facility details are automatically added to the work order.
- By clicking the + symbol under Perform – Work Orders.
- In connection with a Fault Report by clicking Generate Work Order.
- After a service is performed from a service report if there are things that need to be addressed on the service item. Click Create Work Order at the bottom of the report.
When you create a work order based on a service protocol, the work order will receive the service protocol number + a digit. E.g. 518-1. - In the Planner.
- You can also create a new work order by duplicating an existing one. Click Duplicate at the bottom of the order.

When the work order is saved, the date of creation is displayed and (if you have selected the setting under Work order setting “Show latest changes”) in a drop-down list you will see the date and name when and by whom the order was changed.
Creating a list of work orders

First select if and how to filter your list by clicking the filter button.

Then click on this button. The list is created as a xlsx-file or csv-file depending on your groups Group settings.
Here we go through the different fields on a work order in the order they are when you create a work order.
The fields and functions you see depend on the settings you have selected, whether you create a new work order or perform the task in the work order. Read more about settings and permissions for work orders at this page.
Custom fields are those you create yourself. See Image 1 and the field named Possible.
Sub group
If you use the subgroups function, select which subgroup to link to the work order.
If you have added custom fields for a subgroup, these will be automatically added to the work order.
Planned
Enter the date when the work is planned to be performed.
Customer
Enter the customer’s name in the box. The search function (click on the magnifying glass) helps you to find the right existing customers. If the customer is not on the list, write the customer’s name. You will then be asked if you want to add the customer. Answer yes and the customer will be added automatically. If you want to directly fill in more information about the customer, click on + Add customer. A new tab in your browser opens where you can fill in all the information in your Customer Register. This field is mandatory i.e. you must enter a customer.
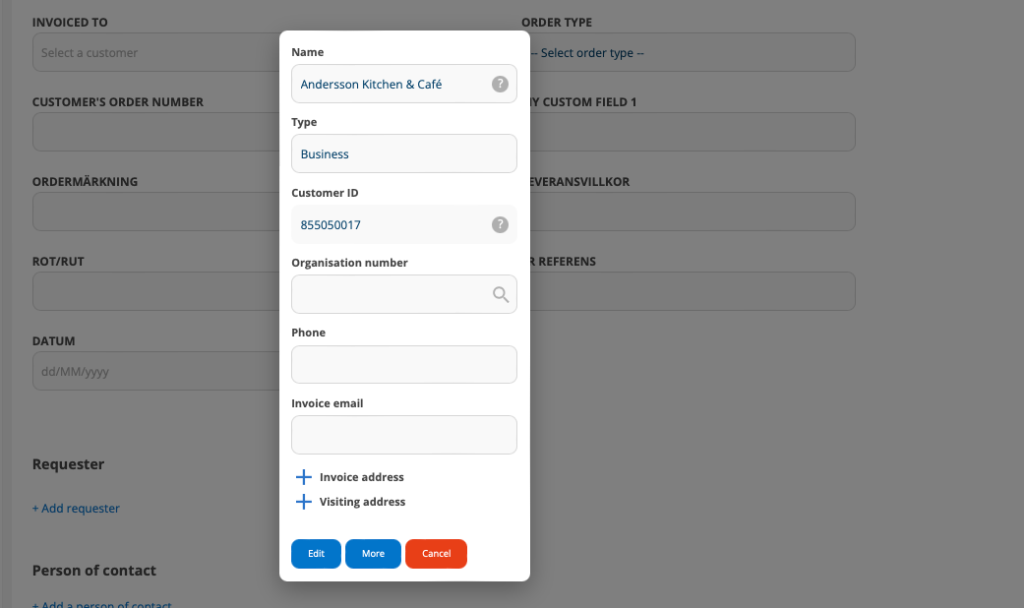
Check or change the customer’s details
When you have selected a customer, you can check the address etc. of the customer by clicking on the pen.
Edit the information and click Save.
Facility
Fill in the name of the facility. The search function (click on the magnifying glass) helps you to locate existing facilities.
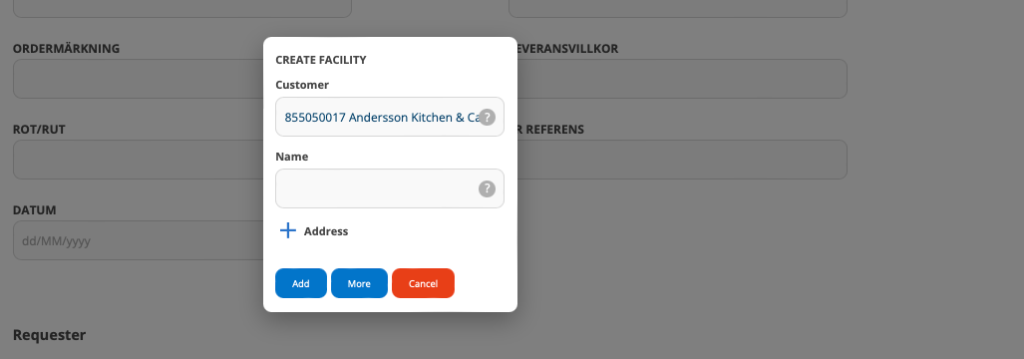
If the facility is not in the list, enter the name of the facility and it will be automatically saved in the Facility Register. If you want to fill in the address of the facility at the same time, click on + Add facility. A box will open where you can fill in the address. Click Add when done.
If you want to enter more information than the address of the facility, click directly on the More button and the facility will open in your Facility Register. (Opens in a new tab in your browser.) Fill in and save the information. You can now close that tab and return to the tab with your work order. If the invoice address differs from the address of the service object, a facility must be selected or added.
If there are articles linked to the facility, these will be added under Articles.
Possible Custom field
In a custom field, you decide what to ask for. For example, it could be a field called “SPECIAL INFORMATION”. Read more HERE. You can create any number of custom fields.
Possible Order Types
Select order type. If you have not entered any order types, the field will not be displayed.
Learn how to create order types here.
Customer order number
Fill in or edit if requested. If you have the customer’s order number specified at the facility or the customer, the order number will be retrieved from there.
Contact person/Requester
Here you can search for contact persons or add a new contact person. The information is saved so you can quickly search for it next time.
When you add a contact person here, it is saved on the facility, if there is no facility on the work order, the contact person is saved on the customer.
The same applies to the requester.
Invoiced to
Enter the information needed when a customer other than the one specified in the work order is to be invoiced.
Invoiced to other customer is displayed when in Group settings – Module settings – Work order settings you have selected the option: Show invoiced to. To make this setting, admin permissions are required.
If you have specified on the service object record that the service objekt is to be invoiced to another customer, that information is displayed in the Assignment field under the service object. If you have not set “Invoiced to” on the object, but on the facility, the information is retrieved from the facility.
Cost center
If further information regarding the cost center needs to be included on the invoice, it can be stated here. If you have a cost center specified at the facility or customer, the cost center will be retrieved from there.
Possible Custom status
Custom statuses are fields that are formulated and set by you, for example whether it should be mandatory to enter your own status.
This settings requires admin permission. Learn how in the article Work order settings.
ASSIGNMENTS
A work order can contain several assignments. An assignment contains a description, measures and articles. To add a new assignment, click the + Add Assignment button. An assignment is located in its own field with a blue background so that you can easily see the different parts of the assignment.
Duplicate assignment
You can also, after saving the work order, duplicate an assignment by clicking +Duplicate Assignment under the assignment you want to duplicate. To edit the duplicated assignment click Edit at the bottom of the work order. The Service object will not be added since there cannot be two tasks with the same object in one work order.

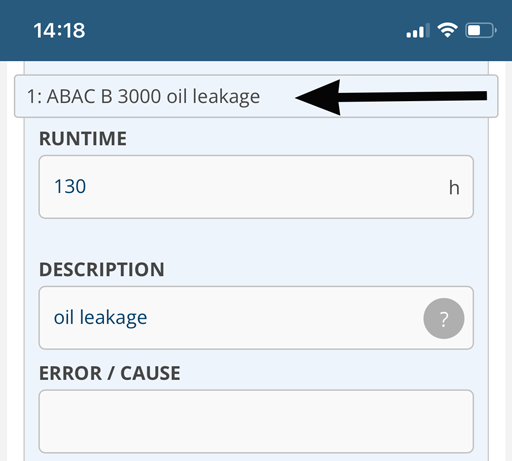
When working in the mobile with a work order, you will find a box at the top of the mobile that indicates which assignment is displayed (the service object and the description of the assignment). If you click on the box, you will get to the top of that assignment.
When you duplicate a work order, all uploaded images and documents are copied to the new order.
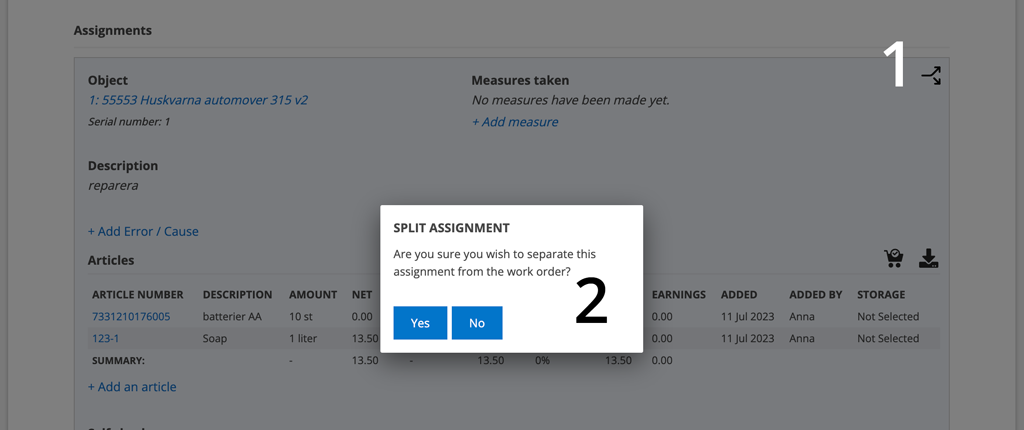
Split assignment
If you want to separate an assignment from a work order, for example if you did not finish one assignment but want to invoice the others, click on this symbol in the upper right corner of the assignment you want to separate from the order. You will be asked for confirmation (2) and when you click yes, a new work order will be created for this assignment.
 alt Shift + Z
QR

If you see this symbol, you can use the mobile phone’s camera to read the QR code on service objects. Then all information entered on the service object is filled in automatically.
Service object
Service objects entered on the customer in the Customer register appear when you place the cursor in the box.
If you need to change the information about the object, click on the pen to the right of the name of the object. A popup will open where you can make your changes. Here you can also upload images and documents.
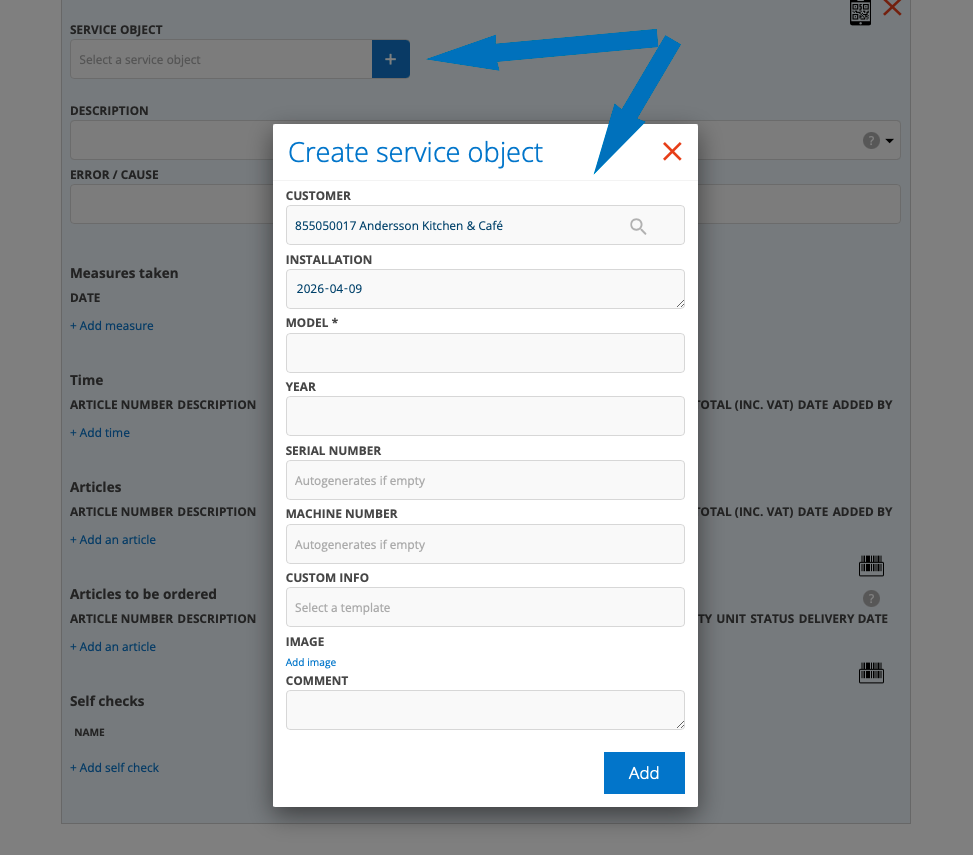
If the service object is not in the list, you can add it by clicking on the + symbol and a popup will open (see image below). The service object is then added, in addition to the work order, to your register of service objects.
The “Add field” gives you the opportunity to enter the basic information about the object. If you need to complete the information (mark on the map, enter a contact person, connect to an agreement, etc.), do so later in the register.
Description
The description is displayed in the list of work orders to support identification.
Error/Cause
In the case of an error report, enter the error here. Fault/error can be added without opening (Edit) the order.
Measures
Under measures, list what was done and the date of the action.
Click Edit on the order if you want to add images under actions.

Time
If you have chosen to separate time from articles, there are fields for this here. This is a setting made with an admin account.
Articles
Enter articles needed for the assignment and used articles. You can see who added the articles and the price for them if you have that permission.
The article search function helps you find the right one. You see recently used articles as well as the articles of the selected service article. This applies to all article search fields. Prices are retrieved from the article register.


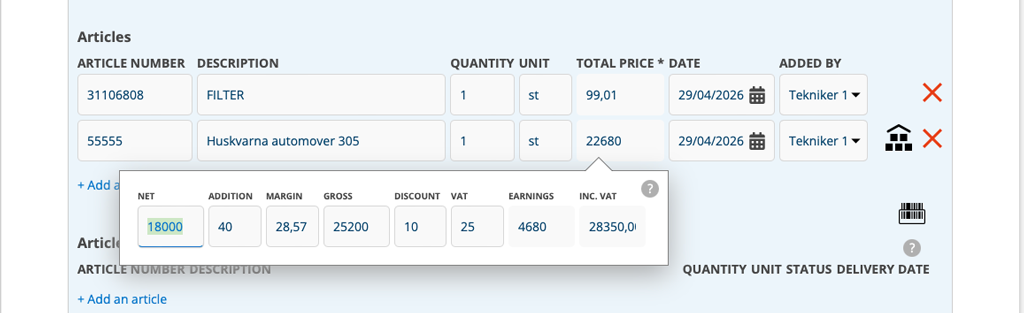
If you use the storage function and you have selected a main storage, the article will automatically be pulled from the main storage. If you do not want to take from the main storage, click on the “house” to select another or no storage where the article is located.
If you have selected a default storage where the article is included, the article will automatically be pulled from your default storage and the “star” will be displayed. If you want to choose another storage, click on the “star”.
Viewing price, net / gross and discount is a setting of user permission made with an admin account.


The barcode symbol indicates that you can use the phone’s camera / barcode scanner to read a barcode to add articles.
If you have entered a facility and there are articles on it, the articles are automatically added here. Click on the red cross if they are to be removed.
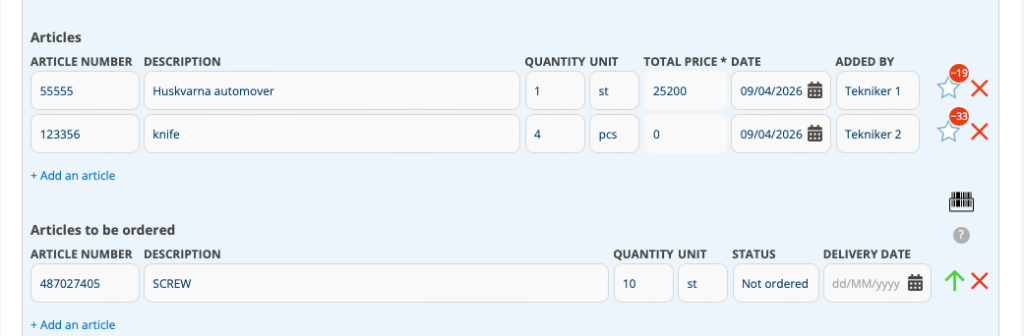
Articles to be ordered
Click + Add an Article to add articles that need to be ordered to complete the order. Change the status of the article if necessary. For example, if you have called the supplier and ordered the item, set the status to Ordered.
If you have entered an email address in the Work Order Settings to which all orders should be sent, an email will be sent when you save the order. The email will be titled Articles to order at AO:xxx and will contain the articles, a link to the order, and the name of the person who placed the articles for order.

If you don’t use the automatic function described above click this symbol to add the articles to an already existing purchase order or create a new one.

You can click on this symbol to save a list of the articles.
When the article has then arrived and it is time to invoice, you need to convert the ordered article to a used article, i.e. move it from the heading Articles to be ordered to Articles.
Do this:
- Open the order by clicking Edit.
- Click on the green arrow to the right of the article and the article will be moved up and listed as used.
If you do not do this and click on Ready for invoicing, you will receive a message that there are articles to be ordered on the order. Ordered articles cannot be added to the invoice, regardless of status (e.g. “delivered”).
Self check
Here you add any self-checks. You create a self-check under the menu Function> Self-check. See more under Creating templates.
If you have chosen to set a mandatory self-check, it will be added automatically. See more here.
Other articles
Other articles may be those that do not directly belong to the assignment. It is a separation that can be used if you want to differentiate in the statistics.
If you have chosen to separate time / articles, Time and Articles will appear both under Assignment and under Other articles. This is a setting made in Group settings – Edit article settings – “Separate time report articles”
Total
Time articles and articles are summarized here.
Bookings
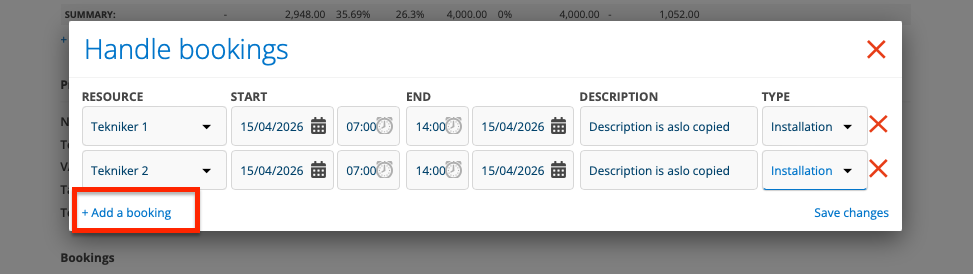
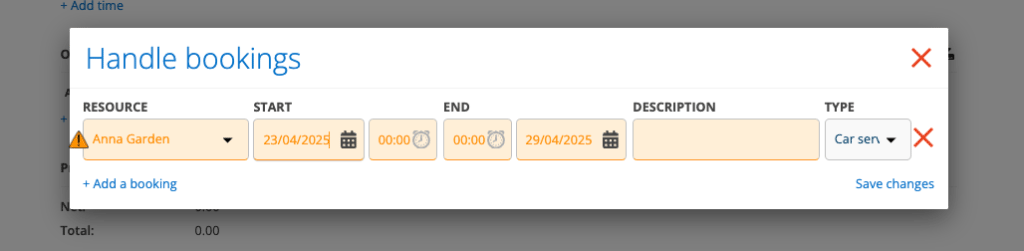
Click Handle bookings and then click +Add a booking.
Select who (resource) will perform the assignment and select a day and time. The resource’s working hours will be filled in automatically – if you have set these for the user’s User Settings.
If multiple resources are to be booked on the same order, click +Add a booking again. The first booking is copied. Select another resource. The times and all booking details are copied.
A warning triangle appears if you try to book a resource that is already booked on another order
When you save a booking, you will be asked if you want to send a booking confirmation to the contact person for the order, the same applies when you change a booking. Date of when booking confirmation has been sent is shown in the order and if the booking has changed after confirmation has been sent.
The booking confirmation contains the name of the booked technician, the date and the order number. If the contact person for the order is a customer user with their own login, there is also a link to the order. If you have made changes to the booking, you can send a new booking confirmation by clicking Send booking confirmation. You can choose to send as e-mail and/or SMS.
If you want to create your own text in the booking confirmation, read more about it in the article Email/SMS.
Comments
Here you can add additional information. By default, the comments are not displayed to the customer. If you want the customer to see the comments, you can change it when you have saved the order. Learn about comments here.

This symbol with a number indicates that there are comments in a work order. The symbol appears in the lists of work orders (but not if you have selected the list mode).
SAVE
When you have filled in all the information for the work order, click on Save. When you save, you also see if there is an agreement linked to the service object to which the order applies.
Sign
To approve a work order, a signature is required. This signature can either be filled in by the responsible technician, a customer or both. If work on the work order is performed on several different occasions, the work order is partially signed.
If both the technician and the customer are to sign, you need to have activated that setting in Work order settings – Signature settings. The technician then signs first and then the customer.
Even if you have signed the order, you can still add lines (articles, measures) to work orders but not change in the already signed lines. Click Edit to make changes on the order.
A name clarification is automatically located for the name you entered under your account settings. If you ask another user or customer to sign the work order, enter a new name clarification in the field.
Signatures can be cleared if the user has that permission. Admin account is required to set this permission.
Once you have signed the order, you can (depending on what permissions you have, mark it as Ready for invoicing and / or Send order to accounting software. It is now also possible to Generate invoice.
Set ready (on your part of the order)
If you see the button Set ready do this:
- Start by clicking Set ready.
- The signing box opens and you sign your work.
- The last technician to Set ready also needs to sign the entire order.

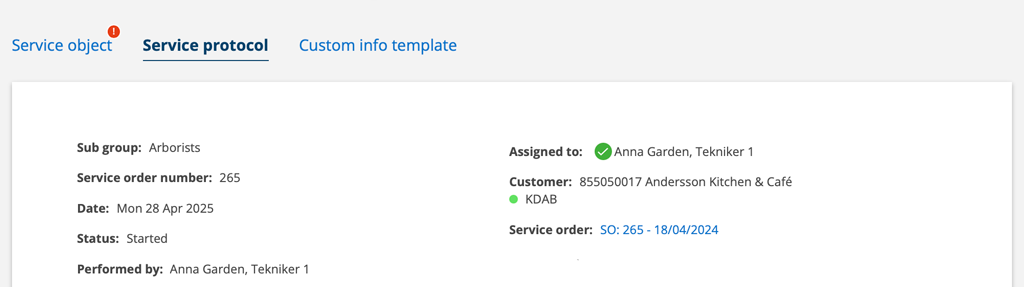
Under Assigned, you will now see a mark that you have marked your part of the work complete and signed it.
Integration reference
When a work order is sent to accounting software (applies to Fortnox and Visma), the Integration Reference field is added. The number is the reference number to the corresponding order in the financial system. Click on the number and the order confirmation will be displayed.
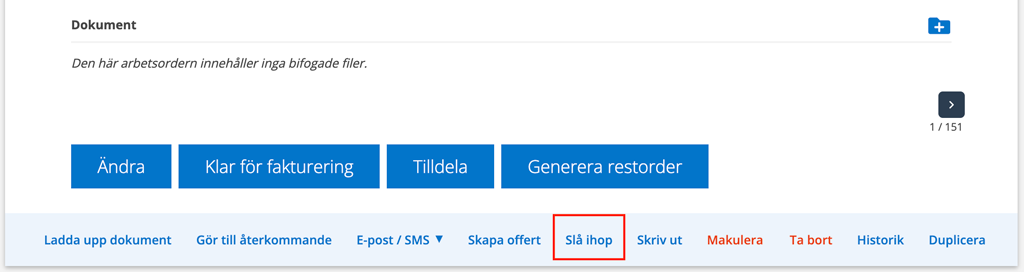
More options – links at the bottom on the order
You will find these buttons at the bottom of an order. Which ones you see depends on your rights in the system and what stage you are at in your work with the order.
Edit, Assign, Upload document, Email protocol, Create quote, Merge, Cancel, Delete, Set to recurring, Duplicate, Show invoice (only Fortnox-integrations), History
Concerning Delete and Cancel
If you choose to delete an order, it will disappear completely, including the history of the order. If you choose Cancel, the history remains and is marked with a large red cross in the list of work orders and in To do.

If you need to remove multiple work orders click on the collection symbol. Select the orders and click Delete.
Concerning Upload Document
To be able to delete documents, you need a special permission that an administrator can grant you. If you need to rename a document, do so locally on your device, reload the document, and delete the old one. It is not possible to rename an already uploaded document.
If you use a mobile phone to take photos as attached documents, the photo will be sent directly to the work order. They are not saved on your mobile.
Concering Duplicate
Duplicate the entire work order with all the details to quickly create a new AO. All images and documents are also copied.
The new WO is not in any way linked to the one you duplicated and can be edited.
You can also duplicate the assignment. See image under Assignment.
Regarding Show invoice
Only with Fortnox integration.
Regarding History
Under History, you see all changes made to a work order.
Regarding sending email/SMS
Under this button there are several possibilities to notify the customer – booking confirmation, self-checks, minutes… Read more in the article Email/SMS.
If you have selected the Email setting “Include order attachments when sending emails”, attached files will also be sent.
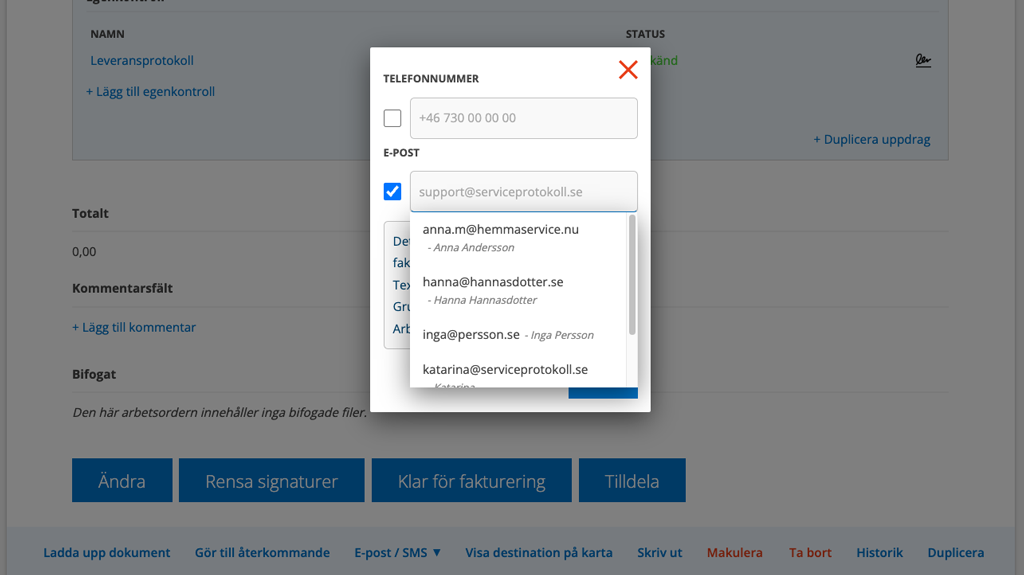
When you select Send message, contact persons from the order, the customer, the facility and “Invoiced to (other customer)” are listed. E-mail address and name appear in a list when you place the cursor in the field for e-mail.
Generate backorder or credit
When you have signed and marked the order as Ready for invoicing,you can quickly create a back order if, for example, something needs to be fixed that was included in the order but was not completed or if the customer returns because the error persists, by clicking on Generate back order. The backorder includes all information about the customer, assignments and objects. The order gets the same number supplemented by a -1, example 421-1. Just supplement with measures and articles.
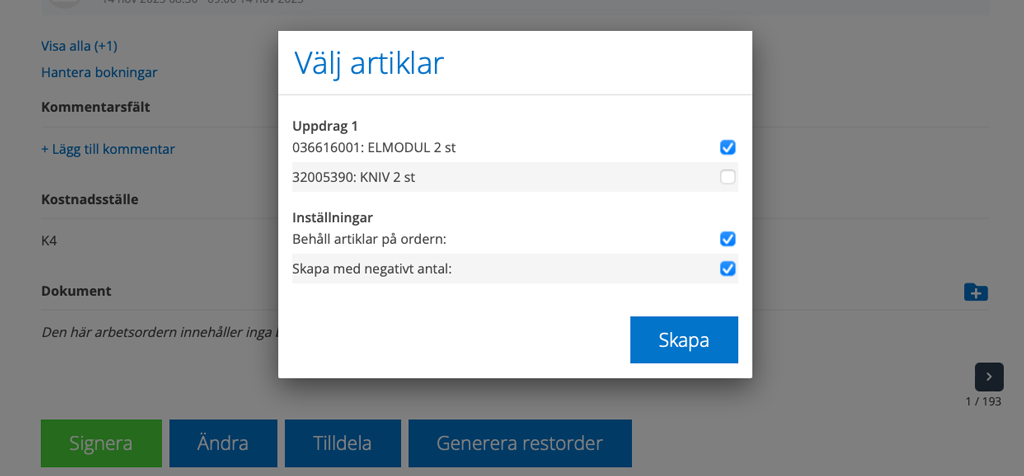
If you want all the articles on the work order to remain on the original order, select Keep articles on order in the popup.
Images and documents are linked from the original order to the new order. Therefore, if you delete an image or document on the original order, it will also disappear from the backorder.
If you are going to create a credit order, you can select Create with negative quantity and the quantity will be entered with a minus sign (- 1).
Note that if you want to credit time articles from the order and the time should still be included on the technician’s time report, you need to select the Keep articles on order setting, otherwise these will be removed from the technician’s time report as well.
To search for an order and its backorder, add a semicolon; after the order number, ex 421;
Create quote
Creates a quote with information from work orders – customer, facility, service object, articles, etc. Your name is added as “Our reference”.
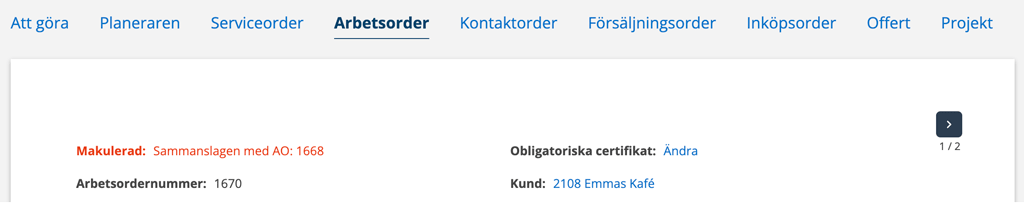
Merge
Only those with admin permissions can see and use the Merge function.
Do this:
- Click on the order you want to merge (order number 1) with another order.
- Scroll to the bottom of the order.
- Click Merge.
- In the popup that opens, search for the order you want to merge with (order number 2).
- Select and click on the order in the popup.
- Now the work orders are merged.
- The order you started with (order number 1) is now listed as Cancelled along with information about which work order it was merged with. You can then find the work order by filtering on Cancelled.
- Order number two includes the description of both orders with a / in between, as well as all added articles and self-checks. Bookings are not included.
Do you regret the merger?
Find order number 1 – you can find it by selecting “Cancelled” in the search filter. Scroll to the bottom of the order. Click Uncancel. Note that this does not completely restore order number 2 to its original order, so review it and remove information from order number 1.
Restore
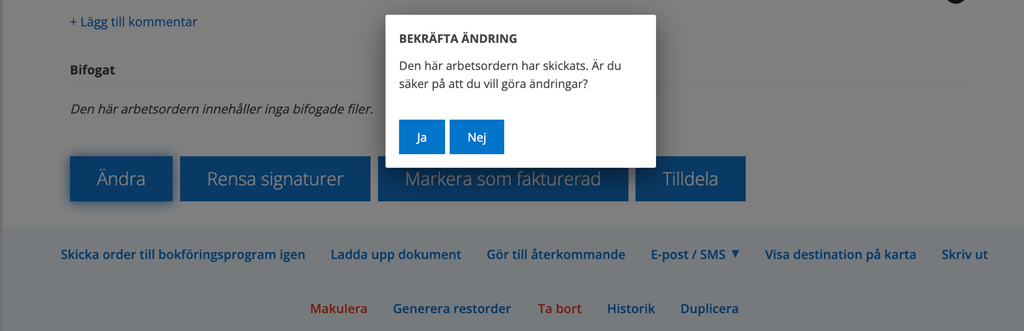
If something happens to be wrong with the order and this is discovered after it has been invoiced, the order can be restored to correct the error. This should be done by an admin and only in case of emergency and things that do not affect invoicing.
Click Restore, then Edit. You will get a warning – answer Yes, make the changes and then save.
When you are done, click on Ready for invoicing, choose No when the system asks if the order should be sent for invoicing again and finally Mark as invoiced.
Admin permissions are required to restore.