To work with Serviceprotocol.com, you need:
- Mobile phone, tablet or computer with internet access
- Account at Service protocol (an e-mail address)
If you do not have access to an account, or do not know if you have an account, please contact your supervisor.
Chapter 1: Log in/get started
- Go to serviceprotocol.com
- Click on Sign in
- Enter your email under Username
- Enter your password (when the person responsible for you posts your e-mail as a user, you will immediately receive a link via e-mail where you choose a password)
- Press Log in
Chapter 2: The To-Do List and Display Settings
- The menu shows where you are by a darker blue marker. Perform and To Do is usually the home page you encounter when you log in.

- Check your display settings by pressing the Advanced Settings button. See picture below.

You can specify which date range you want to be displayed. As a rule, you will work with the following display settings:
Assigned to me – Shows only orders that you are assigned to
Not ready for invoicing – Displays all orders that are not ready for invoicing
Not assigned – If you have orders that everyone can take on their own initiative
The Save Settings button allows you to have your selected settings as either:
Favorite – The settings get a “shortcut” that you name yourself.
Default – Every time you go to “To do” you will see all orders with these settings.
Under the search box, you see which filters you have selected and how many orders your search returned.
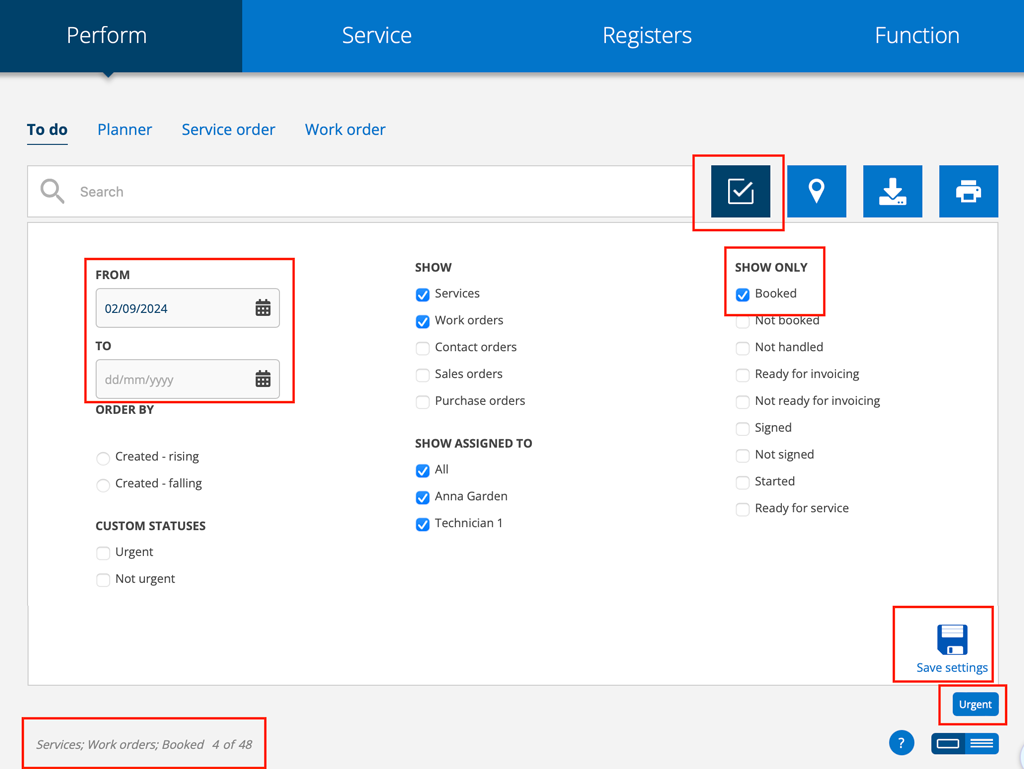
You can also set a from-to date so you don’t have to see all the orders. Once you’ve made your selection, click the small symbol at the bottom of the open box.
Chapter 3: Status and order type
Each order receives one of the following symbols. The symbol shows if the order is a:


Work Order – One-off tasks, such as a repair or installation.
Service order – Recurring assignments on (the same) service object, for example a service.
The color shows whether the order is:

Future date – The date of the order’s planned action has not yet been reached.

Started – A technician has entered an service object or action into the order.

Missed order – Order has not been started even though the planned date has passed.

Completed (performed) order – Order complete, possibly ready for invoicing.

Invoiced – Order exported to financial system for invoicing.
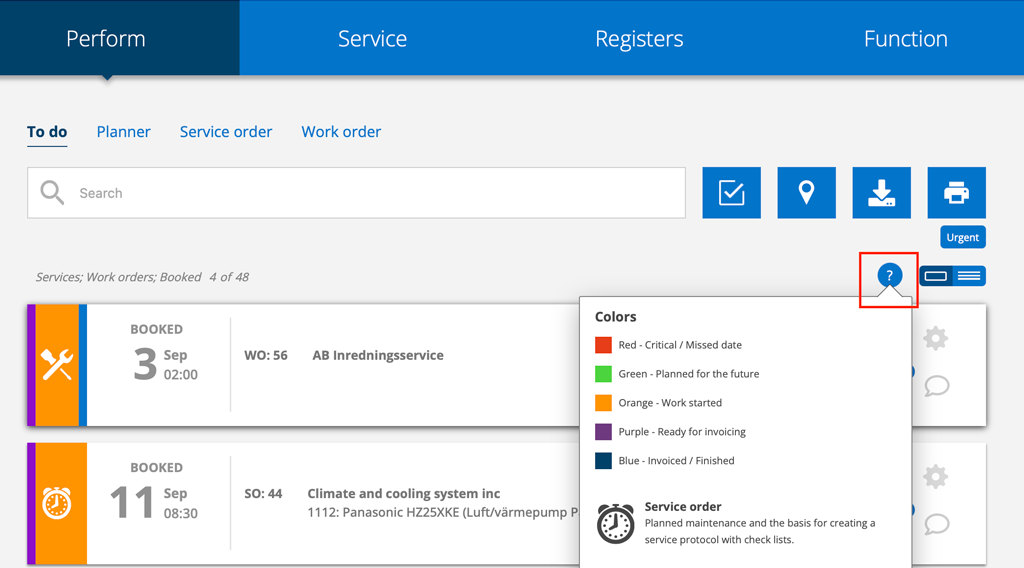
Each order in the list also includes the following information:
- Booking date
- Customer name
- Facility
- Service object
- Status/description of the assignment
And the following symbols:


Assigned – How many technicians are assigned to the order? Click on the symbol to see which ones.
Comment – Click to read existing comments or to add a new one. You choose yourself whether the comment should then be read by the customer.
.
Gear – Quick access to change, among other things, who the order is assigned to.
Learn more about colors and symbols.
Chapter 4: To Perform a work order
By clicking on a work order in the To Do list, you are taken to that order.
The view changes and you will see the following information:
- Work order number
- Assigned to (name)
- Customer
- Facility
Below this you can also see:
- Address
- Person of contact
The task for the work order may include some or all of the following details.
- Task:
- The name of the object
- Description
- Error/Cause (may be a hidden field depending on the settings)
- Measures taken
- Articles
Start performing the work order
The work order is completed by filling in the measures taken and the articles used during the work.
A self check may be added on the work order. This means you may need to perform a risk analysis, safety check, or another type of inspection before the work can begin. The self checks might be set as a mandatory step that requires completion before you can proceed with the next step.
Answer the self checks questions, provide the required information, and sign the self check.
There are two ways to complete a work order – through fast add articles (most common) or by clicking Edit.
Option 1 – Fast add
Complete the task by clicking + Add…
- Measures taken. At least one must be added.

- Articles

- Any comments

Option 2 – By clicking on Edit
Click Edit at the bottom of the page.

Click on + Add… under measures, articles and comments to add the information.
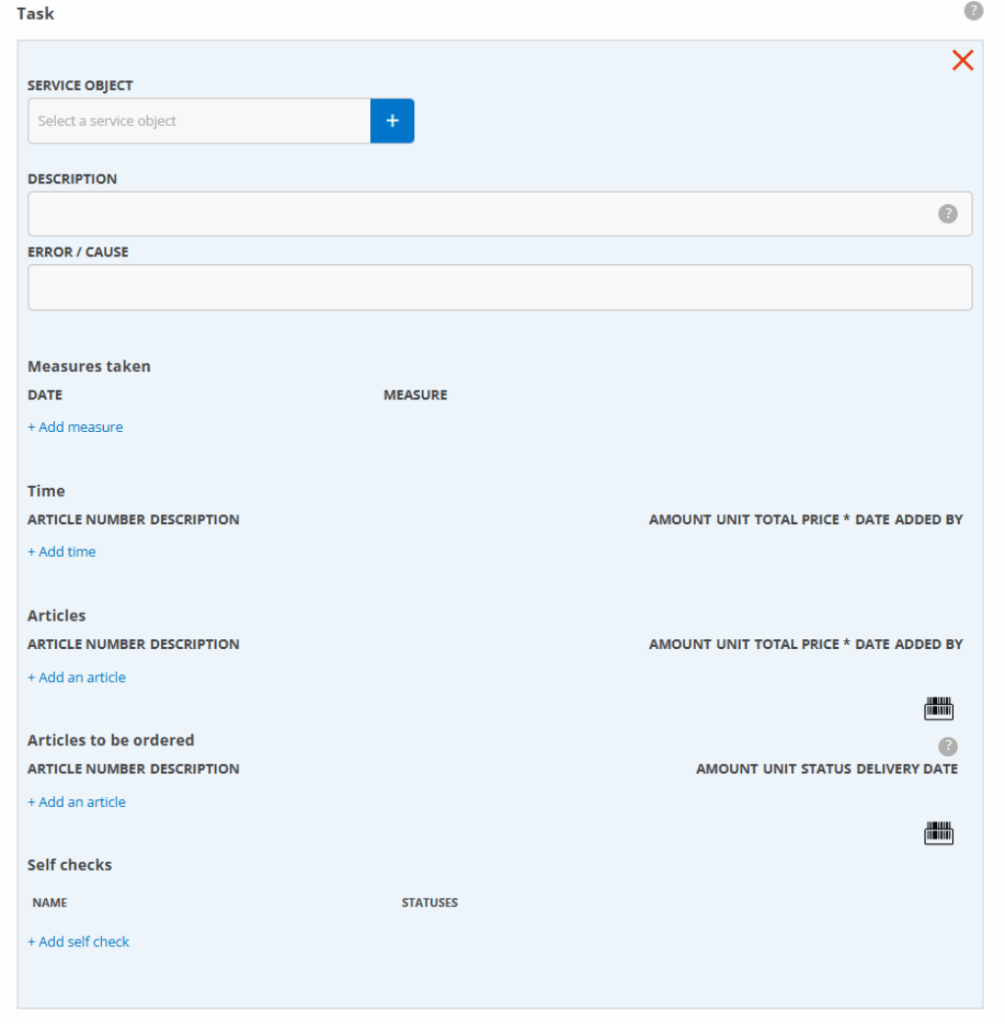
When you have completed your work order and entered all the articles, you press Sign at the bottom of the page.

Sign.
Should a customer also sign? Ask the customer to sign and fill in the name under the customer’s signature.
The order now has status Performed and is awaiting supervisors review before invoicing. If you see the button Ready for invoicing, click it.
Chapter 5: To Perform a service
By clicking on a service order in the To Do list it will open.
The view changes and you will see the following information:
- Service order number
- Status
- Planned (date when the order is planned to be performed)
- Assigned to (name)
- Customer
- Facility
Below this you can also see:
- Address
- Service object
The service object is described with some or all of the following information:
- The name of the object
- Machine number
- Serial number
- Type of service
- Parts (to be used on this type of service)
At the bottom, there are options to upload documents or view objects on a map.
Start to perform the service
If there are 10 or more service objects on the order, the objects are “collated” and you click on the + symbol to open each service object.


Press the button Perform service at the bottom of the page
The service order now generates a service protocol with service components to work over , which must then be signed.
Perform the service components according to the instructions.
Depending on the setup, each component may include different response options. Some also require a comment or a value.
If you need to add articles or time you click on + Add a part.
If applicable, parts and time separated, in which case there is a specific button for + Add time.

You can choose to save changes if you are unable to complete the service and wish to continue the next day or at another time.
To continue with the service order, click Continue.

When you have completed your service and entered all the parts, it is time to press Sign at the bottom of the page.
If you have chosen to have the customer sign as well, let the customer sign och fill in the customer name in the signature name field. Then click Save changes.
The order now has the status Performed and is awaiting review by the supervisor before invoicing.
If you see the button Ready for invoicing you click on it.
Learn more about creating a service protocol.
Chapter 6: Time report
In the top menu you will find the Function button. Click on it and then choose the menu option Time report.
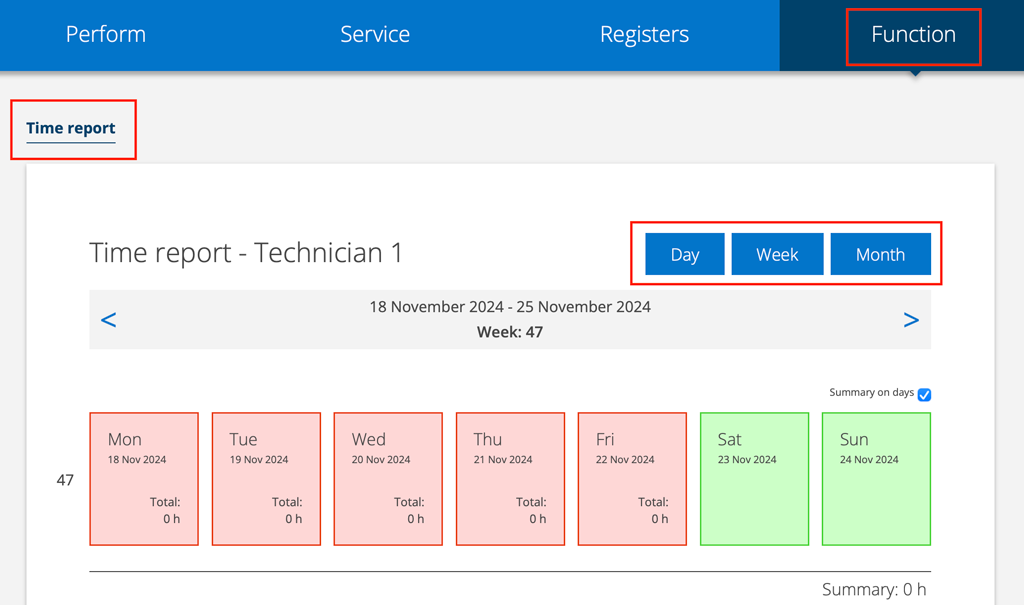
To change between views you can use the buttons Day, Week, Month.
Select the current day, fill in the description, time, and type according to the supervisor’s instructions.
If you have entered your work hours on your orders, the time is already filled in.
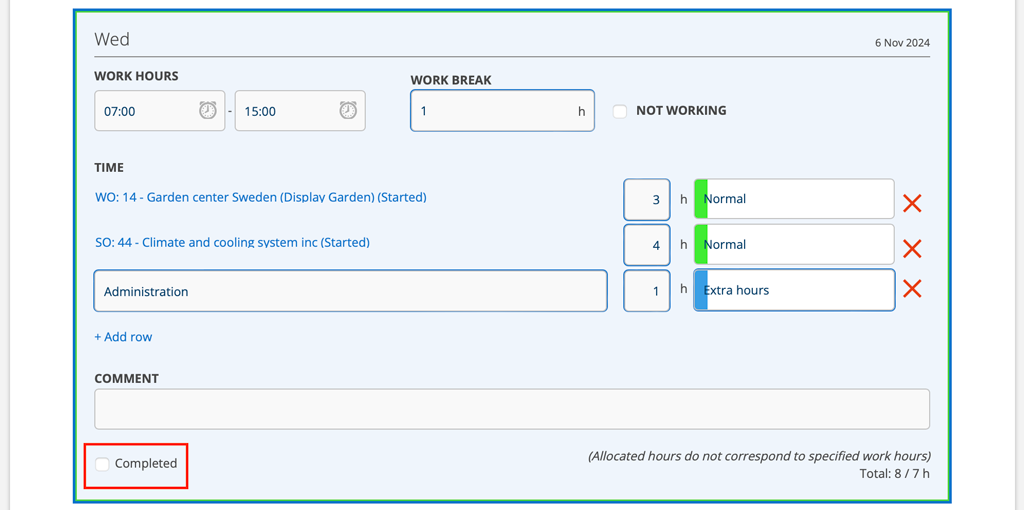
If you have entered your work hours on your orders, the time is already filled in.
If you are not completely finished, click Save at the bottom of the page. You can return to the day later to complete it. When you are fully finished, press Completed and then Save at the bottom of the page. After this you will no longer be able to make changes on that day.
You can see that you have marked completed by a ring with a checkmark appearing.
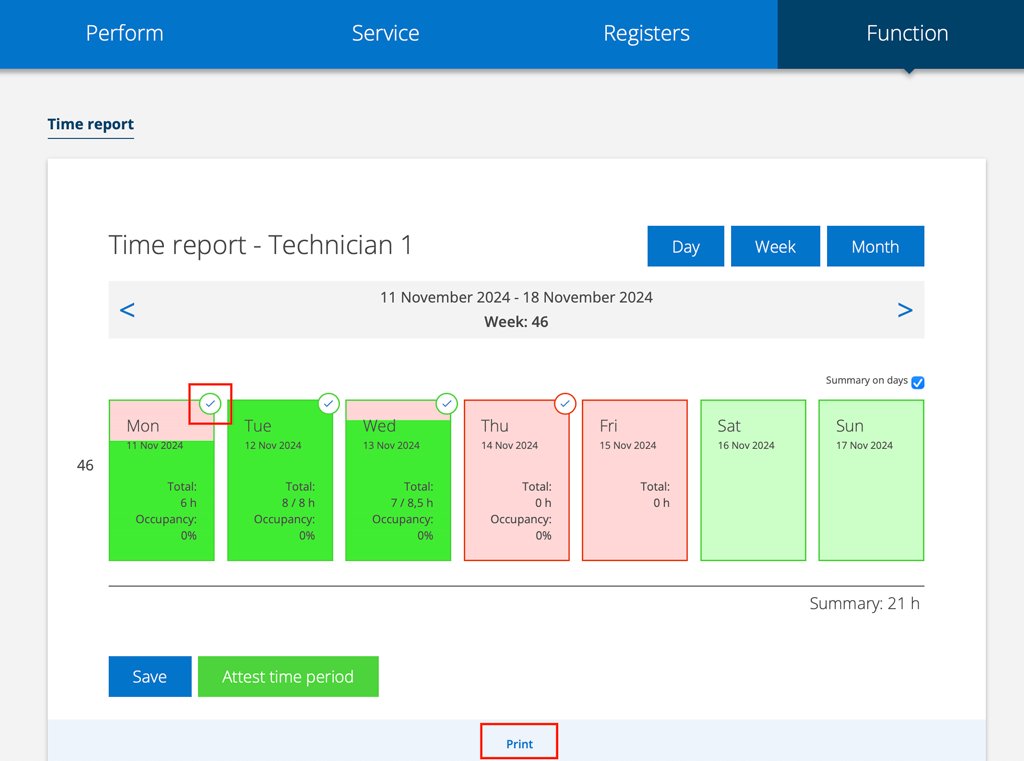
To get a summary of your hours for the selected period, click on the Print button at the bottom.
Everything you have reported is summarized here, divided into:
- Chronological order
- Summary by type
Explanation: Customer, Facility and Service object
- Customer
The customer is the foundation of the system. The “customer card” collects all the facilities and objects that belong to this customer. - Facility
Used to manage the customer’s various units. Most often, it is to the facility you go to perform the service, but the facility can also be fictitious, i.e. not a geographical location. - Service object
Service object is the object on which you perform service. Each service object receives a unique recognition factor, such as a serial number.

