
A customer is what binds the service system together and contains everything from facilities and service objects to orders and service protocols.
The customer contains a name and a unique customer number. The customer number is used for connection with accounting software and to be able to easily distinguish customers. To link customers from this system to others it’s recommended that you use the same number here as in those systems. The customer number can only be changed afterwards by the administrator.
To upload an existing customer register, see the page Upload registers.
Search customer

In the search field you can search for customers by name, contact person and email address. By clicking on the “tick” after the search field you can set different search filters. You can save your filter by clicking Save filter at the bottom right.

The symbol with the three “sliders” is called the collection function. When you click on it, you can change settings for multiple customers at the same time. Feel free to search/filter before clicking on the collection function to narrow down the selection.

By selecting the detailed list view (the three lines), you can choose how the list should be sorted. Click and select which Categories you want in your list.
Add a customer

Press the button with the + sign to the right of the search box.
You can also add a customer directly to an order by clicking the + Create customer link under the customer search field. A popup will open where you fill in the customer details. The customer will be saved in the customer register.
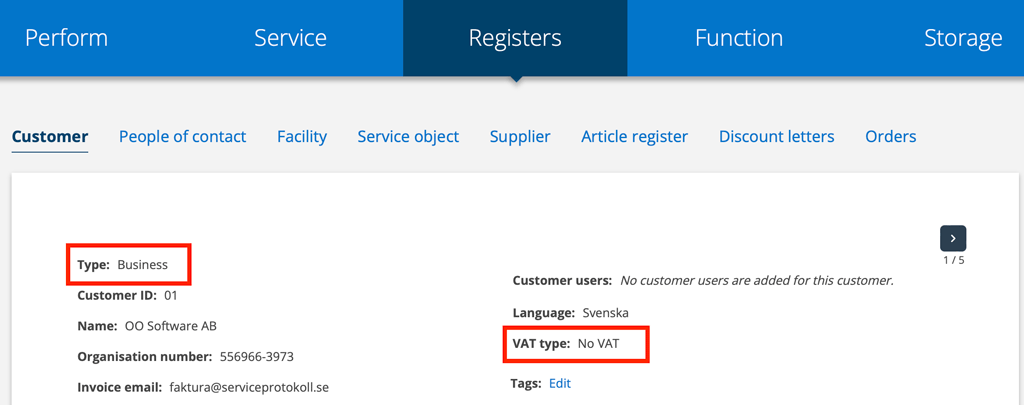
Business or Private?
By default, “Company” is selected when you add a new customer.
If you select “Private”, the organizational unit number field will change to personal identity number and fields for tax reduction and co-applicants will open further down on the customer card.
If you have integration with Fortnox and have selected “sync of updated customers”, the personal identification number is registered in Fortnox and the customer is set as Private there as well and vice versa.
Organisation number/Personal identification number
Fill in the organisation number/personal identification number. If it is an organisation number, you can click on the search symbol (magnifying glass) to retrieve the name and address.
VAT or No VAT?
If a corporate ID is entered, VAT will not be displayed on orders or prints by default. If no corporate ID is entered, VAT will be displayed on orders and prints.
Requirement: that the article has VAT stated.
If you want to be able to change this, there is an option in Customer Settings to “Show VAT type” (See image 1). If you activate this function, you can specify whether the customer’s orders etc. should be entered with VAT or not. If you select “Normal VAT”, VAT will always be displayed – even if a corporate registration number is entered.
Unique VAT on Customer
If you want to specify a specific VAT for a customer, do this:
- Select VAT type – “Custom VAT”.
- The VAT field is activated. Fill in the VAT that should apply to this customer (you do not need to enter the %, just a digit)
Conditions: The customer setting “Show VAT type” is required. Admin permission are required to activate the setting.
Note: If you want to be able to change VAT on an individual article, you also need the Article setting “Use VAT per article row”.
Discount letter
Search and select any discount letters. Put the cursor in the field and all entered discount letters will be listed.
Learn more about Discount letter.
Language
If you have selected “Show language” in Customer settings, you can choose which language the customer receives SMS, e-mail messages and protocols in. This applies to the system’s texts and not to those you have created, such as service points or comments you have entered. Here you can see which languages are offered.
Customer’s order number
Here you enter the customer’s order number. When you create orders from the customer, the customer’s order number is included.
Custom fields
On customer card you can add custom fields. earn more about custom fields here.
Comments
Comments you write in the comments field are not displayed to a logged-in customer (customer user) or on printouts such as protocols.
The comment appears under the customer’s name on orders if you have the Group Setting – Show Customer Comment on Order. This setting applies to all types of orders. It also appears on facilities and service objects linked to the customer.
Customer articles
If you have selected “Show service articles” and/or “Show work order articles” in the Customer Settings – View Settings, you will see the headings Service articles and Work order articles. Here you can add articless that will be added automatically when the customer is selected on a service or work order. For example, a fixed cost for travel can be added as agreed with the customer. This way, technicians on site do not need to keep track of what should be entered for the specific customer.
When you create an order, you will be asked if you want to load the articles onto the order.
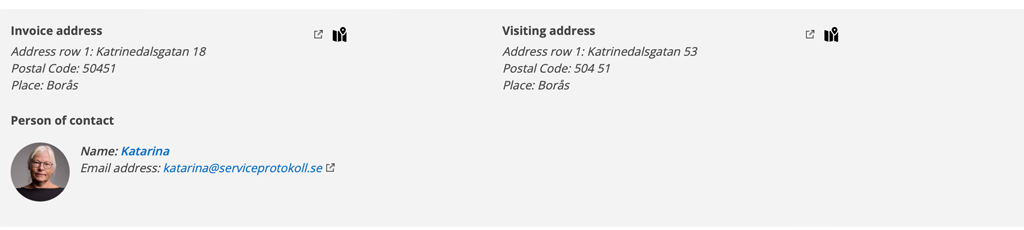
Addresses
The customer has support for three different addresses; Invoice Address, Visiting Address and E-mail Address. To add the latter two, use the “+ Add visiting address” and “+ Add mail address” buttons.
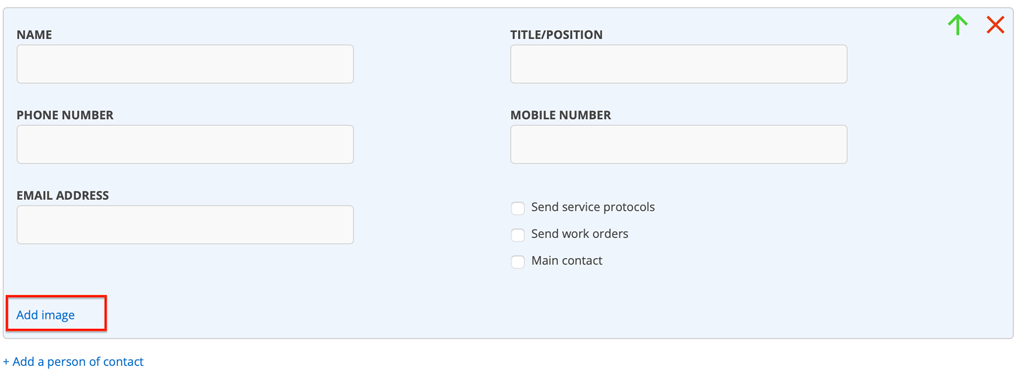
Persons of contact
The customer can have multiple contact persons and you can add these by pressing the “+ Add contact person” button. When you add a contact person, you can choose to select “Send service protocol” and “Send work order”. Then, when an order is ready for invoicing, you will be asked whether these should be sent. If you answer Yes, you do not need to do anything else, the system will take care of the rest and send the report or work order to the email address you have entered here.
You can also mark whether the person is the main contact. This marking is for information only and does not affect any actions.
If you want to add a photo of the contact person, click Add image. The photo should be square and a close-up with the face in the center of the photo. You cannot adjust the photo in the system, so do it before uploading the photo. You can of course change och remove the photo.
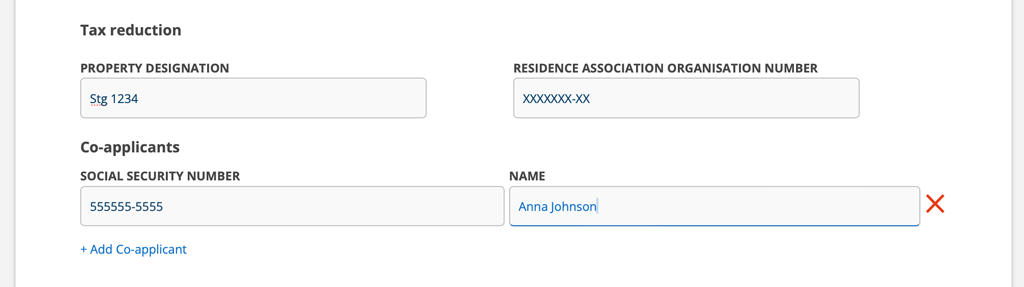
Tax reduction
Enter information for any tax reduction for a condominium association or personal identification number for a co-applicant for any tax deductions, deductions or green deductions.
Note: To activate this feature, select “Use tax reductions” in Article Settings.
More settings
At the bottom of the customer card there are a number of settings to choose from.
- Facilities disabled for this customer.
With this marked it is not possible to add facilities to the customer. - A facility is obligatory when creating orders on this customer.
When you add an order to the customer, the system will require you to select a facility. - A cost center is obligatory when creating orders on this customer.
- Always send to ERP as invoice
Instead of sending an order to the accounting system, an invoice is sent directly. This overwrites the settings you have chosen for the integration of your financial system.
Don’t forget to Save!
Customer user
Once you have saved, you can add a customer user. The customer can get their own login to keep track of their orders, submit error reports, change information, etc. Read more about customer users and how to create a login here.
Time article as a work order article
By adding time articles to the customer card and setting the number of hours to 0, it is enough to, when you are done with the job, change 0 to the actual number of hours worked. The date for the work will then automatically be set to the day you enter the hours.
Note that if you later go in and change the line, the date of the time worked will also change and need to be reset manually.
How to add an order, error report, etc. to the customer
Do this:
- Find the customer and click on the customer name.
- Scroll to the bottom.
- Click the Add button.
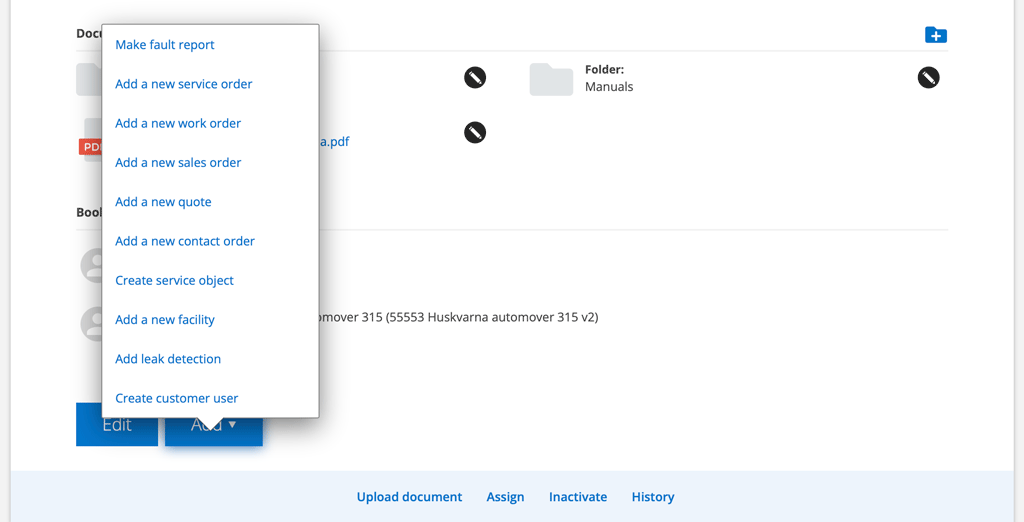
All orders, error reports, quotations etc. are listed on the customer. You can sort the lists by clicking on the headings in the lists. If you have more than 10 in a list, click View all to be able to sort the list.
Documents
Upload files – images, pdfer … Learn more about creating folders and uploading files.
All changes made to the customer card are listed here.
History
Inactivate
Inactivating a customer means that the customer cannot be selected for new orders, but all executed orders remain and can be tracked.
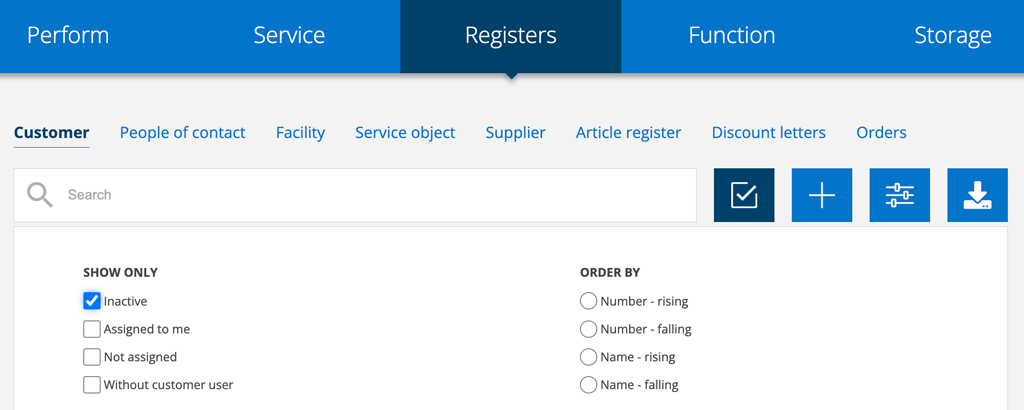
To find inactive customers, use the filter function.
To activate a customer again open the customer card, scroll down to the bottom and click Activate.
Assign technician to customer
By assigning a technician to a customer, all orders will automatically be placed with this technician.
You need to have the Assign permission to be able to select a user (technician, etc.) as responsible for the customer.
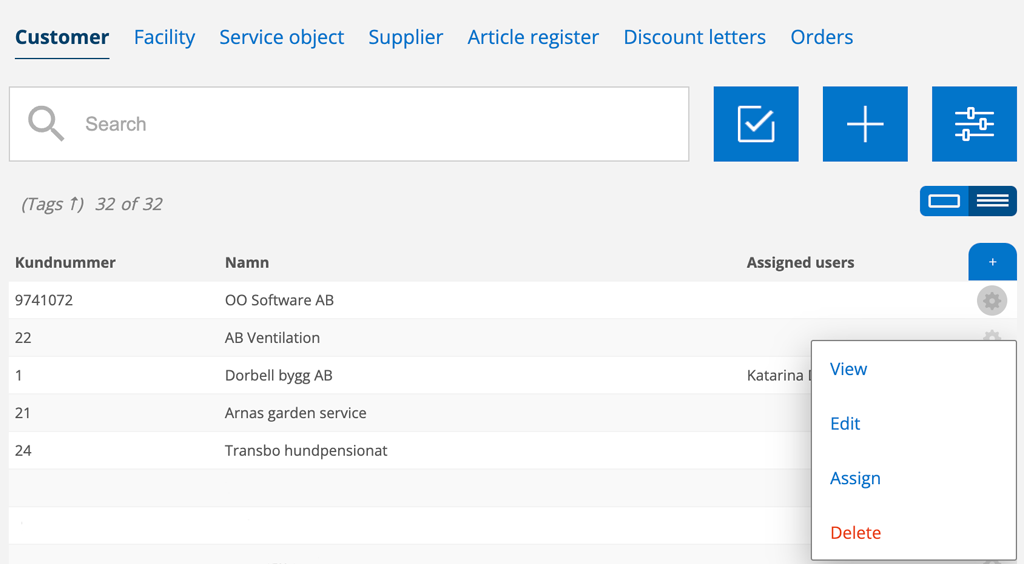
You can assign either by going to the customer, scrolling to the bottom and clicking Assign or by selecting list view (the button with three white lines) in the customer register, clicking the gear and selecting Assign from the list.
A menu with all users in the group opens. Select the user and click Done. A notification is sent to the user with the information that they have been assigned a customer.
The user will now be automatically assigned and notified of all orders and error reports that affect the customer. However, the customer will not be notified.
To remove the assigned technician from a customer, do the same but uncheck the box in the list of users. A notification will be sent to the user that they are no longer assigned to the customer.
Information to admins
Change customer number
A customer number can only be changed afterwards by the administrator. Find the customer in the register and click on the Edit button at the bottom.
Module settings
There are a lot of settings that can be made for the Customer register. You can, among other things, set a minimum and maximum length for the customer number.
Group settings
- Automatically generate the next customer number.
The system automatically adds a customer number when you add a new customer. - Include customer number in the display name.
The customer number is visible above the customer name in list views, for example in the register of customers and before the customer number in list views for orders. - Show the facility name instead of the customer in list views.
- Show cost center fields (also applies to orders).
The field is added to the customer card and orders linked to the customer. - Show order number (also applies to orders).
Displays the customer’s order number. - Require customer’s order number on orders.
Orders can not be saved without entering the customer’s order number. - Make the cost center required on orders
Orders cannot be saved without specifying a cost center. The COST CENTER field is highlighted. - Show language.
This setting makes it possible to choose in which language the customer will receive messages and e-mails from the system. This applies to the system’s texts and not those you have created yourself, such as service points. See list of selectable languages. - Show VAT type.
Adds a field where you choose if the customers order and quotations shall show NormalVAT or NoVAT. - Set private as default type.
To make it easier for those of you who work a lot with private customers. Without this setting, select Business as default type.
View settings
- Show service articles
Provides the ability to add articless to a service order. You will be asked when the order is created whether these should be added. - Show work order articles
Provides the ability to add articles to a service order. You will be asked when the order is created whether these should be added.
Custom fields
Based on your needs you can create your own fields for customer information – Custom fields. Read more about Custom fields.
Work order setting
Work order settings regarding customers that affect
Save requester on facility and customer card.
This is checked by default. Uncheck if you do not want the orderer to be saved on the customer or facility.
Permissions for users who affect the customer register
View, View (Only) Assigned, Edit, edit (Only) Assigned, Create, Delete, Upload, Create Customer Users, Change Customer Users Rights, Delete Customer Users, Assign, Delete Uploaded Files.
Concerning Visma
To further connect a customer and a technician, you can go to the Visma integration settings. Click Visma in the list of Integrations Add Integrations on the Group Settings page.
Click Edit and then click “Add assigned to our reference.”
Save.