In the Planner you see your assigned orders or all currently booked orders, depending on what permissions you have in the system.
As a supervisor, you can in the Planner assign resources to booked orders and plan the day’s, week’s and month’s work. We recommend that you work in the Planner via a computer as the function is not optimised for small screens and mobile devices.
If you want to pair the Planner with a google calendar, go to your account settings by clicking on your username. Scroll to the bottom of that page and you will find the Link to google account button.
You can also subscribe to the Planner Calendar. Read how here.
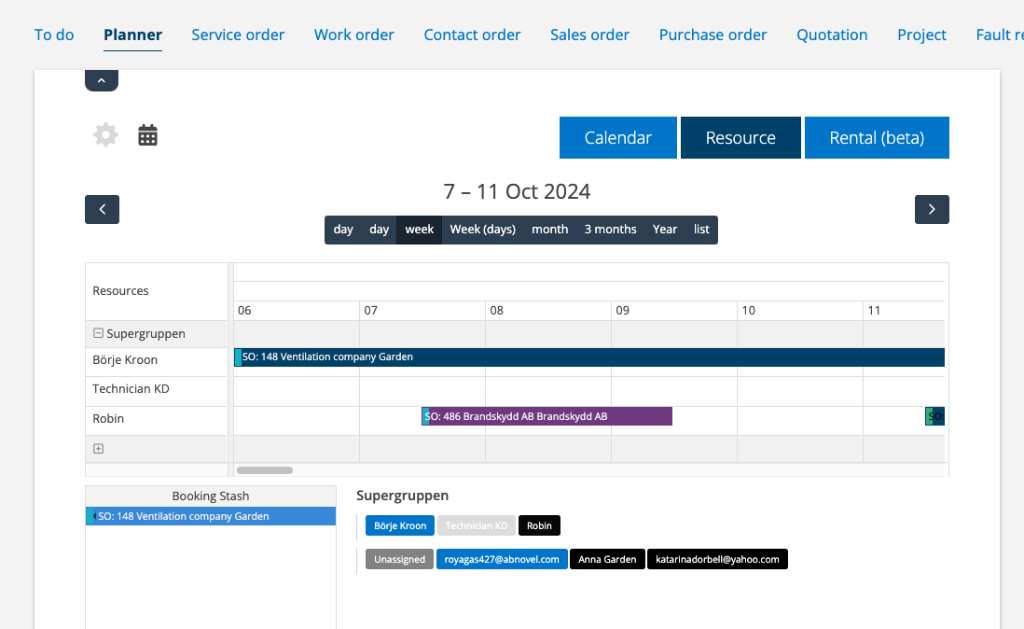
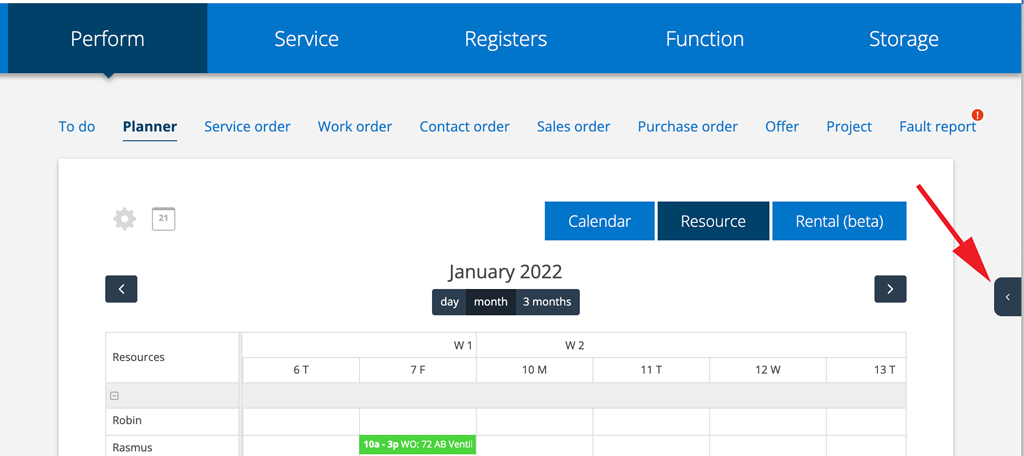
In the Planner there are three tabs – Calendar, Resource and Rental. Rental is still in beta version and i activated in the Planner settings.
There are a lot of settings that can be made for the Planner. Read more about settings for the planner.

The Resource tab gives you a quick overview of who is busy or available for emergency work.
Resources here are equal to employees and users of the system. In the documentation here, we use the word resources.
At the bottom or to the right of the calendar (depending on which setting you have selected) you see the resources in your group but can also choose to see an individual resource or unallocated orders. Resources can also be divided into groups. This is done by an administrator under Module Settings – User Group Settings.
You can also create and book a Work order, Service or Contact order directly in the Planner.
Settings for the Planner
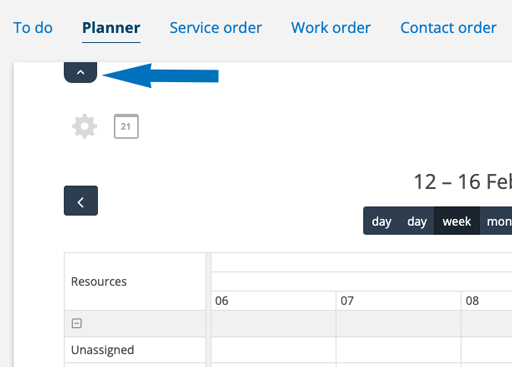
Settings – cogwheel
If you want to change how the Calendar and Resource are displayed (full screen, time interval, Saturday / Sunday …) click on the cogwheel in the upper left part.
Click the cogwheel again to close. The changes are saved automatically. The page may need to be reloaded for changes to your selections to be reflected.
Set resources to the side – here you choose how the names of the resources are displayed – in a row or listed below each other.
Smaller resources make the fields in the calendar under Resource smaller.
If you have the setting Show assigned and planned orders, planned orders that are not booked will be displayed. NOTE! Only applies in monthly view. See more about color coding for these under What do the colours mean?
These orders cannot be moved and booked in the planner. It must be done by entering the order. Click on the order and make a booking.
Once you have booked the order, it disappears from the planner.
Set the time. For example, if you only want to see the time you are on duty, for example 07:00 – 16:00. If you work around the clock, you can choose to enter 00:00 – 23:59.
Optionally set the maximum number of bookings that are displayed on a resource per day. If there are more than the set number, it will be displayed with a + and a number.
Select multipel users on bookings makes it possible to book several technicians on the same order. The unique colors of the techniques are displayed next to each other in Calendar mode.
Go direct to the order on clicking a booking means that you will go directly to the order instead of the Add a booking pop-up.
Compact orders provides a more compact list of orders in the Resource view. Planned orders get a gray background in the list.
Auto update planner. Mark this setting when you need the planner to always be up to date, for example if you have the planner on a TV screen, if you sit with the planner open for a long time or if you are several persons making bookings in the planner at the same time. By default, this feature is not checked as it can make the system a bit slower.
Open orders in new tab. This will cause every order you click on to open in a new tab in your browser.
Added wrap text on bookings.
This choice causes the customer and facility names to wrap, which provides better readability but also a larger field for the booking. See example in the image below.

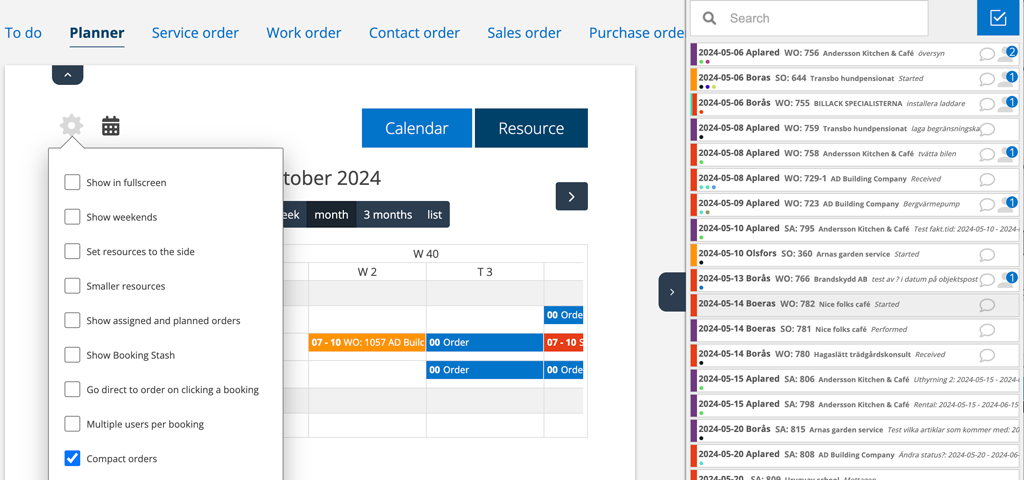
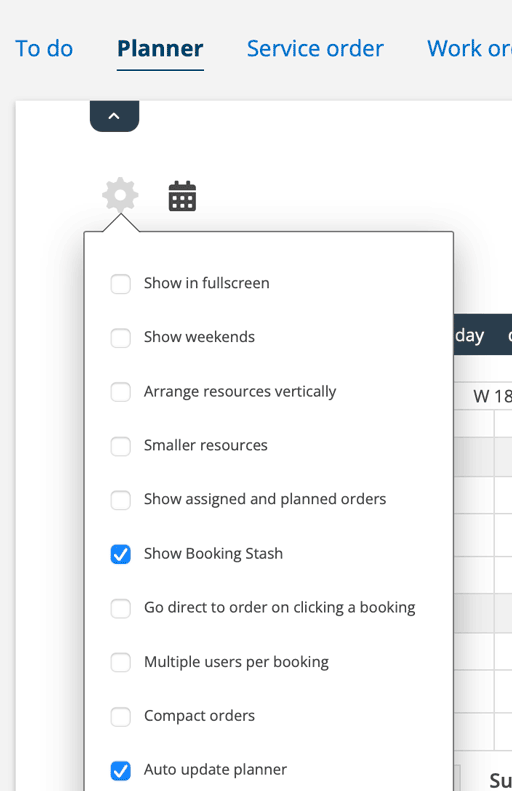
Show Booking Stash opens a field below the scheduler where you can drag and drop orders temporarily. Useful if you have orders that need to be done during the day but have not yet been assigned/deployed to a technician and time. The orders remain until you schedule them.
You can also see orders that your colleagues have placed in the booking repository. Keep in mind that the booking repository is not updated in real time. The page must therefore be reloaded in order for you to see changes that another booker has made. To avoid this, you can select the setting “Auto update planner ” under the gear wheel. However, this setting may make the page load slower.
What view do you want?
If you want to browse monthly and weekly, click on the arrow symbol.
Do you see a month in the calendar but want to see a week, or be able to choose which one? Read more about settings for the planner.
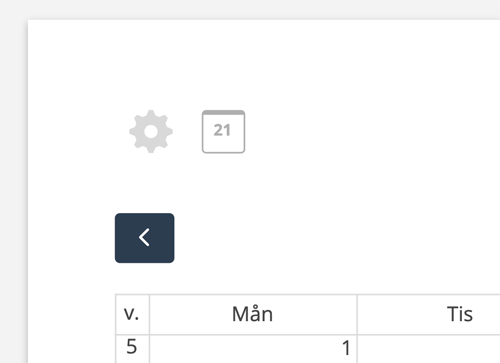
Click on the calendar symbol (the square with a number) and you can browse the calendar monthly via a pop-up window while the current month/week remains in the background.
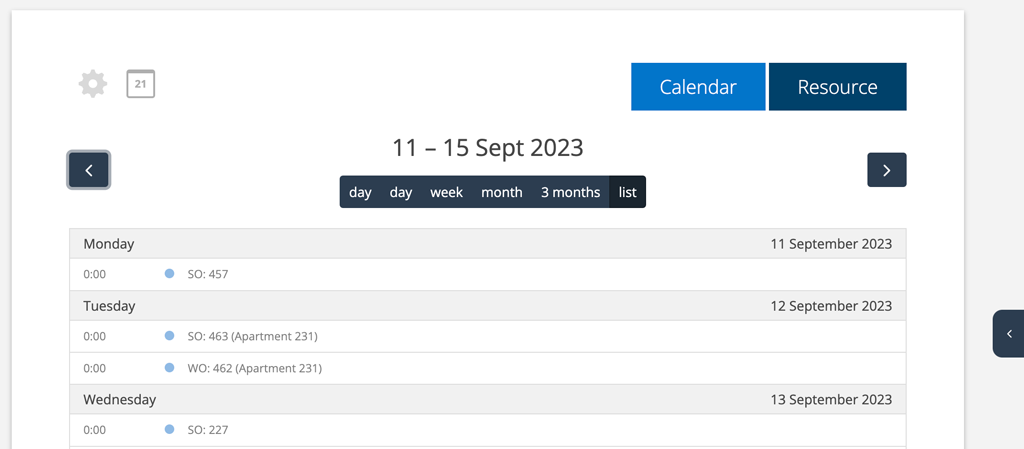
In Resource there are several views to choose from, with or without time of day, as well as List that create a list of orders for a day or two. See image.
If you want to create a larger workspace, you can collapse the menu by clicking on the arrow above the “gear.”
What do the colours mean?
The system is colour-coded so you can quickly see the status of an order.
Read here about the colours and symbols.
Red – missed order, ie a booking that has fallen due in time
Orange – planned
Green – a future date
Purple – ready for invoicing
Blue – performed / invoiced
Light blue* – planned and assigned but not booked
Gray* – planned but not assigned or booked
*If you do not want to see these orders, click on the gear wheel and uncheck Show assigned planned orders.
Read more about order types.
All screenshots on this page are with the default setting.
White triangle
If you enter a description on the booking by clicking on the booking in the Planner a white tab is added to the right corner to make it clear that there is a description added.
If you have selected the Planner setting – Always show description, the text in the description is also displayed in the planner without opening the booking.
It is also possible to set the text to get the color from a custom status.
Colour and expression on “Other time”
Under TYPE, you can choose whether you are working on an order or are free for various reasons. There is also the option “Other” here. Which working time type is linked to Other is set in Planner settings. The selected time type takes its color from settings under Time report. Read more about how to change type and color.
Personal colours
By default, all resources are blue, but it can be useful to give them different colors. You can set this up like this:
(Requires admin permissions)
- Go to Group settings.
- Scroll down to Permissions for users.
- Click on the user you want to edit settings for.
- Select color under Color in the Planner (right column).
- Save

Previously, the color for technicians has become black IF someone has been in the user settings for the technician and saved without choosing a color. Since 24-02-02, the blue color has been retained.
In what order are the techniques listed?
The order of the techniques is controlled by the settings for your user groups. Go to User group settings if you want to change the order. Admin permission is required.
Concept
Planned order – the date when the order is scheduled to be performed.
Assigned order – a technician/user is assigned an order and should executed the order, alternatively is responsible for the order.
Booked order – a technician/user should execute the order and on a specific day and time.
What name is shown when you make a booking?
If you click on a day in the resource view, the resource whose row you clicked on will appear as selected in the booking popup.
If you click on a day in the calendar, it is you (your user) who is marked as selected in the booking popup.
Calendar
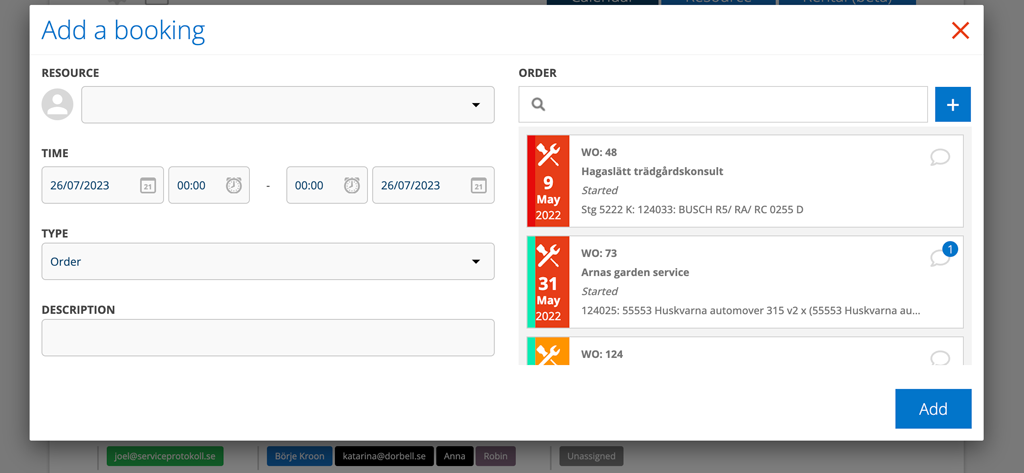
Add a booking
When you make a booking for a technician, he/she will also be assigned to the order.
Click on the day you want to add a booking. A pop-up window opens where you fill in the necessary information – select the resource, enter the time and choose which order the booking applies to. Click Add.
If the work affects a service object where time required to perform has been set in the service interval, the booking is automatically added over the number of days entered on the object.
If you have activated Multiple users per booking (done under the gear wheel), you can book several technicians on one booking.
If you have set custom statuses for work- and serviceorders, these are displayed when you have selected an order. You can change the status here as well.
If you have already placed the order for multiple technicians at different times and decide that the work should be done by the technicians together at the same time, drag each technician to the determined common time. They will then be added to the same booking.
If your or the selected resource’s working hours are entered in the user settings (done with an admin account), the working hours are preset, otherwise it says 00:00.
Change date for a booking
Drag and drop the order into the calendar or click on the order to open the popup and change it there.
Delete a booking
Click on the booking and select Delete and then Save the change.
Change the day, time, or assignment of a booking
Click on the booking. Current order is marked in the list with a blue frame. Make changes and click Save.
Add leave: holidays, sick leave, parental leave etc.
Click on the current day to open the booking window. Select a resource and enter the type of leave under TYPE. The information is automatically sent to the time report. Click Add.
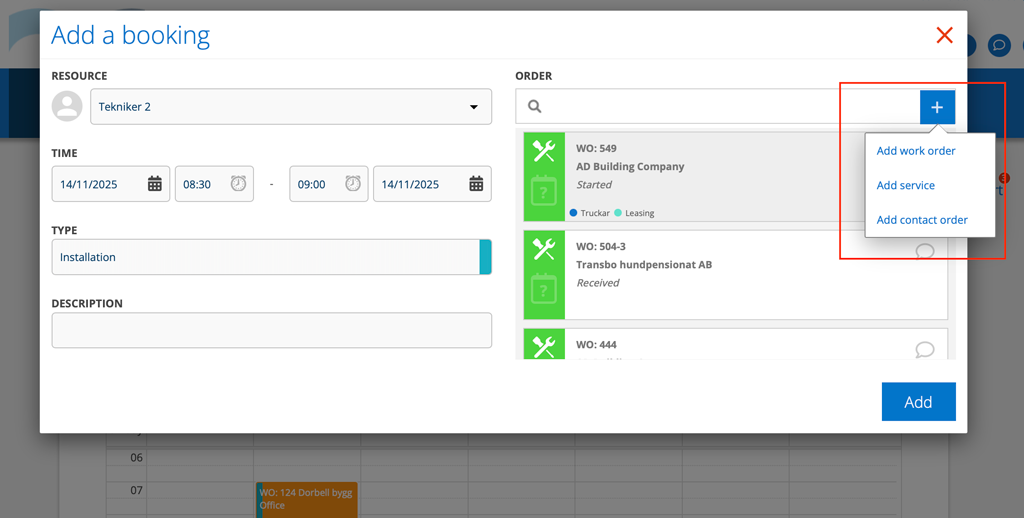
Add new work order, service order or contact order
- Click on a day.
- Select resource.
- Enter time.
- Click the +-symbol after the search field
- Choose what kind of order you want to add.
- A new order is created.
- Fill in the order and click save.

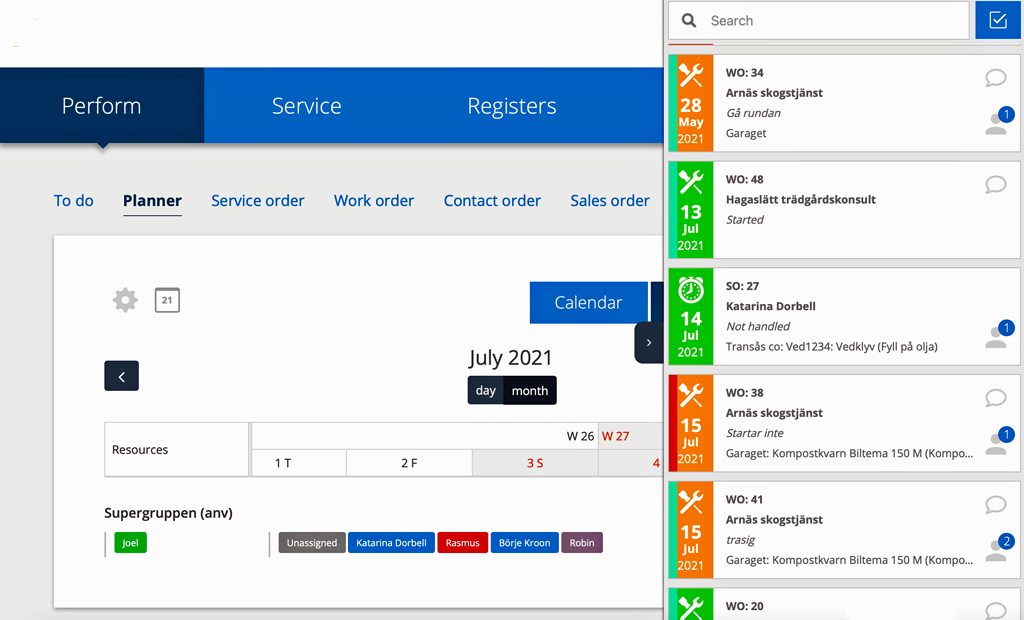
Resource
Resource tab has a slightly different view than Calendar. You can choose to see day (2 versions), week (with or without time of day) or month (incl 3 mounth). (Settings option in Group Settings – Edit Planner settings).
Scroll sideways (scroll under the calendar) to look further ahead. Use the arrows to jump to another month.
If you have chosen to see month, you will see available resources on the left hand side and the orders for which they are booked in the calendar. If you have chosen a day, the resources are at the top.
By clicking on the small tab on the right, you open the list of orders.
List shows a list of orders.

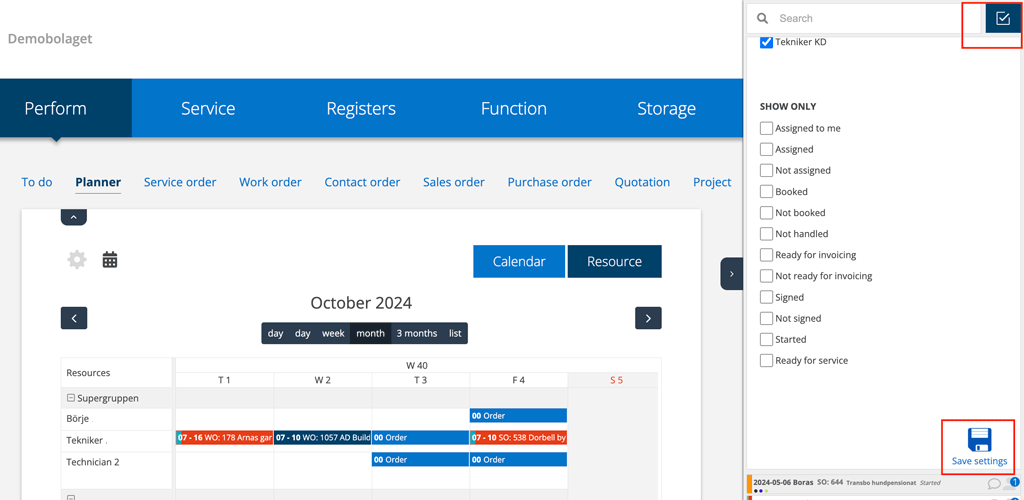
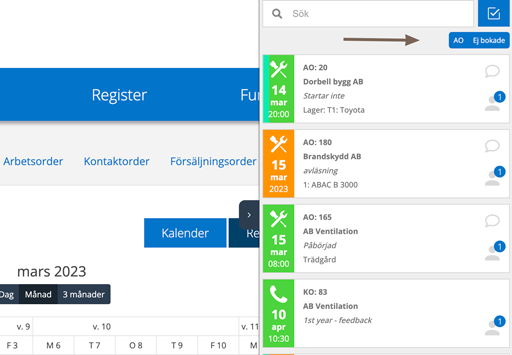
You can search for orders. Click on the symbol with a check mark if you want to specify filters to search in more detail.
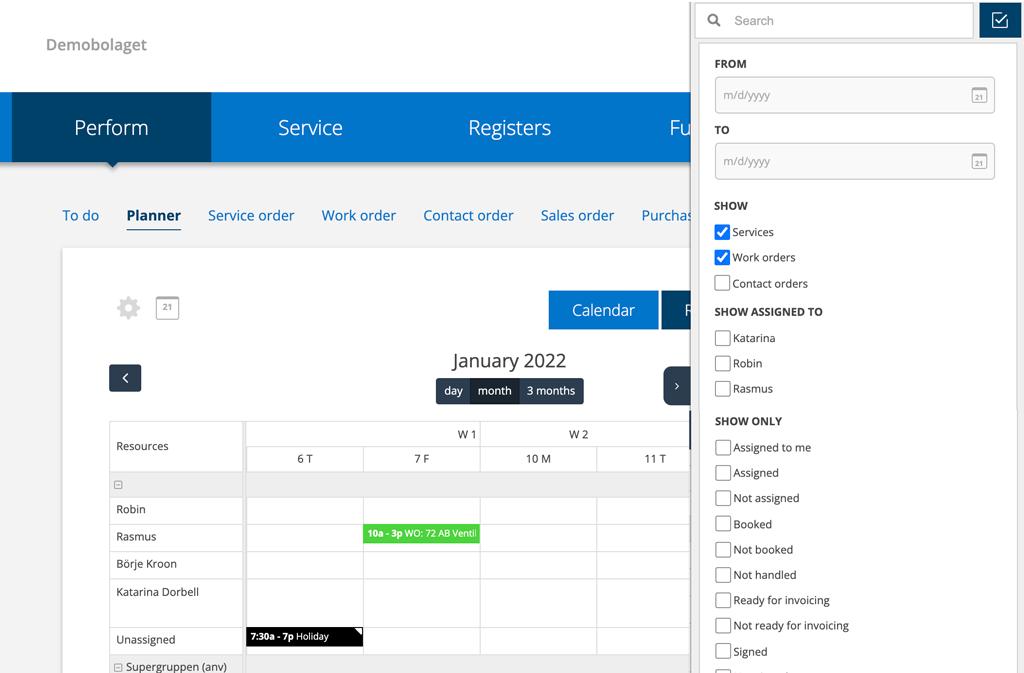
If you want to save a search scroll to the bottom and click Save Settings to save. You can save as default or as favorit.
Assign a resource to a job
Drag and drop a booked order to the column for a resource and the field for booked date and start time. To change the time, drag the bottom edge to the selected end time. You can move bookings by dragging and dropping another resource or time.
You can assign the same order to multiple resources by holding down the Shift key and dragging the order.
Plan multiple orders at the same time
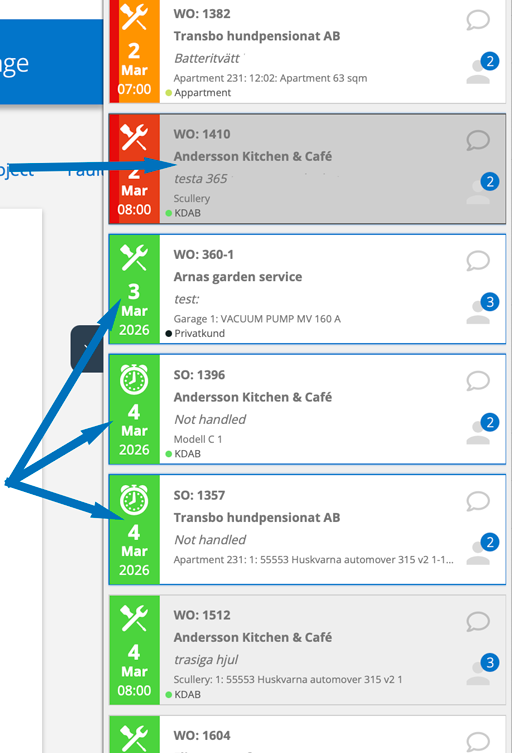
By holding down the alt key you can select multiple orders. A blue frame shows which ones you have selected.
You can see which ones you have planned by the order having a gray background – see the upper arrow in the image.
Then drag the orders to a day. You can see how many orders you have selected by a small number in the upper right corner of the order box.
If you have chosen the day view each order is placed on a separate hour in a row. Example: You plan 3 orders with start at 08:00. The first order is planned to 08:00 – 09:00,
nr 2 09:00 – 10:00 and
nr 3 10:00 – 11:00.
If you are in weekly view each order is placed on a separate day in a row.
Add a booking to a resource
In the Resources tab you can also click on the day you want to add a booking. A pop-up window opens where you fill in the necessary information – select the resource, which order the booking applies to and specify the time. Click Add.
BIf the work affects a service object where time required to perform has been set in the service interval, the booking is automatically added over the number of days entered on the object.
Once you have been booked for a job, you will receive a notification.
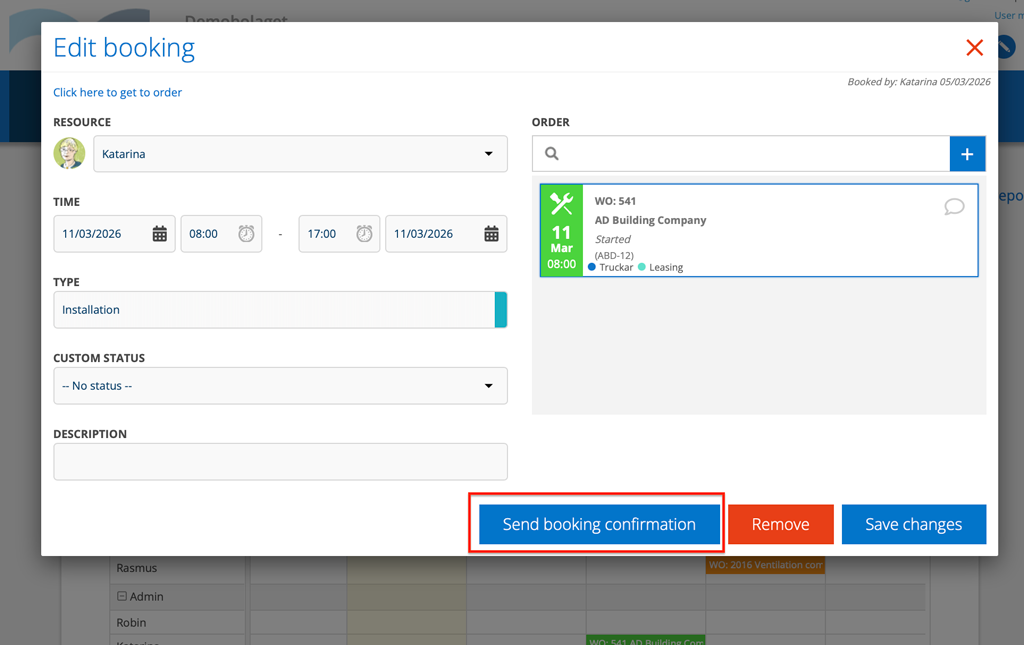
Send booking confirmation
If you want to send a booking confirmation, click the Send booking confirmation button. A popup opens where you select or fill in an email address or mobile number for SMS. If you have preset a message, it will be used. The message can be changed.