
The Contact Order feature is designed to help you build and strengthen relationships through every step of your customer contact. Contact Order is a simple and smart CRM system*.
For example:
- Enter information about new customers.
- Who did you talk to at the customer’s?
- What were you talking about?
- When and for how long?
- Write notes.
- Assess the order value.
- Book a time for visits and meetings.
- Upload documents such as agreements, offers and requirements specifications from customers.
A big advantage of this feature is that you as a salesperson work in the same system as others in the group or company. This means that, for example, service technicians can create a contact order and send it to you directly when a sales question arises during a customer visit or service, or vice versa.
Contact orders can also be used completely on their own and independently of other order functions in the system.

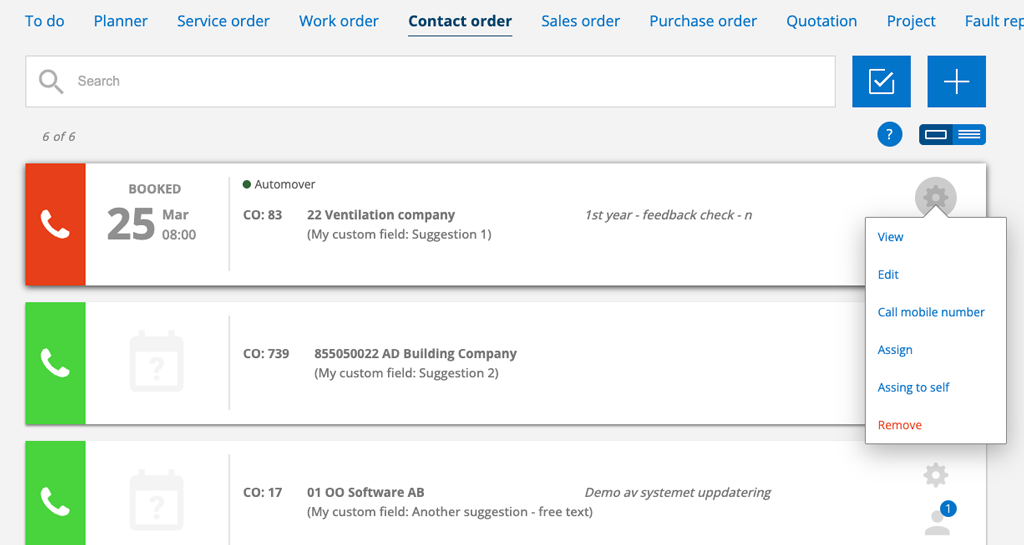
Click this button to filter your search.
Example: select those assigned to you, by date, customer, etc.
If you want to use the same filter multiple times, you can select Save Settings at the bottom of the box. Your selected filter will appear below the search box.
You can also choose to save the filter as a favourite. Read more about save as favourite.
Create a new contact order
Option 1
- Sign in
- Go to Contact order.
- Click on the + symbol to the right of the search field.
- Fill in the fields
- Save

Option 2
Add a new contact order directly to a customer, facility or service item. Go to the Register tab, click on the register you want to search in. Once you have found the relevant customer, facility or service item, scroll to the bottom and click on the Add button and there are a number of options. Information about the customer, facility and/or service item will be automatically added to the new contact order.
If you already have a work or service order open, click on the customer’s name and go directly to the customer card. Click the Add button.
All contact orders linked to a customer are listed on the customer card.
Contact orders (KO) also appear in the To-Do list, where you can see any bookings for the contact order.
The different fields on a contact order
Subject
Under Subject, describe what the contact is about. It could be Sales, Potential Customer, Offer, or perhaps what area of work the customer works in. You decide what suits you best.
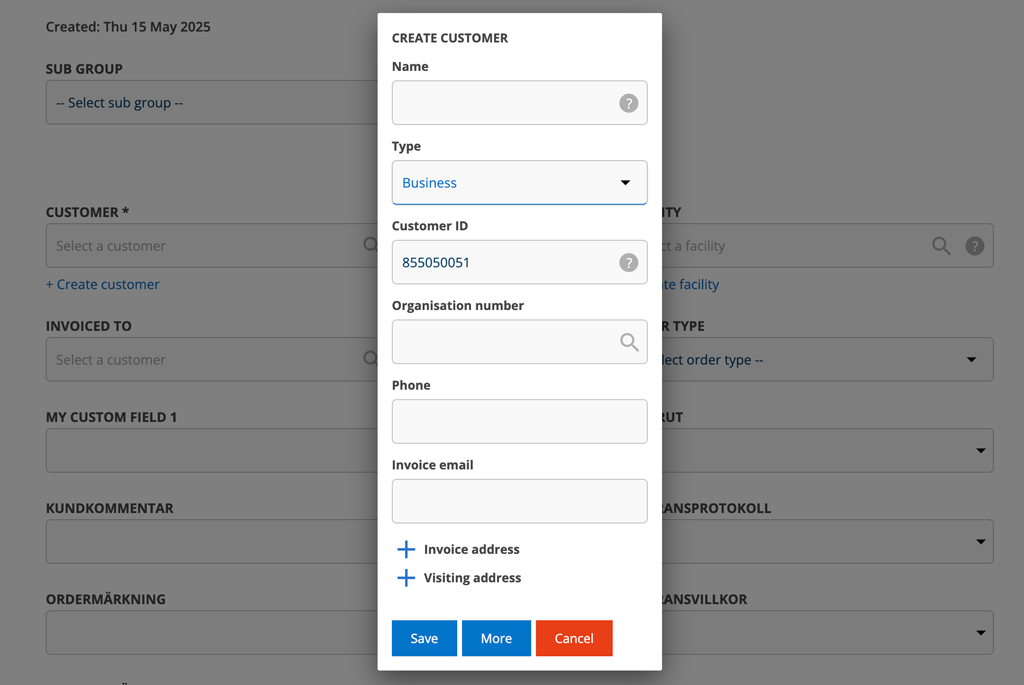
Customer
Enter the customer’s name in the box. The search function (click on the magnifying glass) will help you find existing customers. If the customer is not on the list, enter the customer’s name and you will be asked if you want to add the customer to the customer register. Fill in the contact information you have. You can then complete the information in the Customer Register.
Facility
Enter the customer’s facility name if applicable. The search function (click the magnifying glass) will help you locate existing facilities. If the facility is not listed, type the name of the facility and you will be asked if you want to add it. A pop-up will open where you fill in the information you have and the information will be added to the facility register.
Service object
Here you can search for service objects if the contact order concerns one. If you want to add an object that is not in the register, click on the blue plus symbol to the right of the search field.
Contact
Here you fill in information about your contact. Only one contact person can be specified here.The contact is saved* on the customer card.
*Only applies if you have the work order setting “Save contact person on facility and customer cards”. This setting is the default.
Status
Enter a status that describes where in the process the contact is.
With admin rights, you can enter a list of statuses you want to use. These statuses will appear as a drop-down list.
See more under Information for Administrators below.
Status is displayed in the Contact Order List and in the To-Do List.
Order value
To track the value of leads, you can enter a value here. The field will be linked to Dashboard when that feature is complete.
Notes + time spent
Here you can take notes about the conversation or meeting, what you and the customer talked about, your experience of the contact, paste email conversations, etc.
For every note you make, the date and time are logged, as well as who wrote it. You and your colleagues can easily see what you have done in relation to the customer and when.
In the Time spent field, you can enter time in hours to get an idea of the time required for that particular contact.
Time added to a contact order is automatically added to your time report.
To write multiple notes, you need to save the contact order first. Once you’ve done that, you can click + Add point of contact.
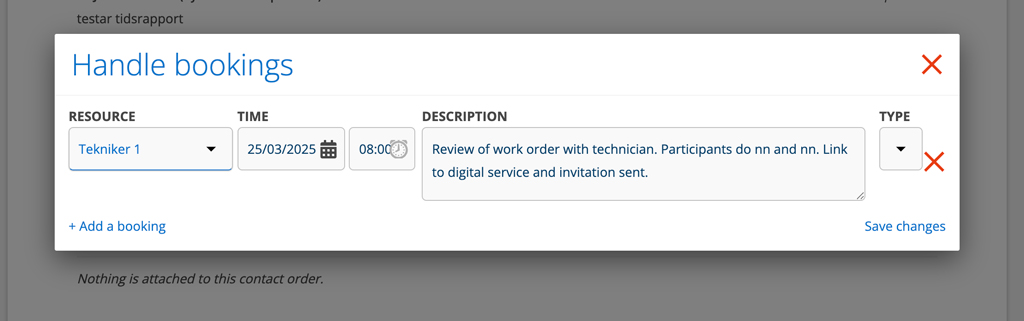
Bookings
You can use “bookings” to book the next contact with the customer: digital contact in various forms, physical meetings or telephone contact. For example, if you have agreed to contact the potential customer again in six months, you make a booking about it. The booking is in your calendar and in your To Do list you will receive a reminder when it is time. You can also assign the task to a colleague in your group.
If you have created booking typs in the Planner settings you set booking type when booking.
Click Send booking confirmation to send information about the booking to the customer via email or SMS. You can create your own booking confirmation in Email settings. Learn more about this here.
You can make settings for the form in which you want notifications (in the system, via email, via SMS, etc.) in your account settings. Click on your user name to go to your Account settings.
The permission to assign tasks to a colleague is set in the user settings. To do so, admin permission are required.
Time to save
Once you have saved, you can:
- add more notes
- set tags on the order. Learn how to create and use tags here.
- Attach documents. Upload documents associated with the contact order.
- Assign the contact order to a coworker. They will receive a message that they have been assigned a contact order. The right to assign tasks to a colleague is set in the user settings. To do this, admin rights are required.
Time to sign an agreement?
If the contact results in a sale, use the Sales Order function. You can read more about them here: Create a Sales order.
End contact?
Didn’t get a pacifier and want to end the contact order? Click on End and archive the order (this is marked with a dark blue color which in the system means completed/invoiced). It remains in the list of contact orders and you can always go back and see your notes and other information about the contact order. No risk of losing or forgetting what you did!
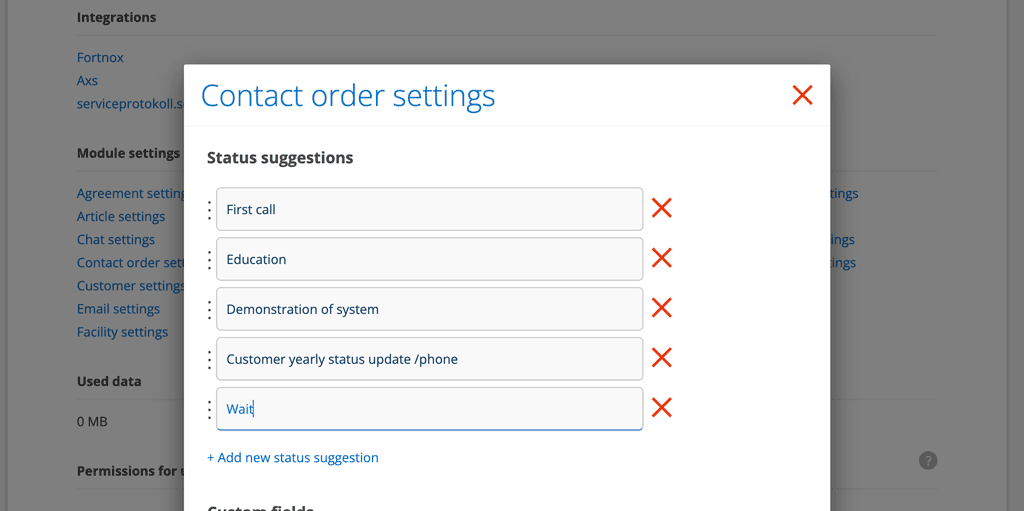
Administrator Information – Contact Order Settings
Settings here require admin permission.
Enter Status suggestions
You can add any number of status suggestions. The status is displayed in the Contact Orders list and in the To-Do list.
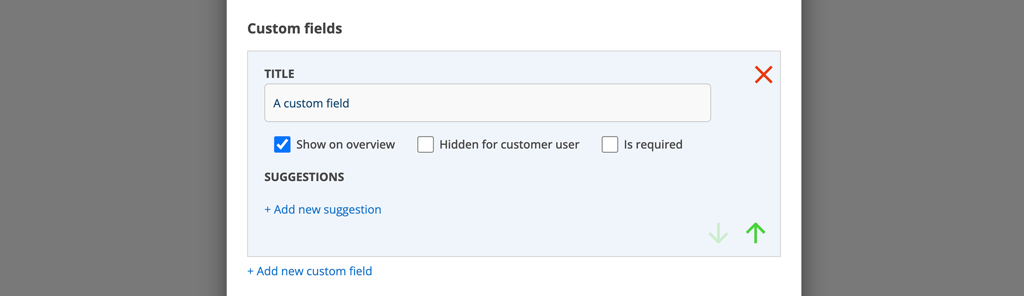
Custom fields
By creating your own fields, you can customize the contact order to your specific needs. The suggestions you enter here will appear in a drop-down list on the order.
Settings for list view
Sort on serial number as default.
If you want the contact orders to be sorted by serial number by default, check the box. Otherwise, the default is sorting by date. Completed contact orders are always last in the list, regardless of your selection here.
Permissions for user related to Contact order
View, View (only) assigned, Edit, Create, Delete, Assign, Assign to self, Remove/edit uploaded file
* CRM = Customer relationship management, or customer care, encompasses the management, organisation and administration of customers and customer relationships in a company.